Category: BBQ Recipes

  • Honey BBQ Sauce Recipe With a Twist
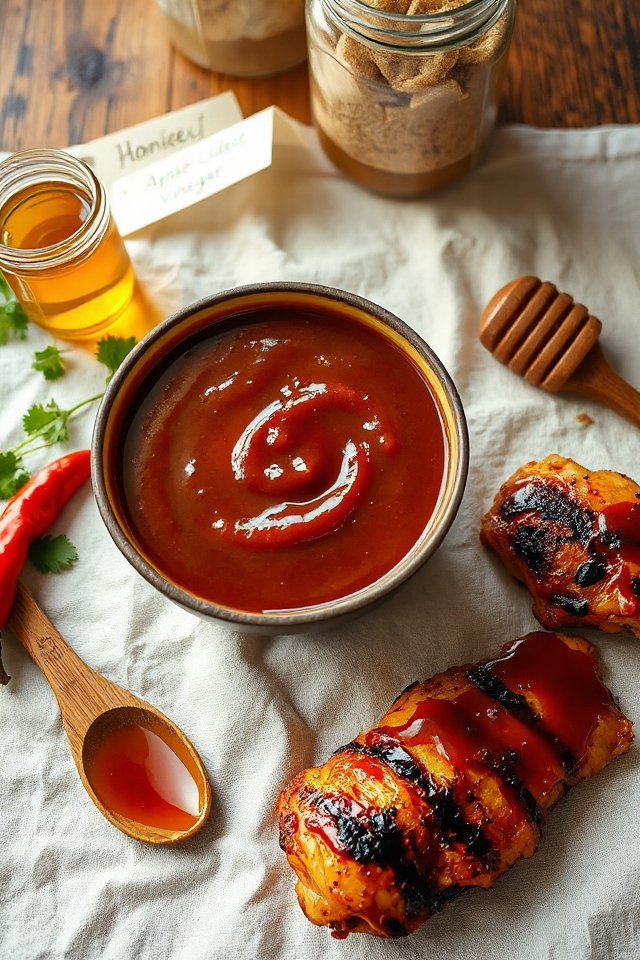
    Honey BBQ Sauce Recipe With a Twist

    Why Honey BBQ Sauce Is a Must-make BBQ Recipe

    When it comes to BBQ, there’s something special about honey BBQ sauce that can’t be ignored.

    It’s that perfect blend of sweetness and tang that elevates any dish. I’ve found that brushing it on grilled chicken or ribs transforms a simple meal into a flavor explosion.

    Its versatility is unmatched; whether you’re marinating, glazing, or using it as a dip, honey BBQ sauce always delivers.

    Plus, it appeals to both kids and adults, making it a crowd-pleaser at gatherings.

    Trust me, once you try it, you’ll wonder how you ever BBQed without it.

    It’s truly a must-make recipe!

    Ingredients of Honey BBQ Sauce

    When you’re gearing up to make honey BBQ sauce, it’s like preparing for a flavor adventure. The ingredients are simple, yet they come together to create something truly magical. Imagine this: a rich, glossy sauce that brings out the best in grilled meats and veggies. You might even find yourself sneaking spoonfuls straight from the pot. I know I have.

    So, let’s explore what you’ll need to whip up this delicious sauce.

    Here’s a list of the ingredients you’ll need:

    • 1 small onion, minced
    • 4 garlic cloves, minced
    • 1 tablespoon butter
    • 2 cups ketchup
    • 3/4 cup honey
    • 1/3 cup apple cider vinegar
    • 1/2 cup Worcestershire sauce
    • 1/4 cup brown sugar
    • 3 teaspoons chili powder
    • 1/8 teaspoon cayenne pepper
    • 1/8 teaspoon ground cloves
    • 1/4 cup red wine
    • Salt (to taste)
    • Ground pepper (to taste)

    Now, let’s talk about these ingredients a bit more. The onion and garlic are your flavor base, adding depth and richness right from the start.

    If you’re like me and sometimes forget to check your pantry, you might even get creative and swap out the onion for shallots or the garlic for garlic powder in a pinch.

    And don’t underestimate the power of good honey; it’s the star of the show, balancing out the tanginess of the apple cider vinegar and the kick from the chili powder.

    Even the red wine adds a nice touch, giving your sauce a sophisticated edge. Just remember, the key to a good honey BBQ sauce is that perfect balance of sweet, tangy, and a little bit spicy.

    How to Make Honey BBQ Sauce

    homemade honey bbq sauce

    Making your own honey BBQ sauce is a rewarding experience, and trust me, it’s pretty easy too. First things first, grab a large kettle and melt 1 tablespoon of butter over medium heat. As that butter starts to sizzle and smell divine, toss in 1 small onion, minced, and 4 garlic cloves, minced.

    Now, here’s where the magic begins; let those sauté for a few minutes until they turn soft and fragrant. Honestly, if you could bottle up that aroma, you’d have a best-seller right there.

    Once your onion and garlic are looking golden and delicious, it’s time to add the star players of this sauce. Stir in 2 cups of ketchup, 3/4 cup of honey, and 1/3 cup of apple cider vinegar—oh yes, the sweet and tangy combination is already making my mouth water.

    Next comes 1/2 cup of Worcestershire sauce, which adds a depth of flavor that’s hard to resist. Then, sprinkle in 1/4 cup of brown sugar, 3 teaspoons of chili powder, and just a pinch of heat with 1/8 teaspoon of cayenne pepper and ground cloves.

    Finally, pour in 1/4 cup of red wine for that touch of sophistication. Mix everything well, and don’t be shy about tasting it—just be careful; it’s hot. You might find yourself wanting to dive right in with a spoon.

    Now, bring this beautiful concoction to a gentle simmer and let it bubble away for about 35 to 45 minutes. This is where the flavors meld together, and your kitchen fills with that irresistible BBQ scent.

    As it simmers, stir occasionally—feel free to daydream about all the grilled meats and veggies that are about to get a delicious makeover. Once it’s thickened to your liking, give it a final taste and adjust the salt and pepper as needed.

    And voila! You’ve just made honey BBQ sauce that can be brushed onto meats or served cold as a dip. Just remember, it keeps in the fridge for up to two weeks, but let’s be real, it probably won’t last that long. Enjoy your culinary creation!

    Honey BBQ Sauce Substitutions & Variations

    After whipping up that delicious honey BBQ sauce, you might find yourself wanting to customize it to suit your taste or dietary needs.

    For a healthier option, swap honey with agave nectar or maple syrup. If you prefer a spicier kick, add more cayenne pepper or some hot sauce.

    For a smoky flavor, try incorporating smoked paprika. If you’re avoiding gluten, use a gluten-free Worcestershire sauce.

    You can also experiment with fruit juices like pineapple or orange for a fruity twist. The possibilities are endless, so don’t hesitate to make it your own!

    Enjoy crafting your perfect sauce!

    What to Serve with Honey BBQ Sauce

    While you might think of honey BBQ sauce as a great marinade, it pairs beautifully with a variety of dishes.

    I love serving it with grilled chicken or ribs, as the sweetness enhances the smoky flavors. It’s fantastic as a dipping sauce for crispy vegetables or chicken tenders, too.

    For a twist, try it drizzled over roasted potatoes or sweet potato fries; the flavors complement each other perfectly. You can even mix it into baked beans for a sweet-savory side.

    Trust me, whatever you choose, honey BBQ sauce will elevate your meal to a whole new level!

    Additional Tips & Notes

    Honey BBQ sauce can truly enhance your dishes, but there are a few tips to keep in mind for the best results.

    First, adjust the sweetness by varying the honey or brown sugar to suit your taste. If you like a spicier kick, add more cayenne pepper or chili powder.

    Don’t forget to let the sauce simmer long enough to develop its flavors—patience is key!

    When storing, make sure it’s in an airtight container to maintain freshness.

    Finally, feel free to experiment with different vinegar types, like balsamic, for a unique twist.

    Enjoy your cooking adventures!

  • Citrusy BBQ Chicken Wings Recipe

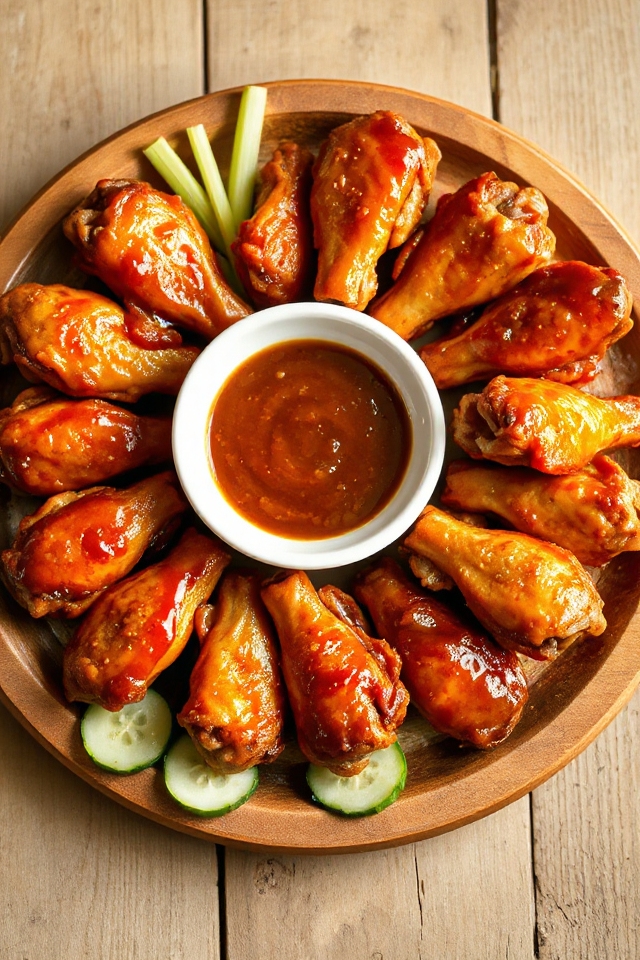
    Citrusy BBQ Chicken Wings Recipe

    Why BBQ Chicken Wings Is a Must-make BBQ Recipe

    When it comes to BBQ recipes, I can’t help but believe that BBQ chicken wings are a must-make.

    They’re the perfect crowd-pleaser, offering that crispy skin and juicy meat that everyone loves. Plus, the hands-on experience of eating wings brings a fun, casual atmosphere to any gathering.

    I adore how versatile they are; you can experiment with flavors, from sweet to spicy. They’re also quick to prepare, making them ideal for last-minute get-togethers.

    Trust me, once you serve these up, you’ll see your guests reaching for seconds and thirds, leaving you with nothing but happy faces around the grill!

    Ingredients of BBQ Chicken Wings

    When gearing up to make BBQ chicken wings, the first step is gathering all your ingredients. You want to make sure you have everything ready so you can dive right into the cooking process without any hiccups. There’s nothing worse than starting a recipe only to realize you’re missing a key component. So, let’s take a look at what you’ll need to whip up these delicious wings that are sure to be a hit at your next get-together!

    Ingredients:

    • 1 small onion, thinly sliced
    • 1/2 cup orange marmalade
    • 1/3 cup ketchup
    • 2 tablespoons white vinegar
    • 3 garlic cloves, thinly sliced
    • 2 teaspoons Montreal chicken seasoning
    • 1/4 teaspoon Chinese five spice powder
    • 3 lbs chicken wings, sections (tips discarded)
    • Cucumber slices (for serving)
    • Celery rib (for serving)
    • Ranch dressing (for dipping)

    Now, let’s chat about the ingredients a bit. The orange marmalade is a real game-changer here; it adds a lovely sweetness that balances out the tangy ketchup and vinegar. If you’re feeling adventurous, you could even swap the marmalade for another fruit preserve you love—maybe apricot or peach? And don’t overlook the spices; they elevate the flavor profile beautifully. You can adjust the amount of Montreal seasoning based on your taste preference—sometimes I sprinkle a little more on just to crank up the flavor. Plus, serving these wings with some crunchy cucumber slices and crispy celery gives your guests a revitalizing bite between the wings. How thoughtful of you!

    How to Make BBQ Chicken Wings

    bbq chicken wings recipe

    Making BBQ chicken wings is a delightful adventure, and trust me, once you nail this recipe, you’ll be the star of every gathering. Let’s get right into it.

    First, you’ll want to grab that 1 small onion, slicing it thinly. In a medium pot, combine the sliced onion with 1/2 cup of orange marmalade**, 1/3 cup of **ketchup**, 2 tablespoons of white vinegar, and 3 thinly sliced garlic cloves**. This concoction might seem a little odd at first—orange marmalade in BBQ sauce? But just wait until it simmers together.

    Over medium-low heat, let this mixture bubble and thicken for about 30 minutes. Stir it occasionally, and maybe take a moment to appreciate how your kitchen smells like a sweet, savory heaven.

    While that glaze is thickening, preheat your oven to a toasty 400°F. Now, let’s work on those wings. You’ve got 3 lbs of chicken wings in sections (don’t forget to discard those tips). Sprinkle them generously with 2 teaspoons of Montreal chicken seasoning****. I like to think of this as giving the wings a little pep talk before they head into the oven.

    Arrange them in a single layer on a jellyroll pan, and bake them for 30 minutes. After that, flip those wings over and brush them with the reserved glaze you set aside earlier. Bake for an additional 15 minutes.

    And just when you think they’re done, it’s time for the broiler! Broil the wings for about 5 minutes until they’re golden brown, like the perfect tan on a summer day.

    Once they’re out of the oven, return the remaining glaze to a simmer, adding a splash of water if it’s too thick. This will be your dipping sauce, and I promise, it’s going to make your wings sing.

    Serve those crispy wings with some invigorating cucumber slices, a crunchy celery rib, and don’t forget the ranch dressing for dipping. Now, if you can resist eating them all before your guests arrive, you’re a stronger person than I am. Enjoy your BBQ chicken wings—they’re bound to be a hit!

    BBQ Chicken Wings Substitutions & Variations

    Whether you’re looking to switch up flavors or accommodate dietary preferences, there are plenty of substitutions and variations for BBQ chicken wings that can elevate your dish.

    For a healthier twist, try using turkey wings or cauliflower wings for a vegetarian option. You can also swap orange marmalade for honey or maple syrup for a different sweetness.

    Experiment with spices like smoked paprika or chipotle powder for added heat. If you prefer a tangy kick, replace white vinegar with apple cider vinegar.

    Don’t hesitate to mix in your favorite hot sauce to create a zesty glaze that packs a punch!

    What to Serve with BBQ Chicken Wings

    After you’ve explored some exciting substitutions and variations for BBQ chicken wings, you might be wondering what to serve alongside this flavorful dish.

    I love pairing them with classic sides like celery and cucumber sticks, which add a invigorating crunch. A bowl of ranch dressing makes for a perfect dip, too.

    For something heartier, crispy potato wedges or coleslaw complement the wings nicely. If you want to elevate the meal, consider a light, zesty salad to balance the richness of the wings.

    Don’t forget to serve some cold drinks to wash it all down! Enjoy your feast!

    Additional Tips & Notes

    To guarantee your BBQ chicken wings turn out perfectly every time, I recommend marinating the wings for a few hours—or even overnight—in the glaze for maximum flavor penetration.

    Make sure to preheat your oven thoroughly; this guarantees even cooking. If you like extra crispy wings, don’t skip the broiling step—it really makes a difference!

    For a healthier option, you can grill the wings instead.

    Finally, don’t forget to serve them with fresh veggies and your favorite dipping sauce for a complete experience.

    Enjoy experimenting with different spices or citrus to customize the flavor to your liking!

  • BBQ Shrimp Recipe With Zesty Lemon Twist

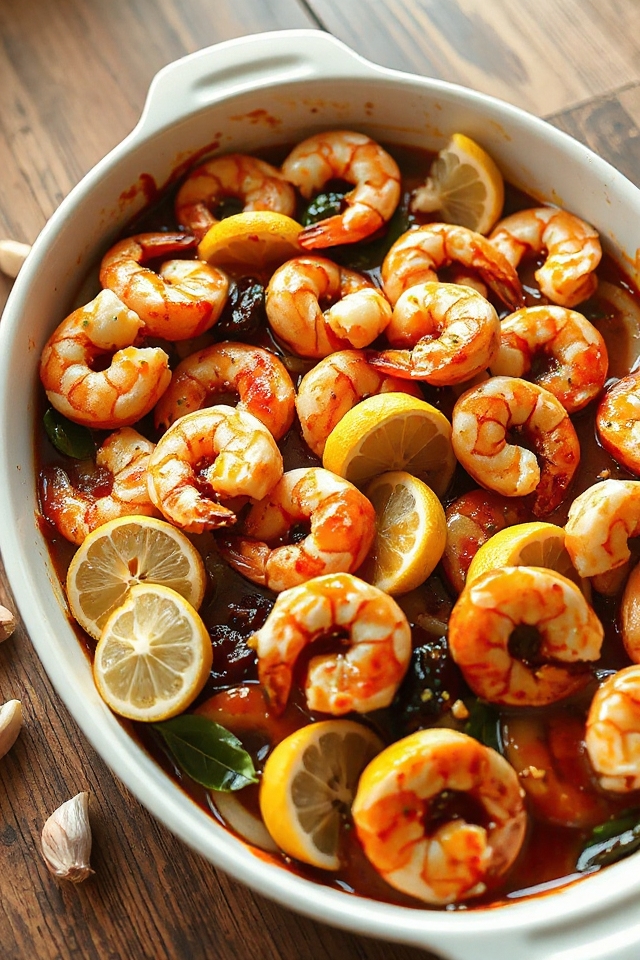
    BBQ Shrimp Recipe With Zesty Lemon Twist

    Why BBQ Shrimp Is a Must-make BBQ Recipe

    When you think of BBQ, shrimp mightn’t be the first thing that comes to mind, but it should be. I can’t tell you how often I’ve served BBQ shrimp, and it always wows my guests.

    The smoky, tangy flavors combined with the succulent shrimp create a dish that’s both comforting and fancy. Plus, it cooks up quickly, making it perfect for gatherings.

    The bright hints of lemon and garlic add an invigorating twist that elevates the whole experience. Trust me, once you try it, you’ll wonder why you ever overlooked this BBQ gem.

    It’s a must-make for any grill master!

    Ingredients of BBQ Shrimp

    When it comes to whipping up a delicious BBQ shrimp dish, having the right ingredients is key to achieving that mouthwatering flavor. You’ll be amazed at how just a handful of simple items can come together to create something so tasty.

    Plus, you probably already have a lot of these essentials in your pantry. So, let’s explore what you need to get started on this delightful recipe that’s sure to impress your family and friends.

    Here’s what you’ll need to make BBQ shrimp:

    • 1/4 cup butter, melted
    • 1/2 cup Italian salad dressing
    • 2 tablespoons Worcestershire sauce
    • 2 tablespoons barbecue sauce (I recommend Sweet Baby Ray’s)
    • 1 tablespoon lemon pepper seasoning
    • 4 crushed garlic cloves
    • 2 bay leaves
    • 2 lemons, sliced
    • 1 onion, sliced
    • 3 lbs raw shrimp

    Now, if you’re like me, you might be wondering if there’s some wiggle room with these ingredients. The great news is, yes! You can certainly tweak the recipe to fit your taste.

    For instance, if you’re not a fan of lemon pepper seasoning, you could substitute it with Old Bay or even a pinch of cayenne for some heat. And if you want to go a little lighter, you might consider using olive oil instead of butter—though let’s be real, butter does bring that lovely richness that makes everything taste better.

    How to Make BBQ Shrimp

    bbq shrimp baking instructions

    Alright, let’s get started on making this scrumptious BBQ shrimp. It’s easier than you might think, and trust me, your taste buds will thank you.

    First things first, preheat that oven to a solid 400 degrees. You want it nice and hot to get the shrimp perfectly cooked.

    Now, grab yourself a mixing bowl and start with 1/4 cup of melted butter. It mightn’t be the healthiest choice, but hey, it’s BBQ shrimp—let’s embrace the flavor, right?

    Pour in 1/2 cup of Italian salad dressing, 2 tablespoons of Worcestershire sauce, and 2 tablespoons of your favorite barbecue sauce. I’m a huge fan of Sweet Baby Ray’s; it really does wonders for this dish.

    Next, toss in 1 tablespoon of lemon pepper seasoning, 4 crushed garlic cloves, and those 2 bay leaves. Mix all of that together until you have a lovely, fragrant sauce. The aroma alone will make your kitchen smell divine.

    Now it’s assembly time! Grab a baking pan and lay down the sliced onion and lemons at the bottom. This not only adds flavor, but it also creates a beautiful base.

    Then, take your 3 pounds of raw shrimp—yes, that’s a lot of shrimp; you might want to invite some friends over—and place them in the pan.

    Pour that delicious sauce over the shrimp, making sure everything is nicely coated.

    Pop the pan in the oven and let it bake for about 20 minutes. Just enough time to clean up your kitchen (or not, if you’re like me and tend to procrastinate).

    When the shrimp are done, they’ll be pink and juicy, ready to impress anyone lucky enough to be at your dinner table.

    And there you have it—a simple yet delectable BBQ shrimp dish that’s sure to be a hit.

    BBQ Shrimp Substitutions & Variations

    If you’re looking to mix things up with your BBQ shrimp, there are plenty of substitutions and variations that can elevate this dish.

    For a spicy kick, try adding a teaspoon of cayenne pepper or your favorite hot sauce. You can also swap out the Italian dressing for a zesty ranch or a honey mustard dressing.

    If you prefer a smoky flavor, incorporate some smoked paprika or chipotle powder. For a healthier twist, use olive oil instead of butter.

    And don’t hesitate to add veggies like bell peppers or zucchini for extra color and flavor. Enjoy experimenting!

    What to Serve with BBQ Shrimp

    To truly elevate your BBQ shrimp experience, consider pairing it with sides that complement its rich, savory flavors.

    I love serving it alongside an invigorating coleslaw; the crunch and tanginess cut through the richness beautifully. Grilled corn on the cob is another favorite of mine, adding a sweet, smoky touch.

    Don’t forget about crusty garlic bread, perfect for soaking up that delicious sauce! For a light touch, a lemony quinoa salad can add brightness.

    Finally, a chilled glass of white wine or a zesty lemonade enhances the meal, making it a delightful feast every time. Enjoy your meal!

    Additional Tips & Notes

    While preparing BBQ shrimp, it’s essential to keep a few tips in mind to enhance the dish. First, make sure your shrimp are fresh or properly thawed for the best flavor.

    Don’t skip the marinating step; letting the shrimp soak in the sauce for at least 30 minutes elevates the taste. When baking, cover the pan with foil for the first half to retain moisture, then remove it to achieve that perfect caramelization.

    Finally, I like to garnish with fresh parsley or additional lemon slices before serving to brighten the dish and impress your guests. Enjoy your zesty BBQ shrimp!

  • Mirin-Enhanced Japanese BBQ Sauce Recipe

    Mirin-Enhanced Japanese BBQ Sauce Recipe

    Why Japanese BBQ Sauce Is a Must-make BBQ Recipe

    While there are countless BBQ sauces out there, I believe Japanese BBQ sauce stands out as a must-make recipe for any grilling enthusiast.

    Its unique blend of flavors—sweet, savory, and umami—brings dishes to life in a way that traditional sauces often can’t.

    I love how it complements everything from grilled meats to stir-fried veggies, making it incredibly versatile.

    Plus, it’s simple to whip up, so I can focus more on grilling and less on complicated preparations.

    Trust me, once you try it, you’ll wonder how you ever barbecued without this delightful sauce in your repertoire.

    Ingredients of Japanese BBQ Sauce

    When it comes to whipping up a delicious Japanese BBQ sauce, the ingredients are pretty straightforward and essential to capturing that unique flavor profile we all love. You won’t need a ton of fancy items or hard-to-find ingredients. Instead, you can find most of these right in your pantry or at your local grocery store.

    So, let’s get into what you need to create this flavorful sauce that will elevate your meals to a whole new level.

    Ingredients for Japanese BBQ Sauce

    • 2 tablespoons mirin
    • 2 tablespoons red miso
    • 2 teaspoons sugar
    • 1 teaspoon sake

    Now, let’s chat about these ingredients a bit more. Mirin, that sweet rice wine, adds a lovely depth and just the right touch of sweetness.

    Red miso, on the other hand, brings that savory umami flavor that makes everything better—trust me, it’s like a magic ingredient.

    And sugar? Well, it balances out the flavors perfectly. Sake adds a bit of complexity, but if you don’t have any on hand, you could consider skipping it—though, I’d recommend finding a substitute if you can.

    Also, if you’re not a fan of too much sweetness, feel free to adjust the sugar to your liking. Cooking is all about making it your own, right?

    How to Make Japanese BBQ Sauce

    homemade japanese bbq sauce

    Making Japanese BBQ sauce is as easy as pie—well, maybe easier, since pie can be a bit tricky sometimes, right? So, let’s get started! You’ll want to grab a mixing bowl because we’re going to combine some delightful ingredients.

    First up, take 2 tablespoons of mirin. If you’ve never used mirin before, it’s like the sweet hug your taste buds never knew they needed. Then, toss in 2 tablespoons of red miso. This stuff is the secret weapon of umami flavor; it’s like the best friend of your dishes.

    Next, add in 2 teaspoons of sugar—this is where the magic of balance happens. Finally, pour in 1 teaspoon of sake. Remember, if you don’t have sake, it’s okay to just skip it, but it does add a little something special.

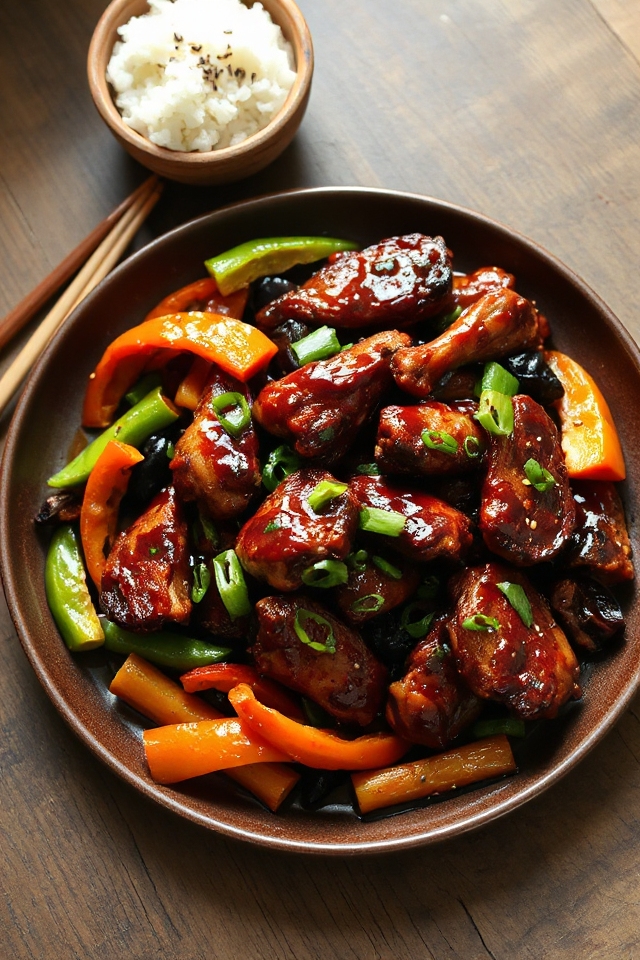
    Now that you’ve mixed everything together into a lovely, thick paste, it’s time to bring it to life. Heat up a pan on medium heat, and once it’s warm, add in your favorite stir-fried vegetables or proteins. We’re talking chicken, beef, tofu, or whatever tickles your fancy.

    Pour your homemade Japanese BBQ sauce over the stir-fry and give it all a good stir. The goal is to make sure every piece is beautifully coated in that luscious sauce. Keep stirring until the sauce thickens and clings to everything like a good friend who just doesn’t want to leave.

    And there you have it! Drizzle it over rice or serve it straight from the pan; either way, you’ve just created a dish that’s begging to be devoured. Just try not to eat it all by yourself, okay?

    Japanese BBQ Sauce Substitutions & Variations

    After whipping up that delicious Japanese BBQ sauce, you might find yourself wanting to experiment or adapt the recipe to fit what you have on hand.

    If you don’t have mirin, a splash of honey or agave syrup can work as a sweetener. Red miso can be swapped with white miso for a milder flavor. You could even use soy sauce instead of sake for added saltiness.

    For a kick, consider adding a dash of chili sauce or ginger. Don’t hesitate to get creative; each variation can lead to a unique twist on this savory delight!

    What to Serve with Japanese BBQ Sauce

    There are countless delicious options to serve with Japanese BBQ sauce that can elevate your meal.

    I love using it with grilled meats like chicken, beef, or pork, as the sauce adds a fantastic depth of flavor.

    For a vegetarian twist, try it on roasted or stir-fried vegetables; it really brings out their natural sweetness.

    You can even drizzle it over rice or noodles for a simple yet satisfying dish.

    Don’t forget to pair it with fresh salads or pickled vegetables to balance the richness.

    With these options, you’ll create a delightful spread that everyone will enjoy!

    Additional Tips & Notes

    While experimenting with Japanese BBQ sauce, I’ve discovered a few tips that enhance its flavor and versatility.

    First, don’t hesitate to adjust the sweetness by adding more sugar or using honey for a different profile. If you want a kick, a splash of chili oil can elevate the sauce beautifully.

    I’ve also found that letting the sauce sit for a few hours allows the flavors to meld, making it even tastier.

    Finally, remember to pair it with fresh, crisp vegetables for a balance of textures.

    Enjoy your cooking adventure and feel free to get creative with your ingredients!

  • Colorful Seven Layer Salad Recipe With Spinach

    Colorful Seven Layer Salad Recipe With Spinach

    Why Seven Layer Salad Is a Must-make BBQ Recipe

    When summer rolls around and BBQ season kicks off, I can’t help but think about how a Seven Layer Salad is an essential dish to bring to any gathering.

    It’s vibrant, colorful, and packed with flavor, making it a feast for the eyes and the palate. The layers create a beautiful presentation that sparks conversation and excitement.

    Plus, it’s incredibly versatile—everyone can enjoy it, whether they’re meat lovers or vegetarians. I love how it can be made ahead, letting the flavors meld overnight.

    Trust me, you’ll be the star of the BBQ when you bring this crowd-pleaser!

    Ingredients of Seven Layer Salad

    Making a Seven Layer Salad isn’t just about throwing some ingredients together; it’s about creating a masterpiece that looks as good as it tastes. Imagine this: vibrant greens, layers of savory goodness, and that creamy topping making everything come together in perfect harmony. It’s like a deliciously colorful garden in a bowl.

    Plus, it’s a breeze to put together, even for those of us who might occasionally burn water. So, let’s plunge into what you’ll need to whip up this delightful dish.

    Ingredients:

    • 1 (10 ounce) package fresh spinach
    • 1 head iceberg lettuce
    • 1 teaspoon sugar
    • 1 dash salt (to taste)
    • 1 dash pepper (to taste)
    • 6 hard-cooked eggs (finely chopped)
    • 1/2 lb boiled ham (cut in julienne strips)
    • 1 (10 ounce) package frozen peas (thawed)
    • 1 small red onion (sliced)
    • 1/2 lb Swiss cheese (cut in julienne strips)
    • 1 cup sour cream
    • 2 cups mayonnaise

    Now, let’s talk about these ingredients a bit more. Fresh spinach and iceberg lettuce are the stars of the show, bringing in that fresh crunch.

    If you want to mix it up, consider using other greens like romaine or arugula for a flavor twist. The hard-cooked eggs and ham add that protein punch, making this salad more filling—because let’s face it, nobody wants to be starving after a BBQ.

    And don’t even get me started on the creamy dressing; it pulls everything together beautifully. Just remember, if you’re not a fan of mayo, you can always swap it out for Greek yogurt for a healthier option.

    Just be careful not to put in too much sugar; we don’t want a salad that tastes like dessert! So gather your ingredients and get ready to impress your friends and family with this colorful creation.

    How to Make Seven Layer Salad

    layered salad masterpiece creation

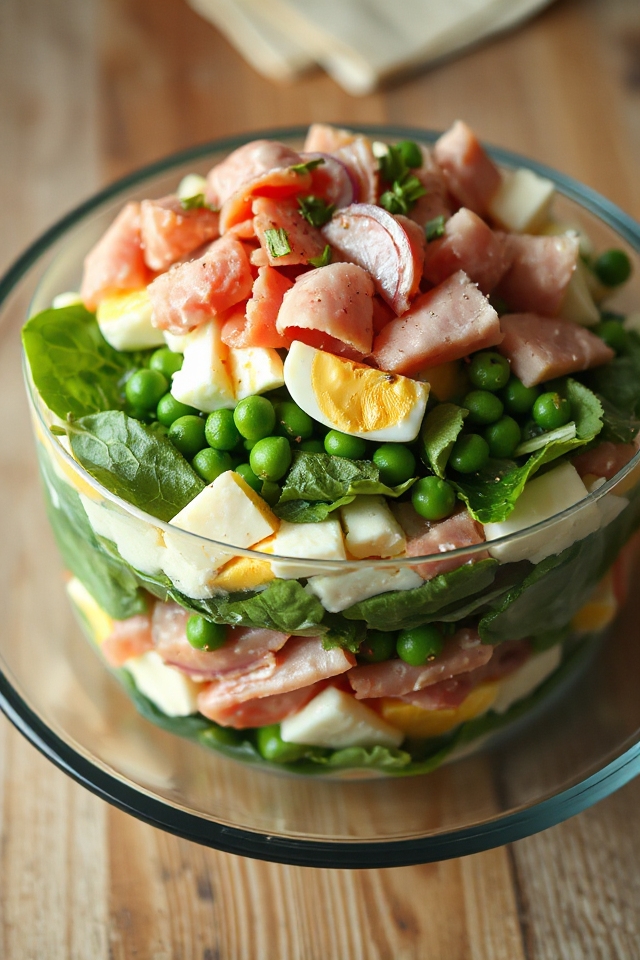
    Making a Seven Layer Salad is as fun as it’s satisfying. First, grab that 10-ounce package of fresh spinach and the head of iceberg lettuce. Tear the spinach and lettuce into bite-sized pieces—this is where the magic begins. Picture it: vibrant green leaves creating a beautiful base for your salad masterpiece. Layer that fresh spinach at the bottom of a deep rectangular dish or a straight-sided glass bowl. It’s like laying the foundation for a delicious building.

    Next, sprinkle half a teaspoon of sugar, a dash of salt, and a dash of pepper over the greens. This little seasoning dance is essential; it enhances the flavors beautifully.

    Now, let’s add some serious protein. Take those six hard-cooked eggs and chop them finely. Spread them evenly over the spinach, followed by half a pound of boiled ham cut into julienne strips. You can almost hear the crowd gasping in delight at this point.

    Next, add a layer of the crunchy iceberg lettuce. Sprinkle the remaining sugar, salt, and pepper over this layer because we want every bite to be a flavor explosion. Then, it’s time for the frozen peas—make sure they’re thawed!—and a small red onion, sliced thinly. And don’t forget that half a pound of Swiss cheese, cut into julienne strips. Layer it on top, and you’ll start to see your salad transform into a colorful work of art.

    Now for the pièce de résistance, mix one cup of sour cream with two cups of mayonnaise. This creamy dressing is what brings everything together, like a warm hug at the end of a long day. Spread this mixture evenly over the top of your salad layers.

    Cover your creation with plastic wrap and pop it in the fridge overnight. Seriously, patience is a virtue here. When you’re finally ready to serve, give it a good toss. The anticipation builds as you reveal your Seven Layer Salad, a feast for both the eyes and the palate. You did it! Who knew making a salad could feel so much like an achievement?

    Seven Layer Salad Substitutions & Variations

    Seven Layer Salad can be customized in countless ways to suit your taste or dietary preferences. For a vegetarian option, I often swap out the ham for chickpeas or roasted veggies.

    If I want a lighter version, I’ll use Greek yogurt instead of sour cream and mayonnaise. Sometimes, I add different cheeses like feta or cheddar for a flavor twist.

    Want some crunch? Toss in nuts or seeds! You can also experiment with dressings, like a zesty vinaigrette.

    The possibilities are endless, so don’t hesitate to make it your own and have fun with it!

    What to Serve with Seven Layer Salad

    When planning a meal, pairing dishes with a Seven Layer Salad can elevate the dining experience.

    I love serving it alongside grilled chicken or shrimp for a protein boost. A light, zesty vinaigrette complements the salad’s richness beautifully.

    You might also consider artisan bread or rolls to soak up the creamy dressing, enhancing the meal’s overall appeal. For a invigorating touch, a fruit platter or berry parfait works wonders.

    If it’s a casual gathering, I often add chips or a cheese platter to keep things fun and relaxed.

    These pairings make my Seven Layer Salad the star of the table!

    Additional Tips & Notes

    For a successful Seven Layer Salad, I recommend prepping the ingredients the night before. This not only saves you time but allows the flavors to meld beautifully.

    Use fresh, crisp vegetables for the best texture and taste. Don’t hesitate to customize the layers; you can add bell peppers or even avocado if you like.

    When mixing the sour cream and mayonnaise, consider adding a splash of lemon juice for extra zing. If you’re serving a crowd, double the recipe—it’s always a hit!

    Finally, toss the salad just before serving to keep everything fresh and vibrant. Enjoy!

  • Hungarian Paprika BBQ Rub Recipe

    Hungarian Paprika BBQ Rub Recipe

    Why BBQ Rub Is a Must-make BBQ Recipe

    While grilling might be a popular pastime, a great BBQ rub is what truly elevates your meat to the next level.

    I’ve found that the right blend of spices can transform an ordinary cut into something extraordinary. When I apply my homemade rub, it creates a flavorful crust that locks in moisture and adds depth to every bite.

    It’s not just about flavor; it’s about creating an experience. With a good rub, my BBQ becomes a centerpiece, inviting friends and family to gather around.

    Trust me, once you make your own, you’ll wonder how you ever grilled without it!

    Ingredients of BBQ Rub

    When it comes to BBQ, the right rub can make or break your dish. This Hungarian Paprika BBQ Rub is a delightful mix that brings a bit of warmth and smokiness to your grilling game. It’s not just a simple sprinkle – it’s a flavor explosion waiting to happen.

    Imagine slathering this on ribs or chicken, and then watching as the magic of grilling transforms your meal into something truly special. You’ll be the star of your next cookout, and everyone will be asking for your secret recipe. Spoiler alert: it’s right here!

    Here’s what you’ll need to whip up this tantalizing BBQ rub:

    • 2 tablespoons salt
    • 2 tablespoons sugar
    • 2 tablespoons brown sugar
    • 2 tablespoons chili powder
    • 2 tablespoons cumin
    • 2 tablespoons freshly cracked black pepper
    • 1 tablespoon cayenne pepper
    • 4 tablespoons paprika (Hungarian is my favorite)

    Now, let’s talk about these ingredients for a moment. Each one plays a vital role in building the flavor profile of your rub. The salt and sugars work together to create a beautiful crust that caramelizes when grilled.

    Chili powder and cumin bring that warmth and earthiness, while black pepper and cayenne add a kick that’ll keep your taste buds dancing. And let’s not forget the paprika – it’s the star of the show, bringing rich color and a smoky undertone that’s just irresistible.

    You can always adjust the quantities based on your heat preference; maybe you want more cayenne for a fiery punch, or less sugar if you prefer a less sweet rub. The beauty of making your own BBQ rub is that you get to customize it to your liking.

    How to Make BBQ Rub

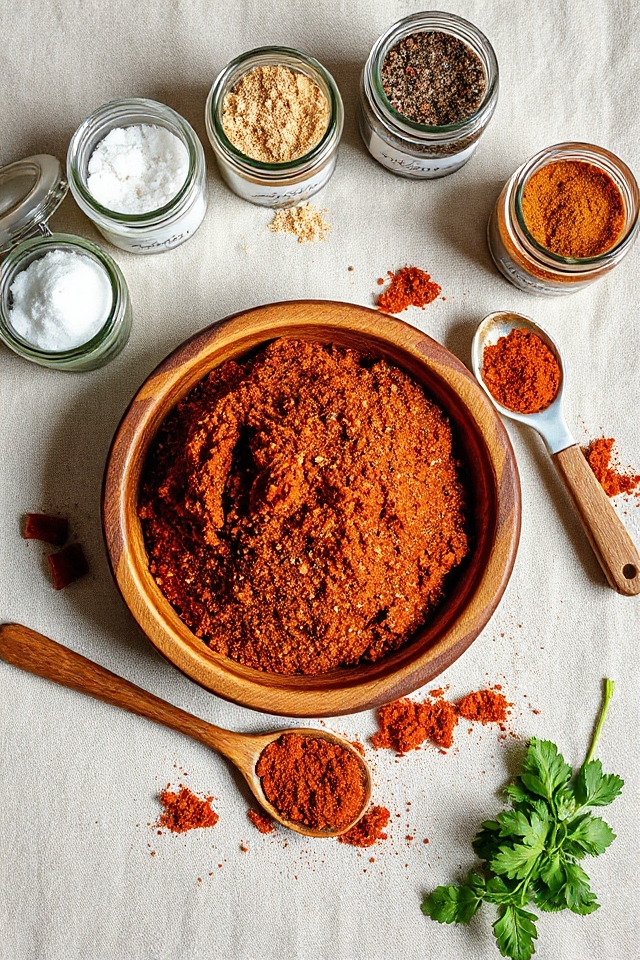
    homemade bbq rub recipe

    Making your own Hungarian Paprika BBQ Rub isn’t just a fun activity; it’s like crafting your very own flavor potion. So, let’s get down to it. First things first, grab a mixing bowl and get ready to channel your inner mad scientist.

    Start with 2 tablespoons of salt. Yes, salt! It’s the magic ingredient that helps all the flavors pop. Then toss in 2 tablespoons of sugar and 2 tablespoons of brown sugar. Sweet, right? This combo is essential for that beautiful caramelization when your meat hits the grill.

    Next up, add 2 tablespoons of chili powder and 2 tablespoons of cumin. These two bring warmth and a touch of earthiness to the party. And because we want to shake things up a bit, let’s throw in 2 tablespoons of freshly cracked black pepper along with 1 tablespoon of cayenne pepper. Trust me, the cayenne is that little kick that’ll make your taste buds sing.

    Finally, the pièce de résistance: 4 tablespoons of paprika. I personally love using Hungarian paprika for its rich color and smoky flavor. It’s like the cherry on top of an already delicious sundae.

    Now, here’s the fun part – mix it all together until you have a beautiful, fragrant rub. You can use a whisk, fork, or even your hands if you’re feeling adventurous (just make sure to wash them afterwards, okay?).

    Once everything is well combined, take a moment to smell the magic you just created. Seriously, it’s delightful. Now, rub this concoction on your favorite meats, whether it’s chicken, ribs, or even veggies, and let it marinate for at least an hour or overnight if you can wait that long. Trust me, the longer, the better.

    And just like that, you’re ready to impress your friends and family with your grilling prowess. Who knew making a BBQ rub could be this easy and fun?

    BBQ Rub Substitutions & Variations

    If you find yourself missing an ingredient for the Hungarian Paprika BBQ Rub or simply want to mix things up, there are plenty of substitutions and variations to explore.

    For instance, you can swap regular paprika for smoked paprika to add a deeper flavor. If you don’t have brown sugar, regular sugar works just fine.

    For a spicier kick, increase the cayenne or add some crushed red pepper flakes. You can also experiment with adding dried herbs like oregano or thyme for an herbal twist.

    Don’t hesitate to get creative; your taste buds will appreciate the adventure!

    What to Serve with BBQ Rub

    While planning your BBQ, it’s important to think about what to serve alongside the flavorful dishes seasoned with your Hungarian Paprika BBQ Rub.

    I love pairing my BBQ with classic sides like coleslaw and cornbread, as they add a revitalizing crunch and sweetness. Grilled vegetables, such as zucchini and bell peppers, complement the smoky flavors beautifully.

    Don’t forget some baked beans for that hearty touch! For drinks, a chilled lager or lemonade works wonders.

    If you want a sweet finish, consider serving fruit salad or brownies. Each of these options enhances the BBQ experience and keeps your guests satisfied.

    Additional Tips & Notes

    To guarantee your Hungarian Paprika BBQ Rub delivers the best flavor, I recommend letting the rub sit on the meat for at least an hour before grilling—this allows the spices to penetrate deeply.

    If you have time, try letting it marinate overnight in the fridge for even more intensity.

    For a twist, add a splash of vinegar or lemon juice to your rub to enhance the tanginess.

    Don’t forget to adjust the cayenne pepper based on your heat preference.

    Finally, store any leftover rub in an airtight container for future BBQ adventures—just make sure to label it!

    Enjoy your grilling!

  • BBQ Chicken Pizza Recipe With Unique Tomato Sauce

    BBQ Chicken Pizza Recipe With Unique Tomato Sauce

    Why BBQ Chicken Pizza Is a Must-make BBQ Recipe

    When I think about BBQ recipes that truly stand out, BBQ Chicken Pizza always comes to mind. It’s the perfect blend of smoky, sweet, and savory flavors, making it a crowd-pleaser at any gathering.

    The combination of tender chicken, zesty BBQ sauce, and melted cheese on a crispy crust creates a mouthwatering experience that’s hard to resist. Plus, it’s incredibly versatile—you can customize it with your favorite toppings!

    Whether you’re hosting a game night or a family dinner, BBQ Chicken Pizza never fails to impress. Trust me; once you make it, you’ll want to enjoy it again and again!

    Ingredients of BBQ Chicken Pizza

    When it comes to making BBQ Chicken Pizza, having the right ingredients is the first step to success. The beauty of this dish lies in its simplicity and the delicious combination of flavors. You’ll be working with juicy chicken, zesty BBQ sauce, and melty cheese, all layered on a crispy crust. Trust me, once you gather all these ingredients, the anticipation of that first bite will have you drooling.

    So, let’s plunge into what you’ll need to whip up this mouthwatering pizza.

    Ingredients for BBQ Chicken Pizza:

    • 2 large chicken breasts
    • 1 medium onion, diced
    • 1 1/4 cups barbecue sauce
    • 1 prepared pizza crust
    • 1 can diced tomatoes
    • 2 tablespoons diced garlic
    • 1 tablespoon dry basil
    • 1 tablespoon olive oil
    • 1 cup four-cheese Mexican blend cheese or 1 cup pizza cheese
    • 1 (6 ounce) can tomato paste
    • 1 teaspoon salt

    Now, as you gather these ingredients, think about any personal touches you might want to add. Maybe you love a little kick—if that’s the case, some sliced jalapeños or a sprinkle of red pepper flakes could bring that heat you crave.

    Or perhaps you’re a veggie lover? Toss on some bell peppers or fresh cilantro after baking for that extra pop of flavor. The great thing about BBQ Chicken Pizza is its flexibility; it can easily adapt to fit your taste buds.

    How to Make BBQ Chicken Pizza

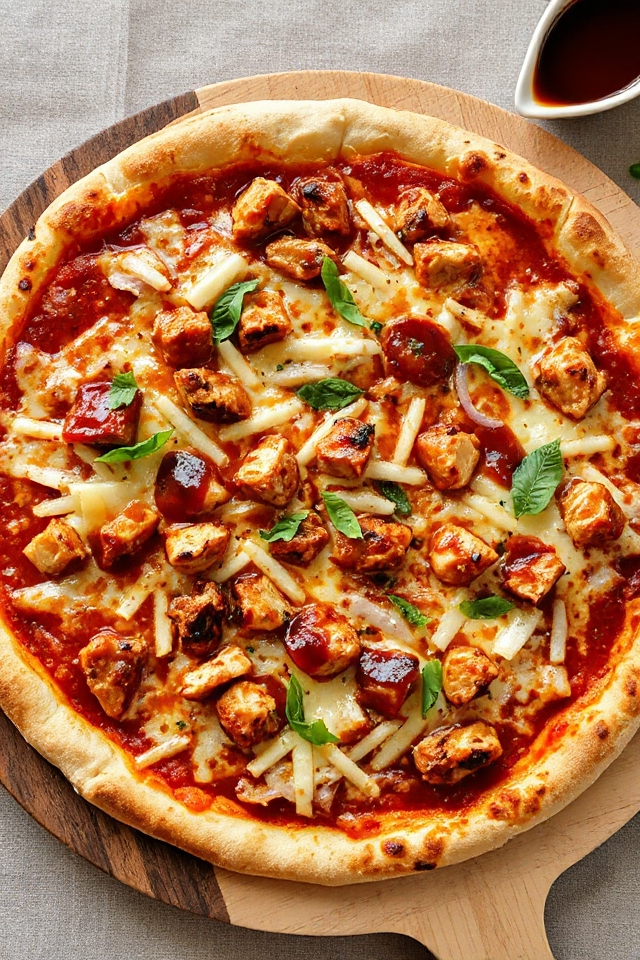
    bbq chicken pizza delight

    Making BBQ Chicken Pizza isn’t just a cooking task; it’s an experience that can fill your kitchen with mouthwatering aromas and your heart with anticipation.

    To kick things off, you’ll want to prepare your homemade pizza sauce. Grab that can of diced tomatoes (15 ounces) and mix it up in a medium bowl with 1 (6-ounce) can of tomato paste, 1 teaspoon of salt, and 1 tablespoon of dry basil. This blend is going to be your flavor base, so stir it well and set it aside.

    Now, in a saucepan, heat 1 tablespoon of olive oil over medium heat. Toss in 2 tablespoons of diced garlic and about a third of that diced onion (let’s say around a third of a medium onion). Cook until it’s fragrant and the onions are soft, which usually takes about 3 to 5 minutes. Ah, the smell of sautéing garlic is like a warm hug, isn’t it?

    Once that’s done, mix it into your tomato concoction and give it a good stir. That’s your pizza sauce, and trust me, it’s going to make your pizza sing.

    Now, let’s get to the star of the show: the chicken. Take those 2 large chicken breasts and dice them into medium-sized squares. You want them to cook evenly and be easy to bite into later.

    In the same saucepan (because who wants to wash extra dishes?), cook the chicken over medium heat until it’s thoroughly cooked—about 7-10 minutes. Once it’s done, remove it from the heat and stir in 1 1/4 cups of BBQ sauce. Feel free to lick a spoon (just don’t tell anyone) because this mixture is seriously good.

    Now, it’s time to assemble that pizza. Grab your prepared pizza crust and spread the pizza sauce evenly over it, leaving a little room at the edges for that crispy crust. Then, scatter that delicious BBQ chicken and the remaining diced onion over the sauce.

    Finally, sprinkle 1 cup of four-cheese Mexican blend cheese (or your preferred pizza cheese) generously on top. It’s okay if it looks a little cheesy—who doesn’t love extra cheese?

    Now comes the best part: baking. Preheat your oven to 450 degrees Fahrenheit and slide that pizza in. You’ll want to keep an eye on it for about 12 to 15 minutes. The goal here is for the cheese to melt beautifully and bubble up, creating that golden, gooey layer we all dream about.

    Once it’s done, take it out and let it cool for a few minutes. This will help the cheese set a bit, and trust me, no one wants to burn their mouth on molten cheese.

    Slice it up and prepare for the compliments. You did it! You’ve made a BBQ Chicken Pizza that not only tastes amazing but also brings everyone together. So, dig in and enjoy every cheesy, saucy bite.

    BBQ Chicken Pizza Substitutions & Variations

    If you’re looking to mix things up with your BBQ Chicken Pizza, there are plenty of substitutions and variations that can elevate your creation.

    For a twist, try swapping chicken for pulled pork or even sautéed mushrooms for a vegetarian option. You can also experiment with different cheeses; a sharp cheddar adds a nice kick.

    Instead of classic BBQ sauce, a spicy chipotle or tangy honey BBQ can change the flavor profile entirely.

    Add toppings like red onions, jalapeños, or even pineapple for a sweet-savory combo.

    Don’t hesitate to get creative—your pizza will thank you!

    What to Serve with BBQ Chicken Pizza

    BBQ Chicken Pizza pairs wonderfully with a variety of sides that enhance its flavors.

    I love serving it alongside a fresh garden salad, drizzled with a tangy vinaigrette. The crunch and brightness of the veggies perfectly balance the pizza’s richness.

    Another favorite is coleslaw; its creamy texture adds a delightful contrast.

    If you’re in the mood for something warm, garlic bread complements the pizza nicely.

    For a revitalizing drink, I’ve found that a cold lemonade or iced tea can be the perfect accompaniment.

    Each of these sides elevates the BBQ Chicken Pizza experience, making it even more enjoyable!

    Additional Tips & Notes

    While preparing your BBQ Chicken Pizza, keep in mind a few tips that can elevate the dish.

    First, marinate the chicken in BBQ sauce for extra flavor before cooking. If you like a kick, add jalapeños or red pepper flakes to the sauce.

    For a crispy crust, pre-bake the pizza crust for a few minutes before adding toppings. Don’t hesitate to experiment with different cheeses; a smoked cheese can add depth.

    Finally, let the pizza cool for a couple of minutes after baking—this helps the cheese set and makes slicing easier.

    Enjoy your delicious creation!

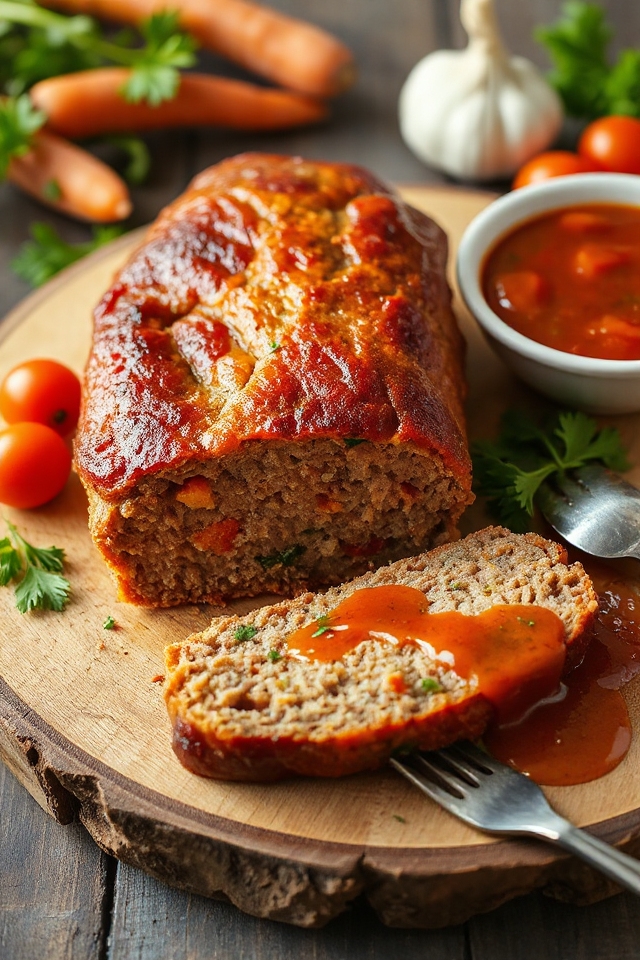
  • BBQ Meatloaf With Garlic Twist Recipe

    BBQ Meatloaf With Garlic Twist Recipe

    Why BBQ Meatloaf Is a Must-make BBQ Recipe

    When I think about BBQ recipes that really pack a punch, BBQ meatloaf always comes to mind. It’s a delicious twist on a classic dish that brings bold flavors straight to the table.

    The combination of spices and barbecue sauce creates a mouthwatering blend that satisfies every craving. Plus, it’s versatile; you can whip it up for a casual family dinner or serve it at a backyard gathering.

    I love how simple it’s to prepare, and it always impresses my guests. Trust me, once you try BBQ meatloaf, it’ll become a staple in your BBQ repertoire!

    Ingredients of BBQ Meatloaf

    When it comes to whipping up a comforting meal that brings everyone together, BBQ meatloaf is a true crowd-pleaser. It’s the kind of dish that warms the heart and fills the belly, making it perfect for family dinners or casual get-togethers. The best part? You probably already have most of the ingredients in your kitchen.

    Let’s dig into what you’ll need to make this delicious meatloaf that’s laced with smoky barbecue goodness.

    Here’s what you’ll need for your BBQ meatloaf:

    • 1 1/4 lbs of extra lean ground turkey
    • 1 whole egg
    • 3 garlic cloves, pressed
    • 1/2 cup barbecue sauce (any flavor you fancy)
    • 1/2 cup breadcrumbs
    • 1 small onion, diced

    Now, let’s chat a bit about the ingredients. Extra lean ground turkey is a fantastic choice for this recipe because it keeps the meatloaf moist without packing in too much fat.

    But if you’re feeling adventurous, you could swap it out for ground beef or pork. Just keep in mind that it might change the flavor and texture a bit.

    Also, the barbecue sauce is your chance to get creative—choose a tangy, sweet, or spicy variety that suits your taste.

    And if you want to kick it up a notch, consider adding spices or herbs to the mix. After all, it’s your meatloaf, so make it sing!

    How to Make BBQ Meatloaf

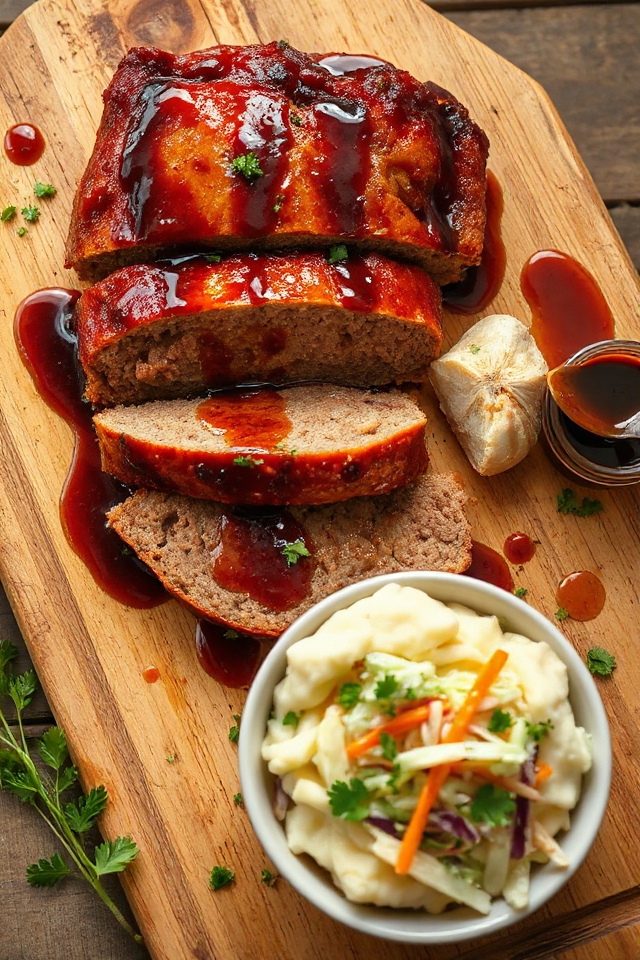
    bbq meatloaf preparation guide

    Making BBQ meatloaf at home is as easy as pie—or should I say, as easy as loaf? Start by gathering your ingredients: you’ll need 1 1/4 lbs of extra lean ground turkey, a whole egg, 3 pressed garlic cloves, 1/2 cup of your favorite barbecue sauce, 1/2 cup of breadcrumbs, and a small onion that’s been diced. Got everything? Great! Now, let’s roll up our sleeves and get mixing.

    In a large bowl, throw all those ingredients together. It might look a little messy at first, but that’s just part of the fun. Use your hands to combine everything; it’s the best way to guarantee all the flavors meld together perfectly. Just think of it as a mini workout.

    Once everything’s well mixed, grab a loaf pan and give it a good spray with non-stick cooking spray. Trust me, you don’t want your beautiful meatloaf to stick to the pan. Transfer your mixture into the loaf pan, flattening it down slightly so it spreads evenly. You want a nice, uniform shape.

    Now it’s time to pop it into a preheated oven. Bake at 350°F for about 45 to 55 minutes. You’ll know it’s done when the internal temperature reaches 165°F.

    While it’s baking, you can take advantage of the time to clean up the kitchen—or maybe sneak a few bites of leftover barbecue sauce. Who can blame you?

    Once your meatloaf is out of the oven and resting for a few minutes, slice it up and serve it with your favorite sides. Maybe some mashed potatoes or a crisp salad? Either way, you’re in for a treat.

    And remember, this BBQ meatloaf isn’t just food; it’s a warm hug in a loaf shape. Enjoy!

    BBQ Meatloaf Substitutions & Variations

    If you’re looking to mix things up with your BBQ meatloaf, there are plenty of substitutions and variations to explore.

    I love swapping ground turkey for beef or chicken for a different flavor profile. You can also use oats instead of breadcrumbs for a heartier texture.

    If you want to spice things up, try adding diced jalapeños or a dash of hot sauce to the mix.

    For a twist, incorporate chopped veggies like bell peppers or zucchini.

    You can even experiment with different barbecue sauces—smoky, honey, or spicy—to create your perfect meatloaf masterpiece.

    Enjoy getting creative!

    What to Serve with BBQ Meatloaf

    To truly elevate your BBQ meatloaf experience, pairing it with the right sides can make all the difference.

    I love serving it with creamy mashed potatoes, which balance the smoky flavors beautifully. A fresh coleslaw adds a crunchy, tangy contrast that I find irresistible.

    For something light, grilled vegetables or a simple green salad work wonders, too. If you’re in the mood for comfort food, baked beans are a classic choice that complements the meatloaf perfectly.

    Don’t forget some warm, buttery corn on the cob to round out the meal—it’s a crowd-pleaser that everyone enjoys!

    Additional Tips & Notes

    Pairing your BBQ meatloaf with the right sides can elevate the meal, but there are some extra tips that can enhance the meatloaf itself.

    First, consider using a mix of meats for a richer flavor; ground beef and turkey work well together. Adding a splash of Worcestershire sauce can also amp up the umami.

    Don’t skip on the seasoning—salt, pepper, and a pinch of smoked paprika can make a difference.

    Finally, let the meatloaf rest for about 10 minutes before slicing; this helps keep it moist.

    Enjoy experimenting, and you’ll find the perfect balance for your taste!

  • Crispy Parmesan Baked Pork Chops Recipe

    Crispy Parmesan Baked Pork Chops Recipe

    Why Baked Pork Chops Is a Must-make BBQ Recipe

    When it comes to BBQ favorites, I believe baked pork chops deserve a spot on your menu. They’re juicy, tender, and packed with flavor, making them a crowd-pleaser at any gathering.

    Plus, baking them means you can enjoy that crispy outer layer without the fuss of frying. I love how simple they’re to prepare; you can whip them up quickly and let the oven do the work.

    The aroma that fills your kitchen while they’re baking is irresistible, drawing everyone in. Trust me, once you try these, you’ll wonder how you ever BBQ’d without them!

    Ingredients of Baked Pork Chops

    When you’re gearing up to make some delicious crispy parmesan baked pork chops, the first thing you need is a solid list of ingredients. It’s like a treasure map leading you to flavor town! Don’t worry, I’ve got your back. Let’s make sure you have everything you need to whip up this delightful dish.

    Here’s what you’ll need:

    • 1 cup Ritz crackers, crushed
    • 3 tablespoons parmesan cheese, grated
    • 1/2 teaspoon salt
    • 1/4 teaspoon pepper
    • 1 egg
    • 2 tablespoons milk
    • 6 pork chops (make sure they’re thick for the best results)
    • Melted butter (for that extra richness)

    Now, just a little note on those ingredients—quality matters! I mean, using fresh parmesan cheese can really elevate the dish, bringing out those nutty, savory flavors that just scream delicious.

    And when it comes to those pork chops, go for the thicker cuts. Trust me, thin ones might end up dry, and nobody wants that.

    Oh, and if you happen to have a few extra Ritz crackers lying around, I won’t judge if you sneak a few while you cook—just keep the noise down so no one catches you in the act!

    How to Make Baked Pork Chops

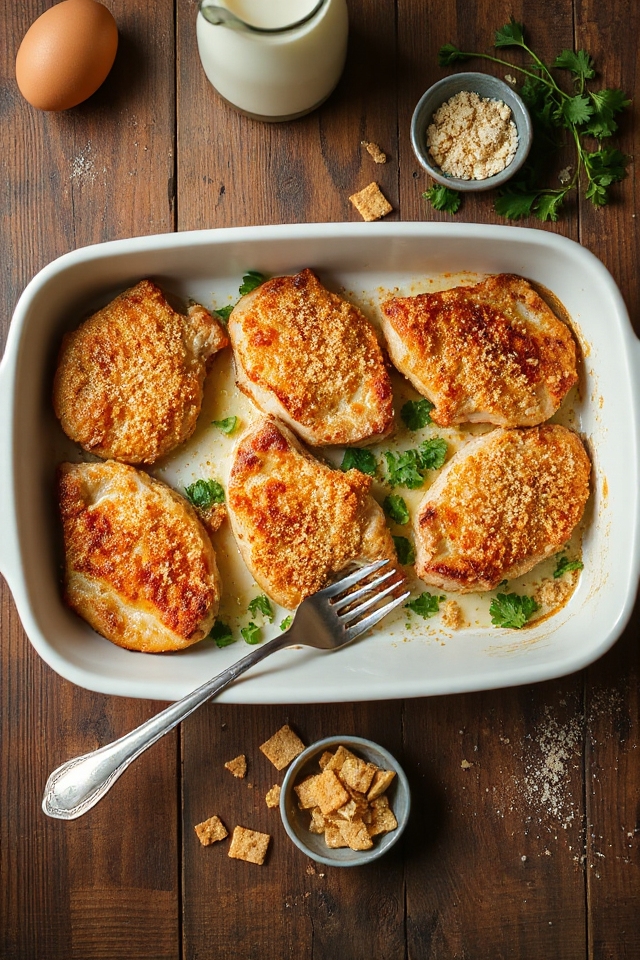
    crispy parmesan baked pork chops

    Alright, let’s roll up our sleeves and make those crispy parmesan baked pork chops that’ll make you feel like a kitchen superstar. First things first, preheat your oven to 350 degrees. Trust me, this step is essential—nobody wants to wait around for the oven to heat up while the chops are just sitting there, looking forlorn.

    Now, grab 1 cup of crushed Ritz crackers and toss them into a bowl. Add in 3 tablespoons of grated parmesan cheese, 1/2 teaspoon of salt, and 1/4 teaspoon of pepper. Mix it all together, and let me tell you, the smell is already pretty fantastic.

    Next, you’ll want to dip those lovely pork chops—six of them, to be exact—into some flour first. This little trick helps the coating stick, and who doesn’t want a good crunch? After a light dusting of flour, whisk together 1 egg and 2 tablespoons of milk in a shallow bowl. It’s like creating a magic potion to give those chops a delicious bath.

    Now, here comes the fun part. Dip each floured pork chop into the egg mixture, and then coat it again in that tasty cracker mixture. It’s a little messy, but that’s part of the charm, right?

    Once all your chops are coated, pour some melted butter into a baking dish and arrange your beautifully battered pork chops in there. Pop them into the oven and let them bake for about 30 minutes on each side. If you’ve got thick chops like I do—you know, the kind that can hold their own—you’ll want to stick with that time.

    But if yours are on the thinner side, keep an eye on them because nobody likes dried-out meat. Just imagine the aroma filling your kitchen while they bake. Pure bliss, right?

    Baked Pork Chops Substitutions & Variations

    While I love the classic crispy parmesan baked pork chops, there are plenty of substitutions and variations that can elevate this dish even further.

    For a gluten-free option, I often use crushed almond flour or gluten-free breadcrumbs instead of Ritz crackers. You can also swap out parmesan for other cheeses like cheddar or mozzarella for a different flavor.

    Want a kick? Add some crushed red pepper flakes to the crumb mixture. For a twist on the classic, try marinating the pork chops in your favorite sauce before baking.

    The possibilities are endless, and it’s fun to experiment!

    What to Serve with Baked Pork Chops

    After exploring some tasty substitutions for crispy parmesan baked pork chops, it’s time to think about what sides will complement this dish perfectly.

    I love serving these chops with creamy mashed potatoes; they soak up any juices wonderfully.

    Roasted vegetables, like Brussels sprouts or carrots, add a nice crunch and color to the plate.

    A fresh garden salad with a tangy vinaigrette balances the richness of the pork.

    If you’re in the mood for something a bit heartier, consider pairing with a quinoa or rice pilaf.

    These choices enhance the meal and make for a delightful dining experience!

    Additional Tips & Notes

    When you whip up these crispy parmesan baked pork chops, keep a few tips in mind to guarantee they turn out perfectly every time.

    First, make sure your pork chops are patted dry; this helps the coating stick better. If you want extra crunch, consider adding some panko breadcrumbs to the cracker mixture.

    Don’t skip the flour dip; it’s essential for a good crust. Finally, let the chops rest for a few minutes after baking to lock in the juices.

    Trust me, these simple adjustments will elevate your dish and impress anyone at your dinner table! Enjoy!

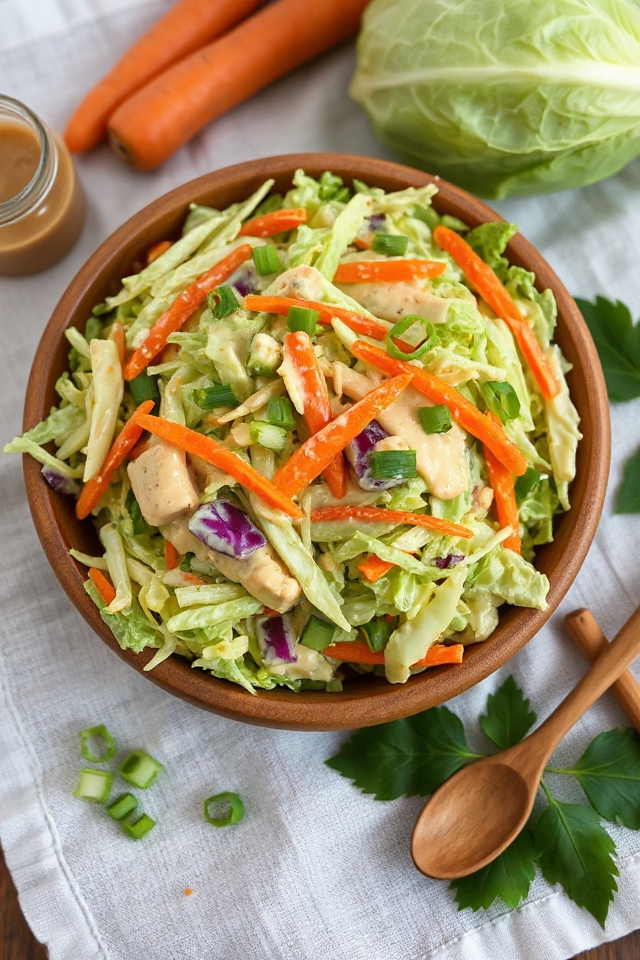
  • Tangy Cider Vinegar Creamy Coleslaw Recipe

    Tangy Cider Vinegar Creamy Coleslaw Recipe

    Why Creamy Coleslaw Is a Must-make BBQ Recipe

    When I think about the must-have dishes for a BBQ, creamy coleslaw always comes to mind. It’s the perfect side that balances the smoky flavors of grilled meats.

    The crunchiness of fresh cabbage and carrots adds texture that complements everything on the plate. Plus, the creamy dressing brings a coolness that contrasts beautifully with hot dishes.

    I love how it’s easy to make ahead of time, allowing flavors to meld. Whether you’re hosting a big gathering or a casual cookout, creamy coleslaw always wins over guests and keeps them coming back for more.

    It’s simply a BBQ essential!

    Ingredients of Creamy Coleslaw

    When it comes to whipping up a tangy cider vinegar coleslaw, the ingredients are simple yet key to achieving that delightful balance of flavors. You don’t need to be a culinary whiz to gather these essentials, and trust me, once you have everything laid out, you’ll be amazed at how quickly it all comes together.

    Just imagine crunching into that fresh cabbage and carrots, all dressed up in a creamy, tangy sauce. It’s a dish that speaks to summer gatherings and backyard barbecues, and it’s ready to become a staple in your recipe repertoire.

    Here’s what you’ll need to make this creamy coleslaw:

    • 1/2 cup light mayonnaise
    • 2 tablespoons cider vinegar
    • 2 teaspoons sugar
    • Coarse salt and pepper (to taste)
    • 1/2 head green cabbage, cut lengthwise into thirds and thinly sliced crosswise
    • 2 medium carrots, julienne cut
    • 2 medium scallions, minced

    Now, let’s chat a bit more about these ingredients. The light mayonnaise is key—it keeps things creamy without being too heavy, so you don’t feel like you’re eating a bowl of clouds.

    The cider vinegar adds that tangy kick that makes your taste buds do a little happy dance. And don’t skimp on the salt and pepper; they’re like the trusty sidekicks that bring out the flavors of the veggies.

    Fresh cabbage is non-negotiable for that crunch factor, while the carrots give a pop of color and sweetness. Scallions? Well, they’re the finishing touch, adding a hint of oniony goodness without overwhelming the dish.

    You can even mix and match some of these ingredients based on what you have on hand—just make sure to keep that balance of creamy and tangy so you end up with the best coleslaw ever! Trust me, your taste buds will thank you later.

    How to Make Creamy Coleslaw

    creamy coleslaw veggie mix

    Making creamy coleslaw is like taking a little trip to flavor town, and the best part? It’s super easy. Start by grabbing a medium bowl, and in it, combine 1/2 cup of light mayonnaise, 2 tablespoons of cider vinegar, and 2 teaspoons of sugar. Now, I know what you’re thinking: “Sugar in coleslaw?” But trust me, it adds a delightful sweetness that balances the tangy vinegar perfectly. Sprinkle in some coarse salt and pepper to taste. Mix it all together until it’s nice and smooth. Honestly, it’s like a little creamy cloud just waiting for its crunchy companions.

    Next up, it’s time for the stars of the show—your veggies. Take 1/2 head of green cabbage and slice it lengthwise into thirds. Then, thinly slice it crosswise. If you’ve ever tried to chop cabbage, you’ll know it can be a bit of an adventure. Just go slow and steady; no one wants a cabbage slice to go rogue.

    Once you’ve conquered that, grab 2 medium carrots and julienne them. Don’t worry if your julienne skills aren’t quite Michelin star level; we’re not here to impress the judges, just to make something delicious. Finally, mince 2 medium scallions for a fresh, oniony kick. Toss all those beautiful veggies into the bowl with your creamy dressing and mix it up until everything is generously coated. It’s like a party in a bowl, and everyone’s invited.

    Now, here comes the hardest part—letting the coleslaw sit. I know, waiting is the worst, but trust me, it’s worth it. Let your coleslaw hang out for at least 15 minutes at room temperature. This little pause allows the cabbage to soften up and soak in all those tasty flavors.

    If you’re planning ahead, you can even cover it and stick it in the fridge for up to a day. Just think about it: you can whip this up ahead of time and have a delicious side dish ready for your next summer gathering or backyard BBQ. And hey, if you find yourself sneaking bites along the way, I won’t judge.

    Creamy Coleslaw Substitutions & Variations

    Looking to shake things up with your coleslaw? I love experimenting with different ingredients!

    Instead of light mayonnaise, try Greek yogurt for a tangy twist. You can swap cider vinegar for lemon juice or even balsamic vinegar, depending on your flavor preference.

    Want some crunch? Toss in chopped apples or nuts like pecans or walnuts. For a touch of heat, add a pinch of cayenne pepper or some diced jalapeños.

    If you’re feeling adventurous, mix in other veggies like bell peppers or radishes. There are endless possibilities to make your creamy coleslaw unique and delicious!

    Enjoy the creativity!

    What to Serve with Creamy Coleslaw

    Experimenting with different ingredients in creamy coleslaw opens up a world of flavor possibilities, but pairing it with the right dishes can elevate your meal even further.

    I love serving it alongside grilled meats like barbecue chicken or ribs; the coleslaw adds a revitalizing crunch. It also complements fish tacos perfectly, balancing the spices with its creaminess.

    For a lighter option, I enjoy it with a simple sandwich, like turkey or ham. You can’t go wrong with fried foods either, as the coleslaw cuts through the richness.

    Trust me, these pairings will enhance your dining experience!

    Additional Tips & Notes

    While preparing your tangy cider vinegar coleslaw, keep in mind a few additional tips to enhance its flavor and texture.

    First, I like to let the coleslaw sit for at least 15 minutes; it allows the cabbage to soften and the flavors to meld beautifully.

    If you want a crunchier texture, try adding some chopped apples or nuts. For extra zest, consider a dash of celery seed or a sprinkle of paprika.

    Remember, fresh ingredients make all the difference, so choose crisp, vibrant veggies.

    Finally, feel free to adjust the sweetness by adding more sugar to your taste! Enjoy!

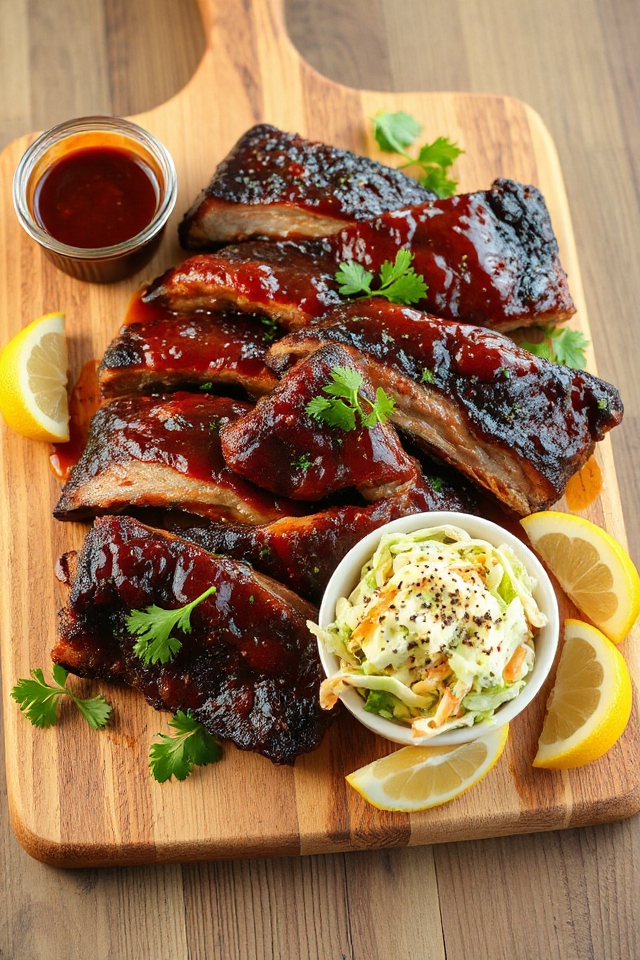
  • Garlic and BBQ Ribs Recipe

    Garlic and BBQ Ribs Recipe

    Why BBQ Ribs Is a Must-make BBQ Recipe

    When you think of BBQ, ribs are often at the top of the list, and for good reason.

    There’s something magical about the tender meat, smoky flavor, and that sticky, sweet glaze. I can’t resist sinking my teeth into a juicy rib, savoring every bite.

    They bring people together, whether it’s a backyard cookout or a family gathering. Plus, they’re surprisingly easy to make, allowing me to impress friends without spending all day in the kitchen.

    Trust me, once you try BBQ ribs, you’ll understand why they’re a must-make recipe that keeps everyone coming back for more.

    Ingredients of BBQ Ribs

    When it comes to making BBQ ribs, the ingredients you choose can make all the difference in flavor and tenderness. In this recipe, we keep it simple yet delicious, ensuring that every bite is packed with flavor. Just imagine the aroma wafting through your kitchen as you prepare these mouth-watering ribs. Ready to get cooking? Let’s gather what we need!

    Ingredients:

    • 2 1/2 lbs country-style pork ribs
    • 1 tablespoon garlic powder
    • 1 teaspoon ground black pepper
    • 2 tablespoons salt
    • 1 cup barbecue sauce

    Now, let’s chat about these ingredients for a moment. First off, I highly recommend using country-style pork ribs—they’re meaty and juicy, which means you won’t be left gnawing on bones. Garlic powder adds depth to the flavor without the hassle of chopping fresh garlic, and honestly, who’s time for that? Salt and black pepper are essential for seasoning, bringing out the natural flavors of the pork. And, of course, the barbecue sauce is where the magic truly happens. You can use your favorite store-bought sauce or even whip up your own if you’re feeling adventurous. The beauty of BBQ ribs is that they’re versatile; you can easily adjust the spices and sauce to suit your personal taste. So, don’t be shy—let your culinary creativity shine!

    How to Make BBQ Ribs

    tender bbq ribs recipe

    Alright, let’s plunge into how to make these mouth-watering BBQ ribs. First things first, grab your 2 1/2 lbs of country-style pork ribs. Trust me, these are the stars of the show.

    You’ll want to start by placing those beautiful ribs in a large pot. Now, fill that pot with enough water to cover the ribs completely. This is where the magic begins. Sprinkle in 1 tablespoon of garlic powder, 1 teaspoon of ground black pepper, and 2 tablespoons of salt. It’s a simple seasoning mix that packs a punch.

    Bring the water to a boil and let the ribs cook until they’re tender—this usually takes about 45 minutes to an hour. And if you’re like me and tend to wander off, just set a timer so you don’t forget about them.

    Once those ribs are tender and practically begging to be devoured, it’s time to bring them out of the pot and into a baking dish (a 9×13 inch one, to be exact). Preheat your oven to a cozy 325 degrees F (165 degrees C) while you’re at it.

    Now, pour 1 cup of your favorite barbecue sauce over the ribs, ensuring they’re well-coated—because who wants dry ribs? Cover the dish tightly with aluminum foil; this helps keep the moisture in, creating a tender, juicy finish.

    Pop them in the oven and let them bake for about 1 to 1 1/2 hours, or until the internal temperature hits 160 degrees F (70 degrees C). Just think about that delicious aroma filling your kitchen while you wait. It’s worth every second.

    BBQ Ribs Substitutions & Variations

    After mastering the basics of making BBQ ribs, you might wonder how to switch things up or cater to different tastes.

    One of my favorite substitutions is using beef or lamb ribs instead of pork for a richer flavor. You can also experiment with different sauces—try a spicy chipotle or a sweet apple cider barbecue sauce.

    If you’re feeling adventurous, add a splash of whiskey or soy sauce to your marinade for a unique twist. For a smoky flavor, consider using smoked paprika or liquid smoke.

    The possibilities are endless, so don’t hesitate to get creative with your BBQ ribs!

    What to Serve with BBQ Ribs

    While BBQ ribs are a delicious centerpiece, the right side dishes can elevate your meal to new heights.

    I love pairing them with creamy coleslaw for that crunchy contrast. Baked beans add a hearty touch, and their sweetness complements the smoky flavors beautifully.

    Don’t forget about cornbread; it’s perfect for soaking up any extra sauce! For something lighter, a fresh cucumber salad can balance out the richness.

    Finally, some crispy potato wedges or fries can’t be overlooked—they’re always a hit.

    With these sides, your BBQ ribs will shine even brighter at the dinner table!

    Additional Tips & Notes

    To guarantee your BBQ ribs turn out perfectly, I recommend checking the ribs for tenderness before taking them out of the pot; they should be easily pierced with a fork.

    Additionally, don’t be shy with the barbecue sauce—generously coat the ribs for maximum flavor. For an extra kick, try adding a dash of cayenne pepper or your favorite hot sauce to the seasoning mix.

    If you like that sticky glaze, remove the foil during the last 20 minutes of baking.

    Finally, let the ribs rest for a few minutes after baking; it helps the juices redistribute for a juicier bite!

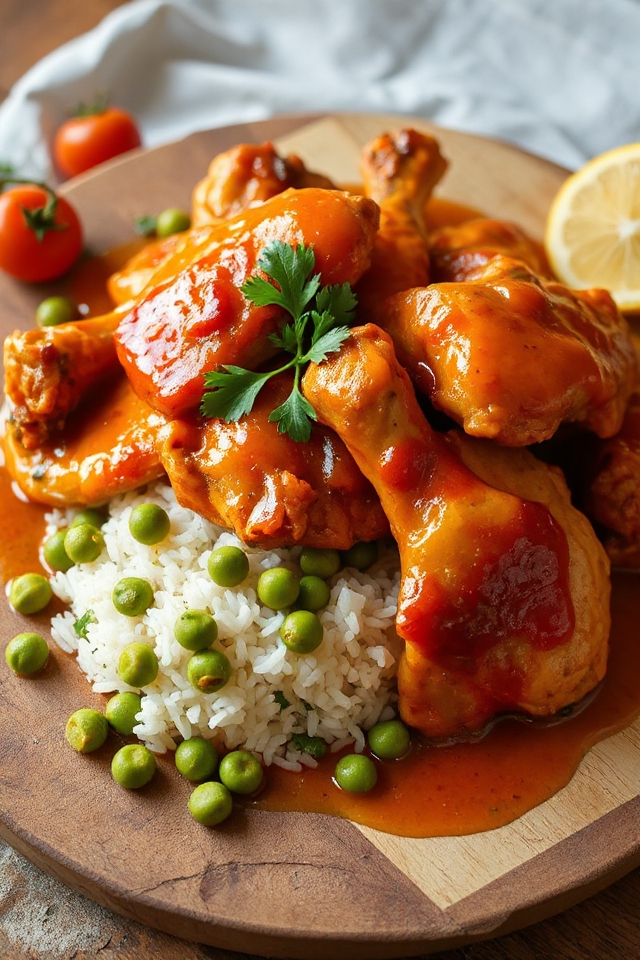
  • Colman’s Mustard BBQ Chicken Recipe

    Colman’s Mustard BBQ Chicken Recipe

    Why BBQ Chicken Is a Must-make BBQ Recipe

    When summer arrives and outdoor gatherings beckon, BBQ chicken becomes an essential dish I can’t resist making. It’s not just about the flavor; it’s the memories created around the grill.

    The aroma wafting through the air pulls everyone together, sparking laughter and conversation. I love how versatile it is, fitting perfectly with sides like coleslaw or grilled veggies.

    Plus, it’s simple to prepare, making it a go-to for any occasion. Whether I’m hosting friends or enjoying a family dinner, BBQ chicken always delivers that delicious smoky taste, reminding me that summer is truly a time for good food and great company.

    Ingredients of BBQ Chicken

    When it comes to making delicious BBQ chicken, the secret really does lie in the ingredients you choose. The combination of flavors, especially with the addition of Colman’s mustard powder, creates that unique taste that sets this dish apart from the rest.

    It’s a simple list, but each ingredient plays an essential role in crafting a mouthwatering sauce that clings to the chicken, making it juicy and flavorful. So, let’s gather what we need to whip up this BBQ delight.

    Here’s what you’ll need for the Colman’s Mustard BBQ Chicken recipe:

    • 1 whole chicken, jointed or 2 lbs chicken breast fillet
    • 1 large onion, finely chopped
    • 3 garlic cloves, crushed
    • 4 tablespoons tomato puree or 4 tablespoons tomato sauce
    • 1 tablespoon Colman’s English mustard powder
    • 2 tablespoons rich soy sauce or ketjap manis
    • 1/4 teaspoon ground black pepper
    • 1/2 teaspoon marine salt
    • 1 tablespoon olive oil
    • 1 teaspoon sugar
    • 1 tablespoon dry sherry

    Now, about those ingredients—it’s all about balance and personal taste. Sure, you can play around with the soy sauce; if you want a sweeter kick, go for ketjap manis.

    And if you’re feeling fancy, a splash of your favorite barbecue sauce can be fun to experiment with, but remember, the mustard powder is the star here. Seriously, don’t skip it. It brings a zing that elevates the whole dish.

    Also, if you’re not a fan of garlic, feel free to reduce the amount or leave it out, but I can’t promise it’ll have the same magical flavor.

    And hey, if you find yourself with some leftover chicken, it makes for a great sandwich the next day. Just saying.

    How to Make BBQ Chicken

    colman s mustard bbq chicken

    Now that we’ve gathered all our ingredients for the Colman’s Mustard BBQ Chicken, let’s plunge into the fun part—making it!

    First things first, grab a bowl (not your fancy mixing bowl; we’re keeping it real here). Toss in your 1 whole chicken, jointed or 2 lbs of chicken breast fillet. Then add 1 large onion, finely chopped, and 3 crushed garlic cloves. If you have a love-hate relationship with garlic, I totally get it. But trust me, it adds an amazing depth to the flavor.

    Next, we’ve got some serious flavor bombs to add. Scoop in 4 tablespoons of tomato puree or tomato sauce, whichever you have on hand. Then, don’t forget the star of the show—1 tablespoon of Colman’s English mustard powder. You might be thinking, “Mustard? Really?” Yes, really! This is where the magic happens.

    Follow that up with 2 tablespoons of rich soy sauce or ketjap manis for a sweet and salty kick. Sprinkle in 1/4 teaspoon of ground black pepper and 1/2 teaspoon of marine salt, because seasoning is key, my friend. A tablespoon of olive oil will help everything come together, and a teaspoon of sugar will balance out those flavors. Finally, drizzle in 1 tablespoon of dry sherry because why not add a little sophistication to our BBQ adventure?

    Now, mix everything together like you’re trying to impress your taste buds. The combination should be a vibrant, dark orangey color. If it looks a little too dark, just add a smidge more tomato puree to brighten things up.

    Once it’s all mixed, you can choose your cooking method: oven, stovetop, or even the microwave if you’re in a rush. If you go the microwave route, make sure it’s in a casserole with a lid and zap it for 10 minutes on high, then let it stand for 5. Personally, I lean towards the oven or hob bake for that lovely caramelization.

    And, oh my goodness, when it’s grilled on the BBQ, it’s like a whole different dish altogether, with a delightful sauce that makes you want to lick your plate. Serve it up with basmati rice and peas, and you’ve got yourself a meal that’ll have your taste buds dancing.

    BBQ Chicken Substitutions & Variations

    Exploring substitutions and variations for BBQ chicken can open up a world of flavor possibilities.

    If you’re out of Colman’s mustard powder, try Dijon or even a spicy brown mustard for a different kick. For a sweeter twist, substitute honey for sugar, or use maple syrup for a unique flavor.

    If you prefer a tangy taste, swap in apple cider vinegar. You can also switch up the protein—turkey or tofu work great as alternatives.

    Don’t hesitate to experiment with herbs and spices; adding smoked paprika or chili powder can really elevate the dish.

    Enjoy your culinary adventure!

    What to Serve with BBQ Chicken

    Serving BBQ chicken opens up a delightful array of side dishes that can enhance your meal experience.

    I love pairing it with fluffy basmati rice and vibrant peas, which balance the rich flavors. You could also serve coleslaw for a crunchy texture or cornbread for a comforting touch.

    Grilled vegetables add a colorful, healthy option, while a fresh garden salad brings brightness to the plate.

    For a fun twist, try baked beans or a tangy potato salad. Each of these sides complements the BBQ chicken beautifully, making your meal not just delicious but truly memorable.

    Enjoy mixing and matching!

    Additional Tips & Notes

    Although BBQ chicken is delicious on its own, a few additional tips can elevate your dish even more.

    First, don’t skip the Colman’s mustard powder—it’s the secret to that unique flavor. If the mixture looks too dark, just add a bit more tomato puree to brighten it up.

    I recommend marinating the chicken for at least an hour, or even overnight, for deeper flavor. When cooking, keep an eye on it to prevent drying out; basting it with the sauce helps.

    Finally, serve it hot with basmati rice and peas for a comforting meal that everyone will love!

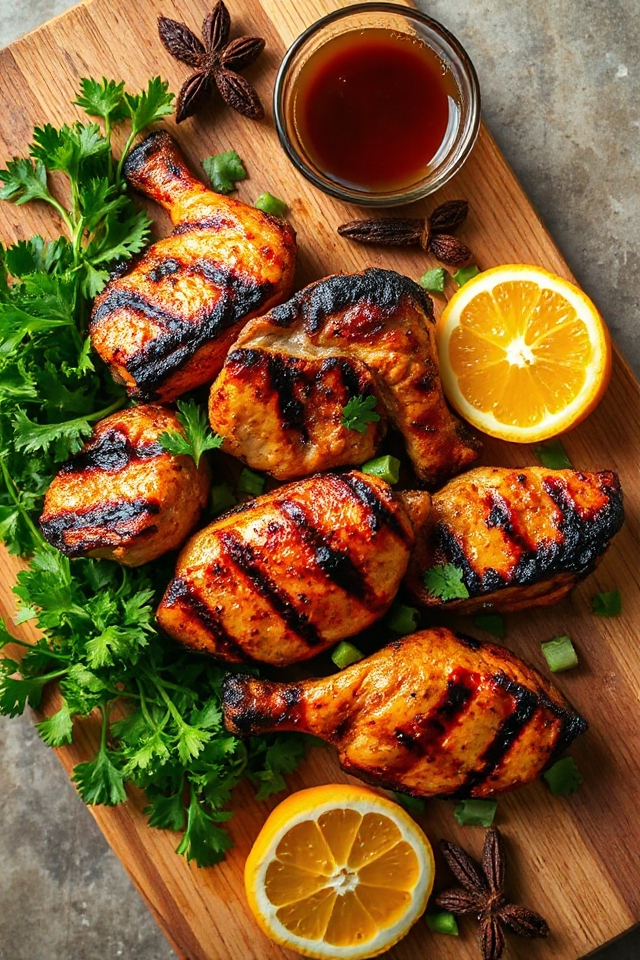
  • Spiced Jerk Chicken Recipe With Orange Twist

    Spiced Jerk Chicken Recipe With Orange Twist

    Why Jerk Chicken Is a Must-make BBQ Recipe

    When I think about must-make BBQ recipes, jerk chicken always stands out.

    There’s something magical about that smoky, spicy flavor that just screams summer. It’s not just a dish; it’s an experience. The aroma fills the air, drawing everyone around the grill, ready to feast.

    I love how versatile it is—whether you’re hosting a backyard party or enjoying a quiet evening, jerk chicken fits right in.

    Plus, the marinating process really allows those bold spices to penetrate the meat, creating a mouthwatering dish that’s hard to resist.

    Trust me, once you try it, you’ll understand why it’s a BBQ essential!

    Ingredients of Jerk Chicken

    Making jerk chicken is like throwing a backyard party for your taste buds. The ingredients come together to create a flavor explosion that’s both spicy and aromatic. When you gather these ingredients, you’re not just preparing a meal; you’re setting the stage for a culinary adventure.

    Trust me, once you get everything prepped, the magic of jerk chicken will fill your kitchen, and you’ll be left wondering why you didn’t try this sooner.

    Here’s what you’ll need for the spiced jerk chicken:

    • 1 tablespoon ground allspice
    • 1 tablespoon dried thyme
    • 1 1/2 teaspoons cayenne pepper
    • 1 1/2 teaspoons black pepper
    • 1 1/2 teaspoons ground sage
    • 3/4 teaspoon grated nutmeg
    • 3/4 teaspoon cinnamon
    • 1 – 2 teaspoons salt (adjust to your taste)
    • 2 tablespoons garlic powder
    • 1 tablespoon sugar
    • 1/4 cup soy sauce
    • 3/4 cup cider vinegar
    • 1/2 cup orange juice
    • 1/4 cup olive oil
    • 1 cup minced onion
    • 3 green onions, chopped (green included)
    • 8 chicken pieces (that can be legs, thighs, or a mix)

    Now, let’s talk about the ingredients a bit more. If you have a spice cabinet that rivals a small store, you might already have most of these items loaded up. If not, don’t panic—most of these spices are pretty common.

    And hey, if you’re feeling adventurous, you can tweak the spice levels to suit your palate. Want it spicier? Toss in an extra pinch of cayenne. Not a fan of nutmeg? Skip it! The beauty of jerk chicken lies in its adaptability.

    Just remember, the longer you let the chicken marinate, the more those flavors will seep in. It’s like a flavor party for your chicken, and everyone’s invited. So, gather your ingredients, and let’s get that grill fired up!

    How to Make Jerk Chicken

    flavorful marinated grilled chicken

    Making spiced jerk chicken is a delightful journey that begins the moment you gather your ingredients. First, grab a large food storage bag—trust me, this will come in handy for the marinating magic.

    In that bag, combine 1 tablespoon of ground allspice, 1 tablespoon of dried thyme, 1 1/2 teaspoons of cayenne pepper, 1 1/2 teaspoons of black pepper, and 1 1/2 teaspoons of ground sage. Add in 3/4 teaspoon of grated nutmeg, 3/4 teaspoon of cinnamon, and 1 to 2 teaspoons of salt, adjusting that salt according to your taste buds. Don’t forget the 2 tablespoons of garlic powder and 1 tablespoon of sugar.

    Now, here comes the fun part: pour in the 1/4 cup of soy sauce, 3/4 cup of cider vinegar, 1/2 cup of orange juice, and 1/4 cup of olive oil. It’s like a flavor bomb waiting to explode. Toss in 1 cup of minced onion and 3 chopped green onions (green parts included), and then zip that bag closed.

    Now, give it a good shake, or as I like to call it, the “jerk chicken dance.” Get all those ingredients mingling—trust me, they’ll be best friends by the end of the marinating process.

    Next, it’s time for the chicken to join the party. Add your 8 pieces of chicken to the marinated mix and make sure they’re all coated. Seal the bag and pop it in the fridge to marinate overnight. This part is essential; the longer it sits, the more those flavors seep in, turning your chicken into a masterpiece.

    Now, I’ll admit, I’ve been known to sneak a taste of the marinade—it’s that good. But remember, once it’s touched raw chicken, you need to be careful with it. So, when it’s time to grill, take the chicken out of the fridge and let it come to room temperature.

    And if you fancy basting your chicken while it grills, make sure to bring that marinade to a hard boil in a medium saucepan first. Safety first, right?

    Fire up your grill—whether it’s charcoal or gas—and place the chicken over the hot coals. Grill those pieces for about 6 to 10 minutes per side until the juices run clear.

    Baste occasionally with the boiled marinade for an extra layer of flavor. Just picture it: juicy, smoky, tantalizing jerk chicken sizzling away, filling your backyard with delicious aromas. It’s hard not to get excited, right?

    Once it’s done, take a moment to admire your creation before diving in. This jerk chicken isn’t just a meal; it’s a celebration of flavors that’ll have you coming back for seconds… and maybe even thirds. Enjoy!

    Jerk Chicken Substitutions & Variations

    If you’re looking to mix things up with your jerk chicken, there are plenty of substitutions and variations that can elevate this dish.

    For instance, try using chicken thighs instead of breasts for juiciness, or swap the orange juice for pineapple juice for a tropical twist. If you’re feeling adventurous, add mango or papaya to the marinade for extra sweetness.

    You can also experiment with different types of vinegar, like rice vinegar, to change the flavor profile.

    For a vegan option, replace chicken with hearty vegetables like portobello mushrooms or tofu, marinating them just the same for a delicious alternative.

    What to Serve with Jerk Chicken

    When you’re ready to enjoy your jerk chicken, consider pairing it with sides that complement its bold flavors.

    I love serving it with coconut rice; the creamy texture balances the spice perfectly. A fresh mango salsa adds a sweet and tangy contrast that brightens the dish.

    You can’t go wrong with plantains, either—they’re sweet and crispy, making a delightful addition.

    For a revitalizing touch, a simple green salad with lime dressing can really tie everything together.

    These sides not only enhance the meal but also create a vibrant, colorful plate that’s sure to impress your guests. Enjoy your feast!

    Additional Tips & Notes

    To guarantee your jerk chicken turns out perfectly, I recommend paying attention to the marinating time and the cooking method.

    Marinating overnight allows the flavors to really penetrate the chicken, but if you’re short on time, even a few hours can make a difference.

    When grilling, keep the heat consistent and avoid moving the chicken too much; let those beautiful grill marks develop.

    If you want extra flavor, baste with the marinade while cooking, but remember to boil it first to eliminate any bacteria.

    Finally, serve your chicken with fresh lime wedges for a zesty finish! Enjoy your meal!

  • Carrot-Infused Turkey Meatloaf Recipe

    Carrot-Infused Turkey Meatloaf Recipe

    Why Turkey Meatloaf Is a Must-make BBQ Recipe

    Turkey meatloaf is an absolute must for any BBQ gathering. It’s not only delicious but also a healthier alternative to traditional beef meatloaf.

    I love how its moist texture and savory flavor appeal to everyone, from kids to adults. Plus, it’s super versatile; you can easily customize it with your favorite herbs and spices.

    When I serve it alongside classic BBQ sides, it always steals the show. There’s something special about the way it holds its shape while still being juicy.

    Trust me, once you try it, you’ll wonder how you ever had a BBQ without turkey meatloaf!

    Ingredients of Turkey Meatloaf

    When it comes to making a scrumptious turkey meatloaf, it all starts with the right ingredients. Trust me, the combination of ground turkey, fresh veggies, and those aromatic herbs makes for a dish that’s not only healthy but also bursting with flavor.

    Plus, who can resist the charm of a home-cooked meal that’s easy to whip up? Gathering your ingredients is the first step, and I promise, it’ll be worth it when you have that warm, comforting meatloaf on your table. So, let’s explore what you’ll need!

    Here’s a handy list of ingredients for the Carrot-Infused Turkey Meatloaf:

    • 1 lb ground organic turkey
    • 1/4 cup non-dairy milk substitute (or chicken or vegetable broth)
    • 1 organic egg
    • 1/2 cup finely chopped onion
    • 1/2 cup grated carrot
    • 1/2 cup minced parsley or 1/2 cup cilantro
    • 1/4 cup finely chopped celery
    • 1/2-1 1/2 teaspoon onion powder
    • 1/2-1 1/2 teaspoon garlic powder
    • 1/2-1 1/2 teaspoon dried oregano
    • 1/2-1 1/2 teaspoon dried sage
    • 1/2 teaspoon salt
    • 1/4-1/2 teaspoon pepper

    Now that you have your ingredients, let’s talk a bit about them. You can always switch things up based on your preferences or dietary needs.

    For example, if you’re looking to skip the egg, a mashed banana can work like a charm as a binder—who knew bananas could do so much? And if you’re not a fan of parsley, cilantro can easily take its place, giving the meatloaf a different twist.

    Don’t be afraid to play around with the spices, too! A little extra garlic powder never hurt anyone, right? The beauty of this recipe is that it’s forgiving and allows for creativity.

    How to Make Turkey Meatloaf

    juicy carrot infused turkey meatloaf

    Alright, let’s get into the nitty-gritty of how to make this amazing Carrot-Infused Turkey Meatloaf. First things first, you’ll want to preheat your oven to a cozy 350 degrees. This is the perfect temperature for cooking your meatloaf gently, allowing it to stay juicy and tender.

    While that’s heating up, grab a large mixing bowl and toss in your 1 lb of ground organic turkey. Now, here’s where the fun begins. It’s time to add in 1/4 cup of your choice of non-dairy milk substitute or broth—this is going to keep your meatloaf moist and flavorful.

    Next, crack in one organic egg, which will help bind everything together, making sure your meatloaf doesn’t fall apart like my New Year’s resolutions. Then, chop up 1/2 cup of onion, grate 1/2 cup of carrot, and finely chop 1/4 cup of celery—get those veggies ready to add some serious flavor and nutrition.

    Don’t forget the herbs! Toss in 1/2 cup of minced parsley or cilantro, and sprinkle in your 1/2-1 1/2 teaspoons of onion powder, garlic powder, dried oregano, and dried sage. A little salt (1/2 teaspoon) and pepper (1/4-1/2 teaspoon) will round out the flavor profile.

    Now, here comes the messy but oh-so-satisfying part: mix all those ingredients together. You can use a spoon, but let’s be real—your hands are the best tools for this job. Dive right in, and don’t be shy about squishing everything together until it’s well combined.

    Once it’s all mixed, pat the mixture into a greased 9×5-inch loaf pan. This is where it starts to take shape. Pop that beauty into the oven and let it bake for about an hour. The aroma wafting through your kitchen will have everyone wondering what’s cooking.

    After it’s done, don’t forget to drain the juices before slicing it up. Trust me, this meatloaf won’t only be a hit with the kids, but it might just become a family favorite. Enjoy every slice!

    Turkey Meatloaf Substitutions & Variations

    There are plenty of ways to customize your meatloaf to suit your taste or dietary needs.

    If you’re vegan, swap the egg for 1/2 banana or applesauce as a binder. You can also use ground chicken or beef instead of turkey for a different flavor.

    To add some kick, try incorporating chopped jalapeños or spices like chili powder. If you’re gluten-free, use gluten-free breadcrumbs or oats.

    For a veggie boost, feel free to add in chopped bell peppers or zucchini.

    Each variation brings a unique twist, making your meatloaf truly your own creation! Enjoy experimenting!

    What to Serve with Turkey Meatloaf

    What pairs beautifully with turkey meatloaf to create a satisfying meal? I love serving it alongside creamy mashed potatoes or roasted sweet potatoes for a comforting touch.

    A fresh green salad adds a crisp contrast, while steamed broccoli or sautéed green beans bring some vibrant color to the plate.

    If I’m in the mood for something hearty, a side of quinoa or brown rice works wonders too.

    And don’t forget a tangy tomato sauce or a drizzle of balsamic glaze to elevate those flavors.

    Together, these sides make for a balanced and delicious meal that everyone enjoys!

    Additional Tips & Notes

    Have you ever wondered how to enhance the flavor and texture of your turkey meatloaf? I’ve found that adding a splash of Worcestershire sauce boosts umami, while fresh herbs like thyme or basil can really brighten it up.

    If you want extra moisture, try incorporating finely grated zucchini alongside the carrots. Don’t forget to let the meatloaf rest for a few minutes after baking—this helps with slicing.

    Finally, leftovers are fantastic in sandwiches or crumbled over salads. Trust me, these little tweaks can take your meatloaf from good to great! Enjoy experimenting!

  • Smoked Paprika Pulled Pork Recipe

    Smoked Paprika Pulled Pork Recipe

    Why Pulled Pork Is a Must-make BBQ Recipe

    When it comes to BBQ, pulled pork is an absolute must-make dish. I can’t think of a better way to wow my guests than with tender, smoky meat that practically falls apart. The aroma alone fills the air with mouthwatering anticipation.

    Plus, it’s incredibly versatile; I love serving it on buns, in tacos, or even over rice. It’s the perfect centerpiece for gatherings, and everyone can customize their plate with their favorite toppings.

    Honestly, once you’ve mastered pulled pork, you’ll want to make it every chance you get. It’s a classic that never disappoints and always brings people together.

    Ingredients of Pulled Pork

    When you’re gearing up to make that delectable smoked paprika pulled pork, having the right ingredients is key. You want to make sure every flavor shines through, and trust me, these ingredients do just that. The blend of spices brings out the best in the pork and creates that irresistible smoky flavor we all crave.

    Let’s explore what you’ll need to gather for this mouthwatering dish.

    • 10 lbs boneless pork shoulder
    • 3 tablespoons smoked paprika
    • 3 tablespoons fresh ground black pepper
    • 2 tablespoons salt
    • 1 ½ tablespoons sugar

    Now, before you rush off to the grocery store, let’s chat about a few considerations. First off, when choosing your pork shoulder, look for a nice marbled piece—those little streaks of fat are what keep your meat juicy and tender during cooking.

    Also, if you can manage it, try to let the pork marinate overnight. It’s like giving your meat a little spa day, soaking up all those lovely spices. And don’t skimp on the smoked paprika; it’s the star of the show here, lending that deep, rich flavor.

    How to Make Pulled Pork

    smoked paprika pulled pork

    Alright, let’s immerse ourselves in the delicious world of making smoked paprika pulled pork. First things first, you’ll want to get your 10 lbs of boneless pork shoulder ready. Trust me when I say, this is where the magic starts.

    The night before you plan to cook, take those spices—3 tablespoons of smoked paprika, 3 tablespoons of fresh ground black pepper, 2 tablespoons of salt, and 1 ½ tablespoons of sugar—and mix them together in a small bowl. It’s like creating your own secret potion.

    Once you’ve got that blend, sprinkle it generously over the entire surface of the pork shoulder. Don’t be shy; pat it down and massage it in like you’re giving the pork a mini spa treatment. Afterward, wrap it up in plastic wrap and let it chill in the fridge overnight. This step is essential; it lets the flavors soak in deep, making each bite a burst of smoky goodness.

    Now, when you’re ready to cook, pull that beautiful piece of meat out and let it sit at room temperature for about an hour. While it’s warming up, preheat your grill—whether it’s gas or charcoal—to a steady 275 degrees.

    If you’re using charcoal, make sure those wood chips have been soaked and are ready to smoke. This is where the fun begins. Place your seasoned pork shoulder over indirect heat, fat side down. Cover your grill and let it do its thing for about six hours. Yes, you read that right. Six hours of mouth-watering anticipation.

    Turn the meat every hour or so to guarantee it cooks evenly. Keep an eye on the temperature; you’re aiming for about 165 degrees in the thickest part of the pork. It’s like waiting for a present to be unwrapped—except this present is all about flavor.

    Once that glorious pork has hit the right temperature, pull it off the grill and let it rest just a bit. This is the hardest part, but trust me, it’s worth it.

    After a while, when it’s cool enough to handle, shred the meat using two forks or your hands—whatever feels right. And here’s the best part: pour any accumulated juices over the shredded meat. Oh, the flavor!

    Now you’re ready to serve it up with BBQ sauce on buns, and watch your friends and family indulge. They’ll be asking for seconds, and you’ll be the star of the show. Who knew pulled pork could make you feel like a culinary genius?

    Pulled Pork Substitutions & Variations

    After mastering the art of smoked paprika pulled pork, you might find yourself wanting to mix things up a bit.

    I love experimenting with different spices like chipotle for heat or cumin for an earthy flavor. You could also swap the pork shoulder for chicken or jackfruit for a lighter option.

    If you’re feeling adventurous, try adding a sweet twist with apple cider vinegar or pineapple juice in the marinade. For a smokier taste, use mesquite wood chips instead of hickory.

    Each variation offers a unique flavor profile, making every batch feel fresh and exciting. Get creative and enjoy!

    What to Serve with Pulled Pork

    While pulled pork steals the show, the right sides can elevate your meal to a whole new level.

    I love serving my pulled pork with classic coleslaw; its crunch and tang perfectly balance the rich, smoky flavors of the pork. Baked beans are another favorite, adding a sweet and savory touch.

    For a lighter option, grilled corn on the cob brings a nice sweetness. Don’t forget some soft, toasted buns to soak up all those delicious juices!

    Finally, pickles or jalapeños can add a zesty kick. These sides not only complement the pulled pork but also create a memorable dining experience.

    Additional Tips & Notes

    To guarantee your smoked paprika pulled pork turns out perfectly every time, I recommend a few vital tips.

    First, don’t skip the overnight marinating; it deepens the flavor. Use a meat thermometer to confirm the pork reaches 165 degrees for safe eating.

    If you want extra smoke flavor, add more wood chips during cooking. For pulled pork that’s tender and juicy, let it rest before shredding—this step is essential!

    Finally, experiment with different BBQ sauces to find your favorite pairing.

    With these tricks, you’ll impress everyone at your next gathering with mouthwatering pulled pork. Enjoy!