Category: BBQ Recipes

  • Sweet and Spicy Barbecue Dry Rub Recipe

    Sweet and Spicy Barbecue Dry Rub Recipe

    Why Barbecue Dry Rub Is a Must-make BBQ Recipe

    Whenever I fire up the grill, I know that a great barbecue dry rub can elevate my meat to a whole new level. It’s not just about flavor; a well-crafted rub creates a delicious crust that locks in juices, making every bite tender and flavorful.

    Plus, it’s incredibly easy to make! I love knowing exactly what’s going into my food, and I can customize the spice levels to suit my taste. Having a jar of my homemade dry rub on hand means I can whip up a mouthwatering meal any time.

    Trust me, it’s a game-changer for any barbecue enthusiast!

    Ingredients of Barbecue Dry Rub

    When it comes to making a fantastic barbecue dry rub, the right ingredients can make all the difference. It’s like creating a spice symphony that dances on your taste buds!

    The beauty of this recipe lies in its simplicity and the way you can tweak it to fit your personal palate. So, whether you like things a little sweet, a bit spicy, or perfectly savory, this dry rub is your new best friend.

    Ready to plunge into the ingredient list? Let’s get to it!

    Here’s what you’ll need for the perfect barbecue dry rub:

    • 1 1/4 cups white sugar
    • 1 1/4 cups brown sugar
    • 1/3 cup salt
    • 1/4 cup fresh ground black pepper
    • 1/4 cup paprika
    • 1 tablespoon garlic powder
    • 1 tablespoon onion powder (optional, but it adds a nice depth of flavor)

    Now that we’ve got our ingredients lined up, let’s chat about a couple of considerations.

    First off, the balance between white and brown sugar is key! The white sugar gives a nice sweetness, while the brown sugar adds that rich, molasses-like flavor that’s just heavenly.

    And the salt? It’s essential for bringing out all those delicious flavors in the meat. If you’re not a fan of onion powder, feel free to skip it—this rub shines on its own, but it’s nice to have that optional layer of flavor if you want to go all-in.

    Just remember, the best part about this dry rub is that you can customize it! So, don’t be afraid to experiment a little. Happy grilling!

    How to Make Barbecue Dry Rub

    barbecue dry rub recipe

    Making your own barbecue dry rub is like starting on a flavor adventure right in your kitchen. Ready to jump in? Let’s do this!

    First, grab a bowl—something large enough to hold all the deliciousness you’re about to create. Now, start with 1 1/4 cups of white sugar. Yes, that’s a lot of sugar, but trust me, it’s what gives your meat that fantastic caramelized crust when it hits the grill.

    Then, add another 1 1/4 cups of brown sugar. I know, it feels like you’re making a dessert rather than a savory rub, but the rich, molasses flavor from the brown sugar is what takes this rub to the next level.

    Next up, toss in 1/3 cup of salt. Salt is the unsung hero here, amplifying all the flavors and ensuring your meat is seasoned to perfection.

    Now, let’s add some spice, shall we? Measure out 1/4 cup of fresh ground black pepper and 1/4 cup of paprika. These two ingredients bring a wonderful warmth and color to your rub.

    Feeling adventurous? Sprinkle in a tablespoon of garlic powder—because, really, who doesn’t love garlic? If you’re feeling a bit fancy, you can add a tablespoon of onion powder too, but it’s totally up to you. Just remember, this is your masterpiece.

    Now for the fun part: mix everything together until it’s a beautifully uniform blend. Use your hands, a whisk, or whatever you have handy—just get in there.

    Once it looks like a spice carnival, take a moment to appreciate your work. You can rub this onto your meat one or more hours before grilling, allowing those flavors to meld and soak in.

    And here’s a little tip from someone who’s accidentally left rub on overnight: the longer it sits, the bolder the flavor. But, hey, don’t stress if you’re short on time. Just make sure it’s on there for at least an hour for that tasty goodness.

    Finally, store any leftovers in a glass jar, tightly covered, so you can keep the flavor party going for your next grilling adventure. Happy cooking!

    Barbecue Dry Rub Substitutions & Variations

    While crafting your barbecue dry rub is a delightful journey, there’s always room to customize it to suit your taste.

    For a spicier kick, I often add cayenne pepper or chili powder. If I’m aiming for a smoky flavor, smoked paprika does wonders.

    Don’t have brown sugar? White sugar works just fine, but I might toss in a bit of molasses for depth.

    Experimenting with herbs like thyme or oregano can elevate the flavor, too.

    Ultimately, it’s about what you love, so feel free to mix and match until you create your perfect blend!

    What to Serve with Barbecue Dry Rub

    Customizing your barbecue dry rub opens up a world of flavor possibilities, but pairing it with the right sides can enhance your meal even further.

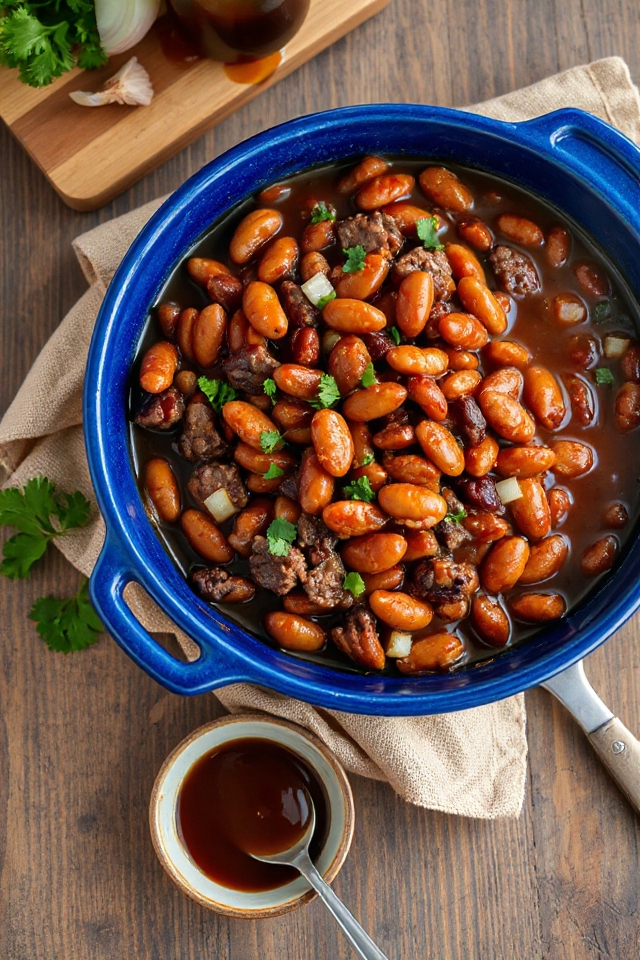
    I love serving classic coleslaw for its crunch and creaminess, which balances the spice of the rub. Baked beans add a sweet, smoky element that complements the meat beautifully.

    Grilled corn on the cob is another favorite of mine; its sweetness pairs perfectly with the savory notes of the rub.

    Finally, don’t forget some fresh, crusty bread to soak up those delicious juices.

    These sides will elevate your barbecue experience to a whole new level!

    Additional Tips & Notes

    When preparing your barbecue dry rub, it’s essential to contemplate a few key tips to boost flavor and effectiveness.

    First, let your rub sit on the meat for at least an hour—ideally overnight—so those flavors can really penetrate.

    I also recommend adjusting the spice levels to suit your taste; add cayenne for more heat or brown sugar for extra sweetness.

    Remember to store any leftovers in a tightly sealed glass jar to keep it fresh.

    Finally, don’t shy away from experimenting; each batch can be unique, allowing you to discover your perfect flavor combination.

    Happy grilling!

  • Apple BBQ Sauce With a Ginger Twist Recipe

    Apple BBQ Sauce With a Ginger Twist Recipe

    Why Apple BBQ Sauce Is a Must-make BBQ Recipe

    When I think about barbecue sauces, apple BBQ sauce stands out as a unique and delicious option that you simply can’t overlook.

    The sweet and tangy flavor of apple pairs perfectly with the savory elements of any meat, creating a taste explosion. It’s not just another sauce; it brings a revitalizing twist that elevates your barbecue game.

    Every time I use it, I’m amazed at how it transforms ordinary dishes into something extraordinary. Plus, it’s incredibly easy to make, so you can focus on enjoying time with friends and family while savoring those delightful flavors.

    Give it a try; you won’t regret it!

    Ingredients of Apple BBQ Sauce

    When it comes to whipping up a delicious batch of apple BBQ sauce, the right ingredients are key. You want to make sure you have everything you need before you plunge into the cooking process. Trust me, nothing is worse than realizing you’re missing a vital element halfway through.

    So, let’s gather our ingredients, and soon enough, you’ll be smothering those ribs in a sauce that’ll have your taste buds dancing.

    Here’s what you’ll need for your apple BBQ sauce:

    • 3 lbs country-style boneless pork ribs
    • 1 cup apple butter
    • 2 tablespoons ginger spread (Trader Joe’s is a great option)
    • 2 tablespoons ketchup
    • 2 tablespoons soy sauce
    • 1 tablespoon hot sauce
    • 1 teaspoon toasted sesame oil

    Now, let’s chat a bit about these ingredients. Apple butter, oh boy, it’s like the star of the show here. It brings that lovely sweetness and deep flavor that you just can’t get from regular apples.

    And don’t skip the ginger spread; it adds a nice zing that complements the sweetness perfectly. The soy sauce might seem a bit unexpected, but it gives that savory depth that balances everything out.

    Plus, the hot sauce? A little kick never hurt anyone, right? Just remember, you can adjust the hot sauce to your liking; if you’re feeling brave, go for a bit extra.

    Cooking should be fun, and experimenting with flavors is part of the joy. So grab your apron, and let’s get saucy!

    How to Make Apple BBQ Sauce

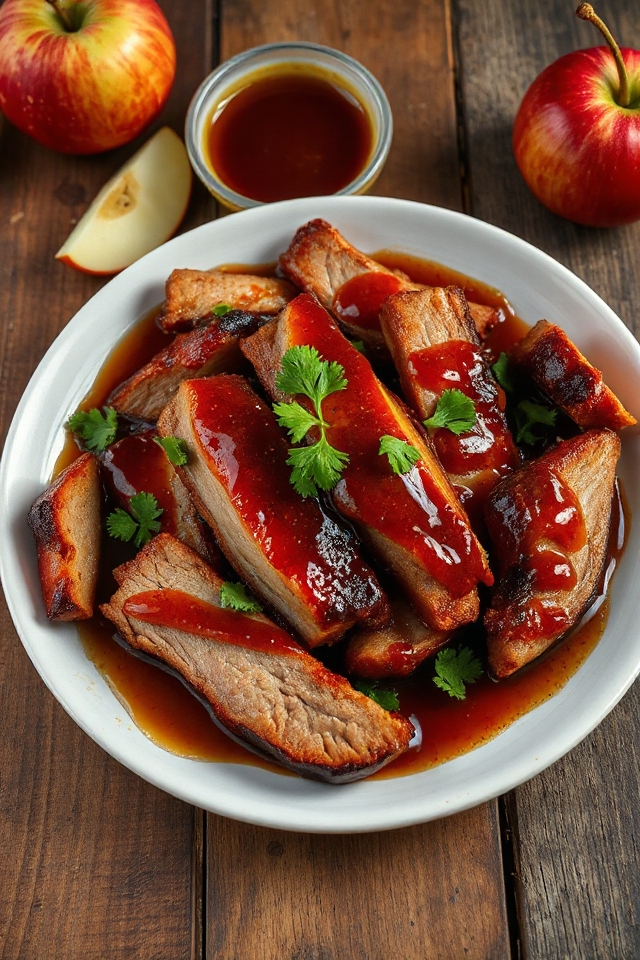
    apple bbq sauce recipe

    Now that you’ve gathered all your ingredients, it’s time to plunge into making that scrumptious apple BBQ sauce. First things first, you’ll want to cook those 3 lbs of country-style boneless pork ribs. Whether you choose to grill them or bake them in the oven, the goal is to get them tender and juicy.

    If you’re using a grill, aim for medium heat and cook them until they reach an internal temperature of about 145°F. If you’re more of an oven person, preheat to 350°F and let them bake for about 1.5 to 2 hours. Either way, don’t rush it; the slower the cook, the more tender those ribs will be.

    Once your pork is perfectly cooked, it’s time to slice them thinly. This is the moment where you can just picture the deliciousness about to unfold.

    While you’re slicing, go ahead and mix up your sauce. In a bowl, combine 1 cup of apple butter, 2 tablespoons of ginger spread, 2 tablespoons of ketchup, 2 tablespoons of soy sauce, 1 tablespoon of hot sauce, and 1 teaspoon of toasted sesame oil. Give it a good stir, and let that mixture come together—trust me, it smells heavenly!

    Now, smother those tender slices of pork with your apple BBQ sauce. You want every bite to be packed with flavor.

    After you’ve coated your ribs, you have a couple of options for finishing touches. You can either throw them on the BBQ for a bit or pop them under the broiler in your oven.

    If you choose the broiler, keep a close eye on them—nobody wants charred ribs. You’re looking for a nice caramelized finish that adds a bit of crispiness to the edges.

    And just like that, you’ve transformed simple pork ribs into a mouth-watering dish that’ll have everyone asking for seconds. So, grab your friends, serve it up, and enjoy the fruits of your labor.

    Apple BBQ Sauce Substitutions & Variations

    After mastering the art of making apple BBQ sauce, you might find yourself wanting to switch things up a bit.

    For a spicier kick, I love adding a splash of chipotle sauce or smoked paprika. If you’re looking for a sweeter twist, maple syrup or brown sugar can enhance the flavor beautifully.

    Instead of soy sauce, feel free to try coconut aminos for a gluten-free option. You can even experiment with different fruit butters, like peach or apricot, to create a unique blend.

    Each variation brings its own charm, so don’t hesitate to get creative!

    What to Serve with Apple BBQ Sauce

    If you’re looking to complement the rich flavors of apple BBQ sauce, consider serving it with a variety of sides that enhance its sweetness and tang.

    I love pairing it with creamy coleslaw; the crunch and creaminess balance the sauce perfectly. Grilled corn on the cob is another favorite—its sweetness pairs beautifully with the apple notes.

    For a heartier option, try baked beans; their savory flavors add depth. Finally, don’t forget a fresh green salad to lighten the meal.

    These sides not only elevate the dish but also create a well-rounded and satisfying dining experience. Enjoy!

    Additional Tips & Notes

    While you’re preparing your apple BBQ sauce, keep in mind a few tips to enhance the overall flavor and texture.

    First, consider using fresh ginger instead of ginger spread for a stronger kick. If you like a bit of heat, adjust the hot sauce to your preference.

    I also recommend letting the sauce sit for a few hours or overnight; it allows the flavors to meld beautifully.

    When cooking the pork, aim for a perfect char to add a smoky depth.

    Finally, don’t hesitate to customize the sweetness by adding more apple butter or a splash of maple syrup if desired.

  • Zesty Red Wine BBQ Sauce Recipe

    Zesty Red Wine BBQ Sauce Recipe

    Why Tangy BBQ Sauce Is a Must-make BBQ Recipe

    When it comes to BBQ, I can’t stress enough how essential a tangy BBQ sauce is. It’s the perfect balance of flavor that elevates any grilled dish.

    A good tangy sauce cuts through the richness of meats, leaving a mouthwatering taste that keeps everyone coming back for more. I’ve found that it adds that zesty kick, making my ribs and chicken unforgettable.

    Plus, it’s incredibly versatile; you can use it as a marinade or dipping sauce. Trust me, once you try it, you’ll agree that a tangy BBQ sauce is a must-have for your next cookout!

    Ingredients of Tangy BBQ Sauce

    When it comes to whipping up a zesty red wine BBQ sauce, the ingredients are key to achieving that perfect tangy flavor. You want a sauce that’s not just good but unforgettable, right? Well, I’ve got you covered.

    The ingredients are pretty simple and likely something you already have in your pantry. But let’s break it down so you know exactly what you need to grab before you start cooking. Here’s what you’ll need to create a deliciously tangy BBQ sauce that will have everyone at your BBQ licking their fingers.

    Ingredients:

    • 1/3 cup olive oil
    • 1 large yellow onion, chopped
    • 1/2 cup dry red wine
    • 1/3 cup cider vinegar
    • 1/3 cup fresh lemon juice
    • 1/4 cup firmly packed light brown sugar or dark brown sugar
    • 3 tablespoons Worcestershire sauce
    • 1 tablespoon soy sauce
    • 1 tablespoon paprika
    • 1-2 teaspoons chili powder (or to your taste)
    • 2 cups ketchup

    Now, let’s talk about a few things to reflect on when gathering these ingredients. First off, the type of red wine you choose can really affect the flavor of your sauce. You don’t need to splurge on anything fancy, but go for something you’d actually enjoy sipping—this isn’t the time for that dusty bottle in the back of your cupboard.

    As for the sugars, light and dark brown sugar both have their own unique flavors, with dark brown packing a bit more of a molasses punch. If you’re feeling adventurous, why not mix both to see what happens?

    And let’s not forget about the chili powder; this is your chance to customize the heat level. A little kick can make all the difference, so taste as you go! With these ingredients in hand, you’re one step closer to BBQ greatness.

    How to Make Tangy BBQ Sauce

    zesty red wine bbq sauce

    Let’s explore the tasty process of making this zesty red wine BBQ sauce. First things first, grab your 1/3 cup of olive oil and heat it in a skillet over medium heat. Once that oil is shimmering like it’s ready for a party, toss in one large yellow onion, chopped up.

    Now, here’s the trick—stir that onion frequently for about 5 minutes until it’s softened and just starting to turn a lovely golden hue. You want to watch it closely; burnt onions aren’t the flavor vibe we’re going for here.

    As those onions get cozy, it’s time to add in 1/2 cup of dry red wine and 1/3 cup of cider vinegar. Bring everything to a boil, and be sure to scrape up those tasty little browned bits stuck to the bottom of the pan. Those bits are basically flavor gold.

    Now that your mixture is bubbling away, transfer it all into a slow cooker. Seriously, this is where the magic happens. To that, you’re going to add 1/3 cup of fresh lemon juice, 1/4 cup of firmly packed light or dark brown sugar (or why not both for a flavor showdown?), 3 tablespoons of Worcestershire sauce, 1 tablespoon of soy sauce, and 1 tablespoon of paprika.

    Are you getting hungry yet? Season it to your taste with 1 to 2 teaspoons of chili powder, depending on how much heat you like in your life. Finally, pour in those 2 cups of ketchup, which is basically the heart of this sauce. Stir it all together until it’s well mixed, cover it up, and let it cook on LOW for about 5 to 6 hours.

    Here’s where your patience gets rewarded: if you find that your sauce isn’t thick enough for your liking, just remove the lid, crank the slow cooker up to HIGH, and let it bubble away for another 30 minutes or so.

    When it reaches the thickness you desire, you can either whip out a handheld immersion blender or transfer the sauce to a food processor to make it smooth and silky. Once it’s all blended, let it cool before you pop it into a jar.

    Tightly cover that jar and store your zesty red wine BBQ sauce in the refrigerator for up to 2 months—though I doubt it will last that long with all the delicious meals you’re going to have. Just imagine slathering this sauce on grilled chicken, ribs, or even veggies. Yum.

    Tangy BBQ Sauce Substitutions & Variations

    While experimenting with your zesty red wine BBQ sauce, you might want to contemplate some tasty substitutions and variations to suit your preferences.

    For a smokier flavor, try adding smoked paprika instead of regular. If you prefer a sweeter sauce, swap in honey or maple syrup for brown sugar. To kick up the heat, toss in some cayenne pepper or your favorite hot sauce.

    For a unique twist, consider using balsamic vinegar instead of cider vinegar. And if you’re out of Worcestershire sauce, soy sauce or tamari works great.

    Don’t hesitate to mix and match to create your perfect sauce!

    What to Serve with Tangy BBQ Sauce

    If you’re looking to elevate your meals, tangy BBQ sauce pairs wonderfully with a variety of dishes. I love slathering it on grilled chicken or ribs for that perfect smoky flavor.

    It also complements pulled pork sandwiches beautifully, adding a zesty kick. For a vegetarian option, try it with roasted vegetables or a hearty veggie burger; trust me, it’s a game-changer.

    Don’t forget about sides! It’s fantastic drizzled over coleslaw or mixed into baked beans. You can even use it as a dip for crispy fries or onion rings.

    The possibilities are endless, and I can’t wait for you to try!

    Additional Tips & Notes

    To enhance the flavor of your zesty red wine BBQ sauce, consider adjusting the balance of acidity and sweetness to suit your taste.

    If you prefer a sweeter sauce, add more brown sugar or honey. For tanginess, increase the vinegar or lemon juice.

    Don’t be afraid to experiment with spices like smoked paprika or cayenne for extra kick! If you want a chunkier texture, skip the blending step.

    Always taste as you go—small adjustments can make a big difference.

    Store any leftovers in a tightly sealed jar; it’ll only get better with time! Enjoy your delicious creation!

  • Sweet and Spicy BBQ Sauce Recipe With Molasses

    Sweet and Spicy BBQ Sauce Recipe With Molasses

    Why Sweet and Spicy BBQ Sauce Is a Must-make BBQ Recipe

    When you fire up the grill, there’s nothing quite like the rich, bold flavor of sweet and spicy BBQ sauce to elevate your meal.

    It’s the perfect blend of sweetness and heat that transforms simple dishes into something extraordinary.

    I love how it clings to ribs, chicken, or veggies, creating a mouthwatering glaze that’s hard to resist.

    Not only does it enhance flavor, but it also adds a beautiful caramelized finish.

    Whether you’re hosting a backyard cookout or enjoying a quiet dinner at home, this sauce is a must-have.

    Trust me, once you try it, you’ll never want to grill without it!

    Ingredients of Sweet and Spicy BBQ Sauce

    When it comes to making BBQ sauce, the ingredients are just as important as the technique. You want to make sure you’ve got the right balance of flavors to create that sweet and spicy goodness that makes your taste buds dance.

    This sauce has everything from rich brown sugar to the tangy kick of mustard, creating a symphony of flavors that will have your guests asking for the recipe. So, let’s explore what you’ll need to whip up this delightful concoction.

    Here’s the list of ingredients you’ll need for our Sweet and Spicy BBQ Sauce:

    • 2 cups brown sugar, packed
    • 2 cups ketchup
    • 1 cup water
    • 1 cup onion, finely chopped
    • 1 (8-ounce) can tomato sauce
    • 1 cup corn syrup
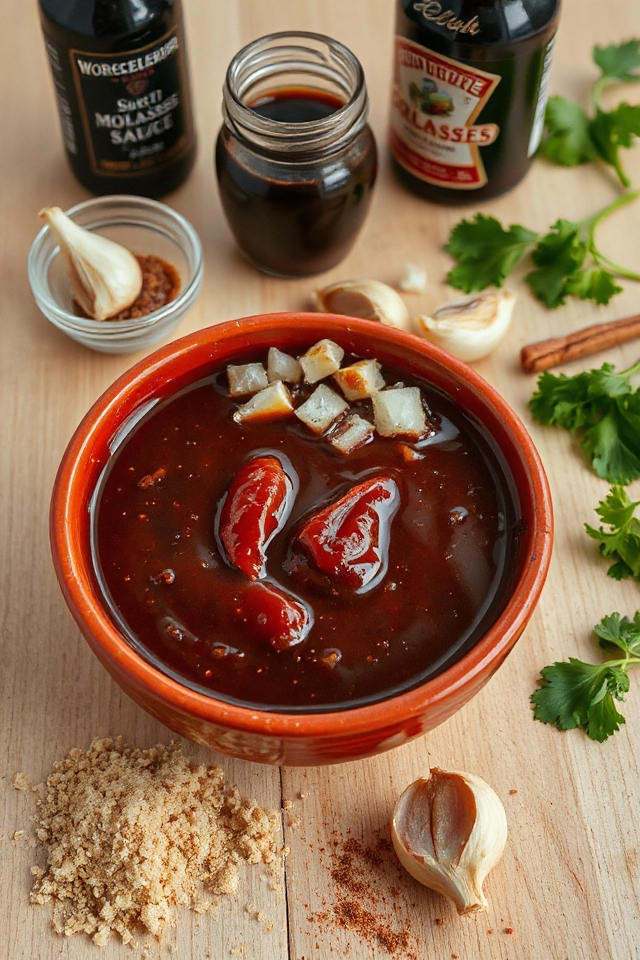
    • 1 cup molasses
    • 1 (6-ounce) can tomato paste
    • 2 tablespoons Worcestershire sauce
    • 1 tablespoon garlic powder
    • 1 tablespoon liquid smoke
    • 1 tablespoon prepared mustard
    • 1 teaspoon onion salt
    • 1 teaspoon celery salt

    Now, before you dash off to the grocery store, let’s chat about a few considerations regarding these ingredients.

    First off, you can definitely play around with the sweetness or spiciness to suit your taste. If you like it a little sweeter, maybe toss in a bit more brown sugar or molasses.

    On the flip side, if you want to add some heat, a dash of cayenne pepper or some hot sauce could work wonders.

    And if you’re feeling adventurous, try using different types of mustard or even adding a splash of apple cider vinegar for some tang.

    How to Make Sweet and Spicy BBQ Sauce

    sweet and spicy bbq sauce

    Alright, let’s get down to the nitty-gritty of making this Sweet and Spicy BBQ Sauce. First things first, grab a medium-sized saucepan, because we’re about to create some magic. Start by tossing in 2 cups of brown sugar—make sure you pack it in there nice and tight. It’s like a sugary hug, trust me.

    Then, pour in 2 cups of ketchup, which will give our sauce that rich, tomatoey base. Next up, add 1 cup of water to help everything blend together smoothly.

    Now, let’s not forget about the flavor builders. Add 1 cup of finely chopped onion for that aromatic punch, followed by an 8-ounce can of tomato sauce and a 6-ounce can of tomato paste. Seriously, if you think you can skip the tomato paste, think again. It’s like the secret weapon in this flavor arsenal.

    Then, bring in the heavy hitters: 1 cup of corn syrup and 1 cup of molasses. You might be thinking, “Whoa, that’s a lot of sweetness!” But remember, we’re aiming for a perfect balance here.

    To kick it up a notch, mix in 2 tablespoons of Worcestershire sauce, 1 tablespoon of garlic powder, and 1 tablespoon of liquid smoke, which adds that oh-so-delicious smoky flavor. Wrapping it all up, sprinkle in 1 teaspoon each of onion salt and celery salt for that extra layer of seasoning.

    Now, this is the fun part. Place your saucepan over medium heat and bring this delightful mixture to a boil. Once you see those bubbles dancing, turn down the heat and let it simmer uncovered for about 15 minutes.

    This is where the flavors meld together beautifully, creating a sauce that’s sweet, spicy, and just downright irresistible. After 15 minutes, remove it from heat and let it cool for a bit. You can use it right away or store it for later, but if you’re anything like me, you might find yourself sneaking spoonfuls straight from the pot. What can I say? It’s just that good.

    Sweet and Spicy BBQ Sauce Substitutions & Variations

    While you might think the Sweet and Spicy BBQ Sauce recipe is set in stone, there are plenty of ways to customize it to suit your taste.

    For a spicier kick, add cayenne pepper or hot sauce. If you prefer a smokier flavor, increase the liquid smoke or use smoked paprika.

    For a tangy twist, try adding apple cider vinegar or a splash of citrus juice. You can swap out brown sugar for honey or agave syrup to change the sweetness level.

    Don’t hesitate to experiment with different mustards or even fruit purees for a unique touch that reflects your preferences!

    What to Serve with Sweet and Spicy BBQ Sauce

    If you’re looking to elevate your meals, pairing Sweet and Spicy BBQ Sauce with the right dishes can make all the difference.

    I love serving it with grilled chicken or ribs, as the rich flavors complement the smoky meat perfectly. You can’t go wrong with burgers, either; it adds a delicious kick that everyone enjoys.

    For a vegetarian option, drizzle it over roasted vegetables or tofu for a tasty twist.

    Don’t forget about serving it with classic sides like coleslaw or cornbread; they balance the sweetness and spice beautifully.

    Trust me, these pairings will impress your guests!

    Additional Tips & Notes

    To create the perfect Sweet and Spicy BBQ Sauce, I recommend paying attention to a few key details.

    First, adjust the sweetness by adding more molasses or brown sugar if you prefer a richer flavor. For a spicier kick, don’t hesitate to incorporate some chili powder or hot sauce.

    If you want a thicker sauce, let it simmer a bit longer. Always taste as you go; this way, you can customize it to your liking.

    Finally, store any leftovers in an airtight container in the fridge for up to a week. Enjoy experimenting with this versatile sauce!

  • Pineapple-Glazed Slow Cooker BBQ Ribs Recipe

    Pineapple-Glazed Slow Cooker BBQ Ribs Recipe

    Why Slow Cooker BBQ Ribs Is a Must-make BBQ Recipe

    When you want a mouthwatering BBQ experience without the hassle, slow cooker BBQ ribs are the perfect solution.

    I love how simple it’s to prepare this dish; just throw the ingredients in and let the slow cooker do the work. The ribs turn out tender and juicy, falling right off the bone.

    Plus, the sweet and tangy flavors meld beautifully, making every bite unforgettable. Whether it’s a family gathering or a cozy night in, these ribs are a crowd-pleaser.

    Trust me, once you try them, you’ll find yourself craving this easy BBQ delight time and time again!

    Ingredients of Slow Cooker BBQ Ribs

    When it comes to BBQ ribs, the ingredients are just as important as the cooking method. For this slow cooker BBQ ribs recipe, you don’t need a long grocery list or fancy ingredients. Instead, you’ll find that the essentials are quite straightforward and easy to gather. This makes whipping up a batch of these scrumptious ribs not just simple, but also enjoyable.

    So, let’s plunge into what you’ll need to create this delightful meal.

    Ingredients for Slow Cooker BBQ Ribs:

    • 3 lbs rack of ribs (pork loin ribs work great)
    • 3 cups pineapple juice
    • 1/2 cup brown sugar
    • 1 (16 ounce) bottle barbecue sauce (Sweet Baby Ray’s Honey Chipotle is a favorite)

    Now, let’s chat about these ingredients for a minute. First up, the ribs. Choosing the right type matters; pork loin ribs are my go-to because they’re tender and flavorful. If you’re feeling adventurous, you could experiment with different cuts, but I promise this one won’t let you down.

    Pineapple juice might sound a bit odd at first, but it brings a wonderful sweetness and helps tenderize the meat. And brown sugar? Well, it’s like a warm hug for your taste buds, balancing out the tangy BBQ sauce later on.

    Speaking of sauce, choose one that you love, because it’s going to be slathered all over those tender ribs. Seriously, pick your favorite, and don’t be shy—this is where the magic happens.

    How to Make Slow Cooker BBQ Ribs

    tender slow cooker ribs

    Making Slow Cooker BBQ Ribs is like inviting a warm hug into your kitchen. It’s a simple process that yields mouthwatering results, and honestly, who doesn’t love that? Let’s explore how to whip up these tender, falling-off-the-bone ribs.

    First things first, grab your 3 lbs rack of pork loin ribs. Now, if you’re anything like me, you might get a little intimidated by cutting up a slab of meat. But don’t worry; it’s easier than it sounds. Just slice the ribs into individual slabs, about 2-3 ribs each. They don’t have to be perfect – remember, we’re going for delicious here, not a Michelin star.

    Then, spray your slow cooker with some non-stick cooking spray or pop in a slow cooker liner (clean-up will thank you later).

    Now, place those rib slabs into the slow cooker, making sure they fit comfortably. Next, it’s time to mix things up a bit. Take 3 cups of pineapple juice and 1/2 cup of brown sugar, and stir them together in a bowl. This mixture is like magic; it tenderizes the meat and adds a sweet touch that complements the BBQ sauce perfectly.

    Pour this delightful concoction over the ribs, ensuring they’re well-coated. Now, set your slow cooker to HIGH for 5-6 hours or LOW for 8-9 hours. Yes, you can go about your day while the slow cooker does all the work. You might even forget about the ribs until the air fills with that irresistible aroma. Just try not to drool too much.

    Once the cooking time is up, use tongs to gently pull the ribs out—they’ll practically fall apart in your hands, which is a good thing. Preheat your oven’s broiler, and while that’s heating up, line a baking sheet with foil.

    This is where we finish off the ribs: place them on the sheet and slather them with your favorite BBQ sauce (I can’t stress enough how much I love Sweet Baby Ray’s Honey Chipotle). Then, pop them in the oven to get that perfect char.

    Alternatively, if you’re feeling adventurous (or if the weather is just too nice), you could throw them on the grill to get that smoky flavor. Either way, you’re in for a treat. So, sit back, relax, and get ready for some seriously delicious BBQ ribs.

    Slow Cooker BBQ Ribs Substitutions & Variations

    After enjoying those tender, falling-off-the-bone ribs, you might wonder how to mix things up a bit. You can easily swap out the pork ribs for beef or even chicken, depending on your preference.

    For a different flavor, try using apple juice instead of pineapple juice or add a splash of soy sauce for an Asian twist. If you’re feeling adventurous, incorporate spices like smoked paprika or chili powder into the brown sugar mixture.

    And don’t hesitate to experiment with different barbecue sauces; a spicy or mustard-based sauce can completely change the dish. Enjoy your culinary creativity!

    What to Serve with Slow Cooker BBQ Ribs

    Pairing sides with Slow Cooker BBQ Ribs can really elevate your meal and make it a memorable experience.

    I love serving these tender ribs with creamy coleslaw; its crunch complements the rich flavors perfectly. You can’t go wrong with cornbread either, as its sweetness pairs well with the tangy BBQ sauce.

    For a revitalizing touch, I often include grilled vegetables or a simple garden salad. Baked beans add a hearty element, rounding out the dish nicely.

    And don’t forget some crispy fries or potato wedges – they’re always a hit! Together, these sides make the meal truly satisfying.

    Additional Tips & Notes

    While cooking BBQ ribs in a slow cooker is straightforward, there are a few tips that can enhance your results.

    First, don’t skip the broiling step; it gives the ribs that perfect caramelized finish. If you want extra flavor, marinate the ribs in pineapple juice overnight before cooking.

    Remember to remove the membrane from the back of the ribs for more tender meat. Keep an eye on the cooking time; every slow cooker varies.

    Finally, feel free to experiment with different BBQ sauces or add some spices to the pineapple juice for a personalized twist. Enjoy your delicious creation!

  • Mirin-Marinated Korean Beef BBQ Recipe

    Mirin-Marinated Korean Beef BBQ Recipe

    Why Korean Beef BBQ Is a Must-make BBQ Recipe

    When you crave a flavorful and satisfying meal, Korean Beef BBQ stands out as a must-make recipe. The combination of tender, marinated beef and savory spices creates an explosion of taste that’s hard to resist.

    I love how it’s quick to prepare and perfect for any occasion, whether it’s a weeknight dinner or a weekend gathering. The aroma fills my kitchen, making my mouth water in anticipation.

    Plus, serving it over jasmine rice rounds out the meal beautifully. Trust me, once you try this dish, you’ll understand why Korean Beef BBQ deserves a spot in your recipe collection!

    Ingredients of Korean Beef BBQ

    When whipping up a delicious dish like Korean Beef BBQ, the ingredients you choose are key to bringing out those mouthwatering flavors. Luckily, most of them are pretty easy to find, and many you might even have sitting in your pantry already.

    Just imagine the sweet and savory aroma filling your kitchen as you prepare this meal, making everyone in the house perk up in anticipation. Let’s dive right into what you’ll need to gather to create this flavorful feast.

    Here’s a handy list of the ingredients for Korean Beef BBQ:

    • 1 lb top sirloin steak, cut into 1/16th inch strips
    • 2 cups steamed jasmine rice
    • 1 tablespoon brown sugar
    • 3 tablespoons soy sauce
    • 1 tablespoon mirin (rice wine)
    • 1 teaspoon bottled minced ginger
    • 1 teaspoon dark sesame oil
    • 3 garlic cloves, minced
    • Cooking spray

    Now, before you rush off to the grocery store, let’s chat about a few things. First off, if you can, buy the highest quality beef you can find; it really makes a difference in flavor and tenderness.

    And when it comes to cutting the beef into those super thin strips, try to pop it in the freezer for about 30 minutes before slicing. Trust me, it makes the whole process a lot easier and less messy.

    Oh, and don’t skimp on the marinade time; letting the beef soak in that sweet and savory goodness is essential for maximizing the flavor.

    How to Make Korean Beef BBQ

    marinated grilled beef strips

    Making Korean Beef BBQ isn’t only fun but also incredibly rewarding when you get to enjoy the delicious results. First things first, grab that 1 pound of top sirloin steak and pop it in the freezer for about 30 minutes. You’ll want it partially frozen to make cutting it into those super thin strips—1/16th of an inch—much easier, trust me. It’s like slicing through butter when it’s firm like that.

    Once you’ve got your beef cut up, it’s time to whip up the marinade. In a large zip-lock bag, combine 1 tablespoon of brown sugar, 3 tablespoons of soy sauce, 1 tablespoon of mirin (that’s rice wine, by the way), 1 teaspoon of bottled minced ginger, 1 teaspoon of dark sesame oil, and 3 minced garlic cloves. Give it a good stir, and then toss in those beef strips. Seal the bag, give it a little shake, and let it marinate in the refrigerator for at least an hour. The longer, the better. You want that beef to soak up all that sweet and savory goodness.

    Now that your beef is marinated and the anticipation is building (I mean, who doesn’t love the smell of cooking beef?), it’s time to cook. Heat up a large non-stick skillet over medium heat and spray it with cooking spray. Once it’s hot enough, add your marinated beef to the skillet, but don’t forget to discard that remaining marinade; we don’t need a soggy situation here.

    Cook the beef for about 8 minutes, turning it frequently. You want it to reach your desired level of doneness—whether you like it a little pink in the middle or fully cooked, it’s totally up to you. If you’re feeling adventurous and want that smoky grilled flavor, you can also fire up the grill. Just place a wire grilling basket coated with cooking spray on the rack and grill for about 8 minutes, turning frequently.

    Once the beef is cooked to perfection, serve it over 2 cups of steamed jasmine rice, and enjoy that delicious spread. Picture yourself digging in, the flavors mingling in every bite, and maybe even catching a whiff of that garlic and sesame oil dancing in the air. It’s a moment worth savoring, trust me. Just don’t forget to save some for seconds—because once you take that first bite, you might find it hard to stop.

    Korean Beef BBQ Substitutions & Variations

    After savoring that delicious Korean Beef BBQ, you might find yourself wanting to switch things up a bit.

    For a different flavor, try using chicken or pork instead of beef; they both absorb marinades beautifully. If you’re looking for a vegetarian option, tofu or tempeh can be great substitutes.

    You can also experiment with the marinade—add a splash of lime juice for acidity or swap out mirin for rice vinegar.

    I love tossing in some sliced scallions or sesame seeds for extra texture. Each variation brings a unique twist to this already fantastic dish!

    What to Serve with Korean Beef BBQ

    Pairing dishes with Korean Beef BBQ can elevate your dining experience to a new level.

    I love serving it with steamed jasmine rice, which balances the rich flavors beautifully. You might also consider adding a fresh cucumber salad for a crisp, revitalizing contrast.

    Kimchi is a classic side that adds a spicy kick, while pickled radish can help cleanse the palate.

    Don’t forget some grilled vegetables like zucchini or bell peppers—they’re a great way to add color and nutrition.

    Finally, a chilled Korean beer or a light soju can perfectly complement the meal and enhance those savory flavors.

    Enjoy!

    Additional Tips & Notes

    While preparing Korean Beef BBQ is straightforward, a few additional tips can enhance your cooking experience.

    First, make sure to cut the beef while it’s partially frozen; this makes slicing it into those thin strips so much easier.

    Don’t skip the marinating step; even an hour adds incredible flavor.

    If you want a smoky taste, consider grilling instead of pan-frying.

    Ultimately, for an extra touch, garnish your dish with sesame seeds or green onions before serving.

    Trust me, these small details can elevate your meal and impress your guests.

    Enjoy your cooking adventure!

  • Korean BBQ Bowl Recipe With Sesame Twist

    Korean BBQ Bowl Recipe With Sesame Twist

    Why Korean BBQ Bowl Is a Must-make BBQ Recipe

    When you plunge into the world of Korean BBQ, you’ll quickly realize why the Korean BBQ Bowl is a must-make recipe. It’s the ultimate fusion of flavors and textures that truly excites the palate.

    I love how every bite offers a delightful mix of savory beef, crunchy cabbage, and sweet carrots. Plus, it’s incredibly versatile; you can easily customize it to suit your taste.

    Whether you’re hosting a gathering or just craving something comforting, this bowl delivers satisfaction without the fuss. Trust me, once you try it, you’ll wonder how you ever lived without this delicious dish in your life!

    Ingredients of Korean BBQ Bowl

    When it comes to whipping up a Korean BBQ Bowl, the ingredients are pretty straightforward, yet they come together to create a dish that’s bursting with flavor. It’s like a little party in your mouth, with each element playing its own unique role. You might think, “Can I really make this delicious dish at home?” The answer is yes!

    And trust me, once you gather your ingredients and start cooking, you’ll feel like a culinary rockstar.

    Here’s what you’ll need to make this mouth-watering Korean BBQ Bowl:

    • 1 cup cabbage, shredded
    • 3 ounces ground beef
    • 1/2 cup carrot, diced
    • 1/2 cup onion, diced
    • 2 tablespoons Korean barbecue sauce
    • 2/3 cup rice, cooked
    • 1/2 teaspoon sesame seeds
    • 1 dash sriracha hot sauce

    Now, let’s talk about the ingredients a bit more. Feel free to get creative! If you’re not a fan of ground beef, you could swap it out for ground turkey or even tofu for a vegetarian spin.

    And while the recipe calls for cabbage, you could use spinach or kale if you’re feeling adventurous. As for the Korean barbecue sauce, it can vary in sweetness and spiciness, so taste as you go.

    If you’re like me and have a tendency to overestimate your spice tolerance, maybe start with a little less sriracha and work your way up. Cooking is all about personalizing the experience, right?

    How to Make Korean BBQ Bowl

    korean bbq bowl recipe instructions

    Alright, let’s plunge into how to whip up this delicious Korean BBQ Bowl. First off, grab that 1 cup of shredded cabbage. You’ll want to wilt it in a skillet over medium heat. Don’t rush this step; let the cabbage soften a bit. It’s like giving it a warm hug before the rest of the ingredients join in.

    While that’s happening, take a separate pan and toss in 3 ounces of ground beef**. It’s time for some sizzle. As that beef browns up, add in 1/2 cup of diced carrots and 1/2 cup of diced onions**. The aroma will be incredible, and you might find yourself dancing around the kitchen—at least I do.

    Drizzle 2 tablespoons of Korean barbecue sauce**** over the mix. Stir everything together and let it cook until the veggies are tender and the flavors meld together. This is where the magic happens, folks.

    Once everything is cooked to perfection, it’s assembly time. Take your wilted cabbage and layer it as the base in your serving bowl. Next, scoop that savory beef and veggie mixture right on top.

    Now, for the grand finale—spoon in 2/3 cup of cooked rice. You can never have too much rice, right? Finish it off with a sprinkle of 1/2 teaspoon of sesame seeds** and a dash of sriracha hot sauce** for that extra kick.

    And voila! You’ve created a Korean BBQ Bowl that’s as tasty as it’s colorful. Enjoy every bite, and don’t be afraid to make a mess; that’s just part of the fun in cooking.

    Korean BBQ Bowl Substitutions & Variations

    After you’ve mastered the delicious base of the Korean BBQ Bowl, it’s time to get creative with substitutions and variations.

    You can easily swap the ground beef for ground turkey or tofu for a vegetarian option. If you’re not a fan of cabbage, try using spinach or kale instead.

    For added crunch, toss in some chopped bell peppers or radishes. Experimenting with different sauces, like teriyaki or sweet chili, can also elevate the flavors.

    And don’t forget about toppings! Avocado slices or a sprinkle of green onions can take your bowl to the next level.

    Enjoy customizing your creation!

    What to Serve with Korean BBQ Bowl

    Serving a Korean BBQ Bowl can be an exciting culinary experience, and pairing it with the right sides can elevate the meal even further.

    I love adding a side of kimchi for that perfect tangy crunch. A simple cucumber salad drizzled with sesame oil also complements the rich flavors beautifully.

    If you want something warm, try a bowl of miso soup—it’s comforting and balances the dish. For a revitalizing touch, serve some pickled radishes.

    And don’t forget some steamed edamame as a protein-packed snack. These sides not only enhance the meal but also make it a more vibrant dining experience.

    Additional Tips & Notes

    While preparing your Korean BBQ Bowl, keep in mind a few tips that can enhance both the flavor and presentation.

    First, I love to marinate the ground beef for at least 30 minutes in the barbecue sauce; it really deepens the taste.

    For crunch, try adding chopped scallions or sliced radishes on top. If you want a bit of heat, don’t be shy with the sriracha!

    Also, using a mix of colorful veggies makes the bowl visually appealing.

    Finally, remember to toast the sesame seeds lightly before sprinkling them on—this brings out their nutty flavor beautifully.

    Enjoy your meal!

  • Guava BBQ Sauce Recipe With a Tropical Twist

    Guava BBQ Sauce Recipe With a Tropical Twist

    Why Guava BBQ Sauce Is a Must-make BBQ Recipe

    When you’re looking to elevate your BBQ game, Guava BBQ Sauce is a game-changer you can’t overlook. This sauce brings a unique tropical twist that transforms ordinary meats into extraordinary dishes.

    The sweetness of the guava pairs perfectly with the tangy and savory elements, creating a balanced flavor profile that’s downright addictive. I love how it complements grilled chicken, ribs, or even veggies, making every bite burst with flavor.

    Plus, it’s super easy to whip up, ensuring you can impress your friends and family without spending hours in the kitchen. Trust me; once you try it, you’ll be hooked!

    Ingredients of Guava BBQ Sauce

    When it comes to whipping up a delicious Guava BBQ sauce, the ingredients are the stars of the show. You might be surprised at how simple they are, yet when they come together, they create a symphony of flavors that will have your taste buds dancing.

    So, let’s explore what you need to gather for this tropical delight.

    Here’s what you’ll need for the Guava BBQ Sauce:

    • 1 cup guava paste
    • 6 tablespoons cider vinegar
    • 1/4 cup dark rum
    • 1/4 cup tomato paste
    • 1/4 cup fresh lime juice
    • 1 tablespoon soy sauce
    • 2 teaspoons ketchup
    • 2 teaspoons Worcestershire sauce
    • 2 tablespoons onions, minced
    • 1 tablespoon ginger, minced
    • 2 garlic cloves, minced
    • 1/4 jalapeno, minced
    • Salt and pepper to taste

    Now, don’t let the list intimidate you. Each ingredient plays a vital role in building that luscious, finger-licking goodness. The guava paste brings in that lovely sweetness, while the lime juice adds a revitalizing zing.

    And let’s not forget the dark rum, which gives it a depth that’ll make you feel like you’re on a tropical vacation. If jalapeno isn’t your thing, feel free to adjust the spice level to your liking. You could even swap in a milder pepper or leave it out altogether—no judgment here.

    The beauty of this sauce is in its flexibility; it adapts to your taste. So, gather your ingredients and get ready to create something unforgettable!

    How to Make Guava BBQ Sauce

    guava bbq sauce recipe

    Alright, let’s plunge into making that mouthwatering Guava BBQ Sauce. It’s as easy as pie—well, maybe easier since there’s no baking involved.

    First things first, gather your ingredients. You’ll need 1 cup of guava paste, which is the star of the show and adds that sweet tropical flair we all crave. Then, grab 6 tablespoons of cider vinegar for that tangy kick, and a 1/4 cup each of dark rum and tomato paste to give your sauce a rich depth. Don’t forget the 1/4 cup of fresh lime juice—trust me, it’s essential for brightening up the flavors and making your taste buds do a happy dance.

    Now, let’s get mixing. In a large mixing bowl, combine all those glorious ingredients: the guava paste, cider vinegar, dark rum, tomato paste, lime juice, and the other flavor boosters—1 tablespoon of soy sauce, 2 teaspoons each of ketchup and Worcestershire sauce, and the fresh aromatics—2 tablespoons of minced onions, 1 tablespoon of minced ginger, 2 minced garlic cloves, and 1/4 jalapeno, minced to your preferred spice level.

    Oh, and don’t forget to sprinkle in some salt and pepper to taste. It’s like a flavor party in there. Just use a whisk or a spoon and mix until everything is thoroughly combined. Yes, it might require a bit of elbow grease—who knew making sauce was a workout?

    Once everything is well blended, give it a little taste. You might find yourself wanting to adjust things, add a pinch more salt, or maybe a splash more lime juice if you’re feeling zesty. This is your sauce, after all.

    Once you’re satisfied with the flavor, you can either use it right away or store it in an airtight container in the fridge. It keeps well and, trust me, it will only get better as it sits.

    Guava BBQ Sauce Substitutions & Variations

    If you’re looking to mix things up with your Guava BBQ Sauce, you’ve got plenty of options to customize it to your taste.

    For a spicier kick, try adding more jalapeño or a dash of hot sauce. If you prefer a sweeter sauce, increase the guava paste or add honey.

    You can swap out the dark rum for coconut rum for an even more tropical flavor. Want a smoky twist? Just incorporate some smoked paprika.

    Don’t forget, you can experiment with different vinegars or even add fresh herbs like cilantro for a unique twist that reflects your palate!

    What to Serve with Guava BBQ Sauce

    Guava BBQ sauce isn’t just a flavorful addition to your dishes; it pairs beautifully with a variety of foods.

    I love using it with grilled chicken, giving it a tropical twist that really impresses my guests. It’s also fantastic on ribs, adding a sweet and tangy layer that complements the meat perfectly.

    For a vegetarian option, try it with roasted vegetables or even as a glaze on tofu. I’ve found it works wonderfully as a dipping sauce for spring rolls too.

    Whatever you choose, this sauce elevates your meal and brings a taste of the tropics right to your table.

    Additional Tips & Notes

    While experimenting with your Guava BBQ sauce, keep in mind that adjusting the ingredients can tailor the flavor to your liking.

    If you prefer a spicier kick, toss in more jalapeño or even a dash of hot sauce. For a sweeter profile, add a bit more guava paste or honey.

    Don’t forget to taste as you go; it’s essential to find the perfect balance. If you want a smoky flavor, consider mixing in some smoked paprika.

    Finally, let the sauce sit for a few hours or overnight in the fridge—this helps the flavors meld beautifully.

    Enjoy your creation!

  • Cranberry BBQ Sauce Recipe With Tangy Twist

    Cranberry BBQ Sauce Recipe With Tangy Twist

    Why Cranberry BBQ Sauce Is a Must-make BBQ Recipe

    Whenever I fire up the grill, I always make sure to have my cranberry BBQ sauce on hand. This sauce transforms any ordinary barbecue into a standout feast.

    The perfect blend of tangy and sweet complements grilled meats beautifully, enhancing flavors in a way that traditional sauces can’t. It’s incredibly easy to whip up, making it a quick go-to for any cookout.

    Plus, it adds a unique twist that impresses guests every time. I love how versatile it is, pairing well with everything from ribs to chicken.

    Trust me, once you try it, you’ll never want to grill without it!

    Ingredients of Cranberry BBQ Sauce

    When it comes to making a sauce that will elevate your grilling game, cranberry BBQ sauce is where it’s at. It’s sweet, tangy, and just downright delicious. All you need are a few simple ingredients that you might already have in your pantry.

    Plus, this recipe is so easy to make that even if you’re not a culinary whiz, you’ll still impress your friends and family. Who knew you could turn a can of cranberry sauce into something so amazing? Let’s explore what you’ll need to whip this delightful concoction up.

    Here’s a handy list of the ingredients you’ll need for your cranberry BBQ sauce:

    • 1 (14 ounce) can whole berry cranberry sauce
    • 1 (1 ounce) packet dry onion soup mix
    • 1 cup French dressing (Catalina)
    • 1 teaspoon garlic powder

    Now, a little note on the ingredients: Don’t feel like you have to stick to the exact brand or type mentioned here. If you have a homemade cranberry sauce hanging out in your fridge, go ahead and use that instead.

    And if you’re not a huge fan of French dressing, you might experiment with a different kind, but just remember that the flavor profile could change a bit. Also, the garlic powder is pretty forgiving—if you love garlic, toss in a bit more.

    Cooking should be fun, right? So, feel free to make this recipe your own.

    How to Make Cranberry BBQ Sauce

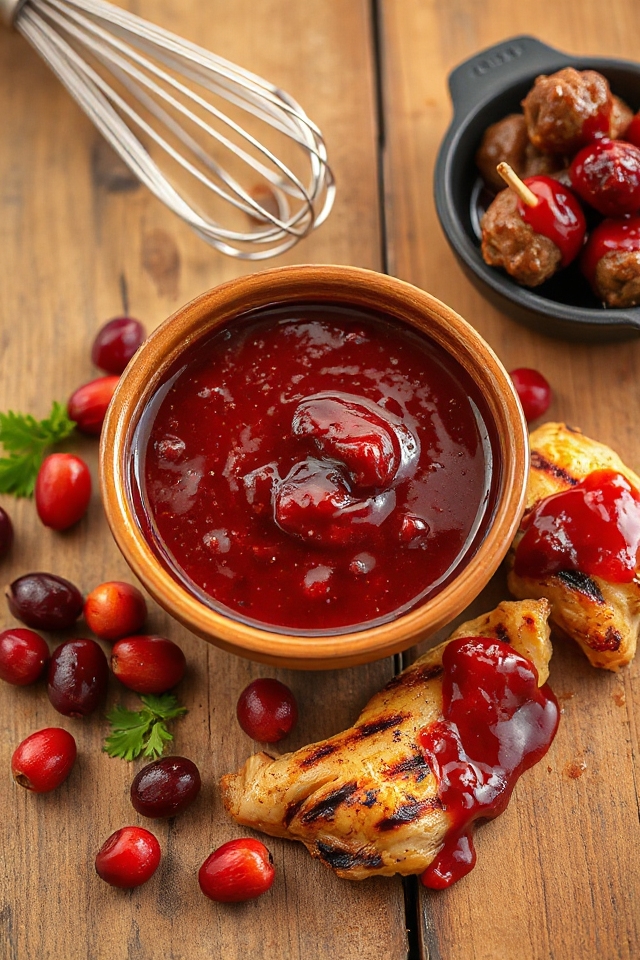
    cranberry bbq sauce recipe

    Making cranberry BBQ sauce is a breeze, and trust me, if I can do it, anyone can. First things first, grab a medium-sized mixing bowl. You’ll want to start with that 1 (14 ounce) can of whole berry cranberry sauce. Just plop it in there and take a moment to admire its shiny, jiggly goodness. Is it just me, or does cranberry sauce always look like it’s ready to party?

    Next, reach for that 1 (1 ounce) packet of dry onion soup mix. Sprinkle it over the cranberry sauce like you’re adding a secret ingredient that will change everything. Spoiler alert: it totally will. Then, add in 1 cup of French dressing—Catalina style, if you’ve got it. It’s the tang that will balance out the sweetness of the cranberry. And don’t forget the 1 teaspoon of garlic powder. Garlic makes everything better, right?

    Now, mix it all together. Grab a whisk or a sturdy spoon, and stir until everything is combined and beautifully blended. You want it to be smooth and cohesive, like a well-rehearsed dance troupe. Honestly, this is the part where I sometimes get a little too enthusiastic and end up with sauce splattered on my shirt. But hey, it’s all part of the cooking experience, right?

    Once it’s mixed, taste it. If you want a little more zing, feel free to adjust the garlic powder or even toss in a dash of hot sauce if you’re feeling adventurous.

    After you’ve perfected your sauce, cover it and let it chill in the fridge for at least an hour. This allows all those flavors to marry and develop, which is when the magic really happens. Meanwhile, you can daydream about all the delicious ways you’ll use this sauce. Grilled chicken, ribs, or even as a dip for meatballs—your options are endless.

    And just like that, you’ve transformed a simple can of cranberry sauce into a gourmet BBQ sauce that’s sure to impress. Enjoy the accolades, my friend. You deserve them.

    Cranberry BBQ Sauce Substitutions & Variations

    After whipping up that delicious cranberry BBQ sauce, you might find yourself wanting to experiment with different flavors or ingredients.

    You can swap the whole berry cranberry sauce for fresh cranberries or cranberry juice for a tangier taste. If you like heat, add some diced jalapeños or a dash of cayenne pepper.

    For a smokier flavor, try incorporating smoked paprika or liquid smoke. Want a sweeter twist? Mix in some brown sugar or honey.

    Don’t hesitate to play with the dressing too; a ranch or Italian dressing can add unique flavors. Enjoy your culinary adventure!

    What to Serve with Cranberry BBQ Sauce

    Cranberry BBQ sauce pairs beautifully with a variety of dishes, making it a versatile addition to your meals.

    I love serving it with grilled chicken or pork, as the tangy sweetness enhances the meat’s flavor. It’s also fantastic drizzled over turkey meatballs or as a glaze for ribs.

    For a vegetarian option, try it with roasted vegetables or as a dip for crispy tofu. Don’t forget about pairing it with burgers or sandwiches; it adds a delightful twist!

    No matter what you choose, this sauce elevates any meal, creating a flavor experience that’s hard to resist.

    Additional Tips & Notes

    While experimenting with flavors can be fun, here are some tips to help you perfect your cranberry BBQ sauce.

    First, adjust the sweetness by adding brown sugar or honey if you prefer it sweeter. For a spicier kick, consider incorporating a dash of cayenne pepper or some hot sauce.

    If you want a smoother texture, blend the sauce until it’s velvety. Don’t forget to taste as you go—seasoning is key!

    Finally, let the sauce sit for a few hours, or even overnight, to allow the flavors to meld together. Enjoy your cooking adventure!

  • Spicy Paprika Baby-Back Ribs Recipe

    Spicy Paprika Baby-Back Ribs Recipe

    Why Best Barbecue Ribs Is a Must-make BBQ Recipe

    When it comes to grilling, I can’t stress enough how essential it’s to master the art of barbecue ribs.

    There’s something magical about those tender, smoky bites that bring everyone together. Whether it’s a casual weekend cookout or a festive gathering, ribs are always a crowd-pleaser.

    The combination of flavors and textures captivates the palate, making every bite memorable. Plus, once you’ve got the technique down, you can easily experiment with different spices and sauces.

    Trust me, serving perfectly cooked ribs will elevate your grilling game and leave your guests craving more. It’s a must-try recipe you won’t regret!

    Ingredients of Best Barbecue Ribs

    When it comes to making the best barbecue ribs, the ingredients you choose play a big role in the final flavor. The right combination of spices and the quality of the meat can transform your ribs from good to downright spectacular.

    Trust me, once you get a whiff of those smoky, spicy ribs sizzling on the grill, you’ll be hooked. So, let’s gather our essentials and get ready to create a dish that will have your friends and family begging for the recipe.

    Here’s what you’ll need for these mouthwatering Spicy Paprika Baby-Back Ribs:

    • 2 tablespoons paprika
    • 1 tablespoon brown sugar
    • 2 teaspoons salt
    • 2 teaspoons chili powder
    • 1 1/2 teaspoons fresh coarse ground black pepper
    • 1 teaspoon cumin
    • 1/4 teaspoon cayenne pepper
    • 4 racks of baby-back pork ribs (about 1 lb each)
    • Heavy-duty aluminum foil
    • 6 ice cubes

    Now, let’s talk about those ingredients a bit more. When selecting your baby-back ribs, look for ones with a good amount of meat and a nice layer of fat.

    This fat will render down during cooking, keeping the meat juicy and tender—just the way we like it. Don’t skimp on the spices either; they’re what give the ribs that bold flavor.

    Feel free to tweak the spice levels based on your own taste preferences, maybe adding a bit more cayenne if you’re feeling adventurous. And remember, cooking is all about having fun and experimenting, so don’t be afraid to make it your own.

    Happy grilling!

    How to Make Best Barbecue Ribs

    delicious barbecue ribs preparation

    Making the best barbecue ribs is a delicious journey that starts with a little preparation and ends with a mouthwatering feast. First, you’ll want to gather your ingredients: 2 tablespoons of paprika, 1 tablespoon of brown sugar, 2 teaspoons of salt, 2 teaspoons of chili powder, 1 and a half teaspoons of fresh coarse ground black pepper, 1 teaspoon of cumin, and a quarter teaspoon of cayenne pepper.

    Oh, and don’t forget about the star of the show—the 4 racks of baby-back pork ribs, each about 1 pound. Seriously, the smell of those ribs cooking will have your neighbors knocking on your door.

    Now, let’s get our hands a little messy. Start by patting those ribs dry with some paper towels. It’s a simple step but trust me, it helps the spice rub stick better. In a small bowl, mix together all those spices we gathered earlier: paprika, brown sugar, salt, chili powder, black pepper, cumin, and cayenne.

    Once you have a fragrant spice mixture, rub it all over the ribs. Don’t be shy—get in there and coat every inch. Next, you’ll need some heavy-duty aluminum foil. Place two racks of ribs side by side on a double layer of foil, and for a touch of creativity, place 3 ice cubes under the sides. This little trick helps keep the ribs moist while they cook.

    Seal the foil tightly around the ribs, making sure no steam can escape, and repeat the process with the other two racks.

    Now comes the fun part: grilling. Place those foil packets on your grill rack, cover it, and let them cook for about an hour. Halfway through, give them a little turn with tongs because, you know, even ribs deserve a change of scenery.

    After an hour, carefully cut an X in the top of the packets to let the steam escape—just watch out for the hot steam, it’s like a surprise sauna. Then, remove the ribs and place them directly on the grill rack. Grill them for 7 to 10 minutes, flipping them once to get that beautiful browning.

    Finally, brush those ribs with your favorite barbecue sauce and grill for another 7 to 10 minutes, turning and brushing with more sauce. When they’re looking all shiny and tempting, cut them into 1-rib portions.

    And voila! You’ve just created a feast that’s sure to impress, even if you burned the toast last week. Enjoy the compliments; you’ve earned them.

    Best Barbecue Ribs Substitutions & Variations

    While I love the classic flavor of spicy paprika baby-back ribs, there are plenty of substitutions and variations to contemplate if you’re looking to mix things up.

    For a tangy twist, try adding apple cider vinegar to your spice rub or using smoked paprika for a deeper flavor. If you prefer a sweeter profile, honey or maple syrup can replace the brown sugar.

    For heat, consider experimenting with chipotle powder or sriracha. You could also swap out baby-back ribs for spare ribs or even chicken.

    Each change brings a unique taste that can keep your barbecue game exciting!

    What to Serve with Best Barbecue Ribs

    To elevate your barbecue ribs experience, consider pairing them with a variety of sides that complement their rich flavors.

    I love serving coleslaw for its crunchy texture and tangy taste, which cuts through the richness of the ribs. Baked beans add a sweet, smoky element that works perfectly.

    For a lighter touch, grilled corn on the cob adds sweetness and a bit of char. Don’t forget some warm, buttery cornbread to soak up any leftover sauce!

    Finally, a revitalizing potato salad can balance everything out, making your barbecue feast truly unforgettable.

    Enjoy experimenting with these tasty combinations!

    Additional Tips & Notes

    As you prepare these spicy paprika baby-back ribs, keep in mind a few tips that can enhance your grilling experience.

    First, always pat the ribs dry before applying the spice mix; this helps the rub adhere better. If you love extra heat, feel free to increase the cayenne pepper.

    Also, consider marinating the ribs overnight for deeper flavor. Keep an eye on the grill temperature; too high can dry them out.

    Finally, don’t skip the barbecue sauce glaze at the end—it caramelizes beautifully, adding that irresistible finish.

    Trust me, these small tweaks will elevate your ribs to a whole new level!

  • Apricot-Glazed Beef Barbecue Recipe

    Apricot-Glazed Beef Barbecue Recipe

    Why Beef Barbecue Is a Must-make BBQ Recipe

    When it comes to BBQ recipes, I believe beef barbecue stands out for its rich flavor and tender texture.

    There’s something special about slow-cooked beef that melts in your mouth, making it a crowd-pleaser at any gathering. The combination of savory and sweet flavors creates a delightful balance that keeps you coming back for more.

    Plus, it’s incredibly versatile—perfect for sandwiches or served alongside your favorite sides. Trust me, once you try making beef barbecue, you’ll understand why it’s a must-try.

    It’s the ultimate comfort food that brings friends and family together around the grill.

    Ingredients of Beef Barbecue

    When you’re gearing up to make Apricot-Glazed Beef Barbecue, the first step is gathering all those delicious ingredients that will transform a simple chuck roast into a mouthwatering dish. Trust me, the blend of sweet apricot preserves and savory barbecue sauce is a match made in culinary heaven.

    Plus, who doesn’t love the idea of a slow-cooked meal that practically prepares itself? So, let’s check out what you’ll need to whip up this fantastic barbecue.

    Here’s your ingredient list:

    • 1 (3 lb) boneless beef chuck roast
    • 1 cup barbecue sauce
    • 1/2 cup apricot preserves
    • 1/3 cup chopped red bell pepper
    • 1 small onion, chopped
    • 1 tablespoon Dijon mustard
    • 2 teaspoons brown sugar
    • 12 kaiser rolls

    Now, let’s chat a bit about these ingredients. The boneless beef chuck roast is the star of the show, providing a rich and juicy base for your barbecue. Don’t skimp on the quality here; it really makes a difference.

    The combination of barbecue sauce and apricot preserves not only adds sweetness but also a delightful complexity that will have your taste buds doing a little happy dance.

    And let’s not forget the veggies. The chopped red bell pepper and onion add a nice crunch and depth of flavor. If you’re feeling adventurous, you could even experiment with different types of barbecue sauce or throw in some extra spices.

    Cooking should be about having fun, right? So, gather up your ingredients, and let’s get ready to plunge into making this delicious dish.

    How to Make Beef Barbecue

    apricot glazed beef barbecue recipe

    Now that we’ve rounded up all those tasty ingredients, let’s jump into the nitty-gritty of making this Apricot-Glazed Beef Barbecue. First things first, grab your 3-pound boneless beef chuck roast. You’ll want to cut it into quarters; this step makes it easier for the meat to soak up all those glorious flavors as it cooks.

    Once you’ve done that, place those juicy chunks into a greased 5-quart slow cooker. Seriously, greasing it’s a must—nobody wants to deal with a sticky mess later, trust me on this one.

    Next up, let’s whip together the flavor-packed sauce that will elevate your beef from good to oh-my-goodness-amazing. In a bowl, combine 1 cup of barbecue sauce, 1/2 cup of apricot preserves, 1/3 cup of chopped red bell pepper, and a small onion (chopped, of course).

    We’re also adding in 1 tablespoon of Dijon mustard and 2 teaspoons of brown sugar. Give it a good mix! Once everything’s nicely blended, pour this delicious concoction over the roast in the slow cooker.

    Now, cover it up and let it work its magic on low heat for about 6 to 8 hours. The longer it cooks, the more tender and flavorful your meat will be. You might find yourself losing track of time just thinking about how good it’s going to taste.

    When the beef is tender and ready to party, carefully remove it from the slow cooker and slice it thinly. Return the sliced meat to the slow cooker and stir it gently to coat it in that glorious sauce.

    Let it simmer for another 20 to 30 minutes so it can soak up even more flavor. Finally, don’t forget to skim off any excess fat from the sauce before serving.

    Now, pile that delicious beef onto 12 kaiser rolls, and there you have it—your very own Apricot-Glazed Beef Barbecue. It’s perfect for gatherings or just a cozy night in when you want to impress yourself with some seriously good food.

    Beef Barbecue Substitutions & Variations

    After mastering the basics of making that delicious Apricot-Glazed Beef Barbecue, it’s time to get creative with substitutions and variations.

    If you’re looking for a different flavor, try using peach preserves instead of apricot. You can also swap the beef chuck for pork shoulder or chicken for a lighter option.

    For a spicy kick, add jalapeños or switch to a spicy barbecue sauce. Want a smoky flavor? Incorporate smoked paprika or liquid smoke.

    Finally, feel free to experiment with different vegetables, like carrots or zucchini, for added texture and taste. The possibilities are endless, so have fun!

    What to Serve with Beef Barbecue

    Serving beef barbecue is a delightful experience, and choosing the right sides can elevate the meal even further.

    I love pairing it with classic coleslaw for that crunchy contrast and a revitalizing touch. Grilled corn on the cob adds a sweet, smoky flavor that complements the barbecue perfectly.

    For a hearty option, baked beans provide a savory depth that balances the sweetness of the apricot glaze. Don’t forget some pickles or jalapeños to add a zesty kick.

    Finally, a light potato salad can round out the meal, offering creaminess that harmonizes with the tender beef.

    Enjoy your feast!

    Additional Tips & Notes

    When preparing your apricot-glazed beef barbecue, keep a few tips in mind to enhance the flavor and presentation.

    First, don’t skip the browning step for the beef; it adds depth. I often add extra spices like garlic powder or smoked paprika for a kick.

    If you prefer a sweeter glaze, adjust the amount of apricot preserves to your taste. For a fresh touch, top the sandwiches with sliced jalapeños or coleslaw.

    Finally, let the beef rest after cooking; it helps lock in juices. Enjoy your barbecue with friends, and don’t forget to have plenty of napkins on hand!

  • Sweet and Smoky BBQ Spice Rub Recipe

    Sweet and Smoky BBQ Spice Rub Recipe

    Why BBQ Spice Rub Is a Must-make BBQ Recipe

    When it comes to BBQ, I believe a spice rub is essential for elevating the flavors of your meat.

    It’s like a secret weapon that transforms ordinary cuts into something extraordinary. The right blend can enhance smokiness, add depth, and create a delicious crust that locks in moisture.

    Plus, it’s incredibly easy to make, which saves time during those busy grilling days.

    I love how versatile a spice rub can be, allowing you to customize it to your tastes.

    Trust me, once you try it, you won’t want to grill without it. Your BBQ will never be the same!

    Ingredients of BBQ Spice Rub

    When you’re gearing up for a BBQ, having a solid spice rub on hand can really make all the difference. It’s like giving your meat a flavorful hug before it hits the grill.

    Now, let’s plunge into the ingredients you’ll need to whip up this BBQ spice rub that will have your friends and family begging for seconds.

    Here’s what you’ll need:

    • 2 tablespoons sweet paprika
    • 2 tablespoons mild paprika
    • 2 tablespoons caster sugar
    • 2 tablespoons ground cumin
    • 2 tablespoons ground coriander
    • 1 teaspoon dried chili pepper flakes
    • 1 tablespoon sea salt
    • 1 tablespoon fresh ground black pepper (optional)

    Now, isn’t that a colorful lineup? Each ingredient plays its part, and together, they create a flavor explosion.

    Sweet paprika brings that nice, smoky sweetness, while ground cumin and coriander add a warm earthiness that can’t be replicated. Don’t get me started on the sugar; it caramelizes beautifully on the grill, giving your meat that irresistible crust.

    If you’re feeling adventurous, toss in some more chili flakes for an extra kick, just make sure you know your audience—no one wants to see Uncle Bob reach for the water after one bite!

    Store this spice mix in an airtight jar, and it’ll last for about a month. But trust me, it won’t last that long once you start using it.

    How to Make BBQ Spice Rub

    homemade bbq spice rub

    Making your very own BBQ spice rub is a breeze, and trust me, once you try it, you’ll wonder why you ever bought those pre-packaged versions. To start, gather your ingredients: you’ll need 2 tablespoons of sweet paprika, 2 tablespoons of mild paprika, and 2 tablespoons of caster sugar. It’s like a colorful trio that just begs to be mixed together.

    Grab a large mixing bowl, because we’re about to make some magic happen. Now, toss in those paprikas and sugar, and then add 2 tablespoons of ground cumin and 2 tablespoons of ground coriander. These spices are the backbone of your rub, bringing warmth and depth to enhance whatever meat you decide to grill.

    But wait, we’re not done yet. Don’t forget the 1 teaspoon of dried chili pepper flakes if you’re feeling a little spicy; just sprinkle them in and imagine the flavor explosion. Finally, add 1 tablespoon of sea salt and, if you like, 1 tablespoon of fresh ground black pepper. If you’re like me and sometimes forget to add the pepper while mixing, don’t fret; you can always sprinkle it on the meat while cooking.

    Once you’ve tossed everything together, it’s time to get a little hands-on. Mix those ingredients well until they’re combined into a lovely, fragrant spice blend. You’ll want to store your rub in an airtight jar, so find one that’s clean and dry—think of it as a cozy home for your new spice creation.

    Keep that jar in a cool, dark place, and it’ll be good for up to a month, though with the way you’ll be using it, I bet it won’t last that long. And there you have it, folks—a homemade BBQ spice rub that’s ready to take your grilling game to the next level.

    Now, go ahead and slather it on some ribs or chicken, and prepare for the compliments to roll in.

    BBQ Spice Rub Substitutions & Variations

    After whipping up that delicious BBQ spice rub, you might find yourself wanting to get a little creative.

    If you’re low on sweet paprika, smoked paprika can add a deeper flavor. For a kick, swap in cayenne pepper instead of chili flakes.

    Don’t have caster sugar? Brown sugar works wonders and adds a hint of molasses.

    Feel free to play with herbs; dried oregano or thyme can enhance the mix. If you prefer a milder taste, cut back on cumin.

    Experimenting with these substitutions can tailor the rub to your palate, ensuring every BBQ is uniquely yours!

    What to Serve with BBQ Spice Rub

    Serving BBQ spice rub can elevate a variety of dishes beyond just meat.

    I love using it on roasted vegetables like corn, zucchini, and bell peppers; the flavors create a delicious smoky twist. It also works wonders on grilled fish or shrimp, giving them a unique depth.

    Don’t forget about baked potatoes—just sprinkle some rub on before baking for a tasty surprise.

    I even mix it into dips or spreads for an added kick. Each dish becomes a flavor-packed delight with this simple addition.

    Trust me, once you try it, you’ll want to use it everywhere!

    Additional Tips & Notes

    While experimenting with the BBQ spice rub, I’ve discovered a few tips that can enhance its flavor and versatility.

    First, consider adjusting the sugar level based on your taste; less sugar can create a more savory profile. If you love heat, try adding more chili pepper flakes to kick things up a notch.

    Also, let the rub sit for at least an hour before using it; this allows the flavors to meld beautifully.

    Finally, don’t hesitate to customize it with your favorite herbs or spices. It’s all about what makes your taste buds sing!

    Enjoy your BBQ adventures!

  • Chili-Infused BBQ Sauce Recipe for Ribs

    Chili-Infused BBQ Sauce Recipe for Ribs

    Why BBQ Sauce for Ribs Is a Must-make BBQ Recipe

    When it comes to BBQ, I can’t help but believe that a great BBQ sauce for ribs is essential.

    It’s not just a condiment; it’s what elevates those tender, smoky ribs to a whole new level. Without a flavorful sauce, you’re missing out on that perfect balance of sweet, tangy, and spicy.

    I’ve tried countless recipes, and each time, I’m reminded of how a good sauce can transform a meal. It brings people together, creating shared moments around the grill.

    If you want to impress your guests or just treat yourself, a homemade BBQ sauce for ribs is a must!

    Ingredients of BBQ Sauce for Ribs

    When it comes to making that perfect BBQ sauce for your ribs, the ingredients play an essential role. Each element contributes to the overall flavor that will have everyone coming back for seconds—or thirds! The right balance of sweetness, tanginess, and a little kick really brings the dish to life.

    Plus, making your own sauce allows you to tweak it to your taste. So, if you’re ready to get started, here’s what you’ll need to whip up a batch of delicious chili-infused BBQ sauce.

    Ingredients:

    • 12 ounces chili sauce
    • 2 tablespoons brown sugar
    • 2 tablespoons apple cider vinegar
    • 1 tablespoon Worcestershire sauce
    • 1 teaspoon ground chili powder
    • 1 teaspoon salt
    • 1 teaspoon garlic powder

    Now, let’s talk about these ingredients for a moment. Chili sauce is the star of the show, bringing that rich, tangy base that you just can’t replicate with anything else.

    Brown sugar adds a delightful sweetness, while apple cider vinegar gives it that tangy punch that cuts through the richness of the ribs. Worcestershire sauce? A must-have for that complex umami flavor.

    And don’t forget the spices; they’re what make the sauce sing! You can also play around with the chili powder—if you like it spicier, go ahead and add a little more.

    Just remember, sometimes less is more, unless you’re me trying to impress my friends with my “spicy” culinary skills. Spoiler alert: they laugh every time.

    How to Make BBQ Sauce for Ribs

    homemade chili infused bbq sauce

    Making your own BBQ sauce for ribs isn’t just easy; it’s downright fun. Trust me, you’ll feel like a kitchen rock star when you whip up this chili-infused delight.

    First things first, gather all your ingredients: you’ll need 12 ounces of chili sauce, 2 tablespoons of brown sugar, 2 tablespoons of apple cider vinegar, 1 tablespoon of Worcestershire sauce, 1 teaspoon of ground chili powder, 1 teaspoon of salt, and 1 teaspoon of garlic powder. Once you have everything, it’s time to mix things up.

    Start by grabbing a bowl—any bowl will do, but I recommend something that can hold all that saucy goodness without spilling. Pour in the 12 ounces of chili sauce and then add the 2 tablespoons of brown sugar, 2 tablespoons of apple cider vinegar, and 1 tablespoon of Worcestershire sauce.

    Next, sprinkle in the 1 teaspoon of ground chili powder, 1 teaspoon of salt, and 1 teaspoon of garlic powder. Stir it all together until the ingredients are well combined. You should see a lovely, glossy sauce that smells so good it might just convince you to skip the ribs and eat it by the spoonful. But we won’t judge if you do.

    Now here comes the fun part: marinating those ribs. Take about 1/3 of your sauce and slather it all over your ribs, making sure they get a good coating. Wrap those babies up and pop them in the fridge overnight. This step is essential—the longer they marinate, the more flavor they soak up.

    The next day, get ready to grill! Brush another 1/3 of that delicious sauce on the ribs right before you start cooking and during the cooking process, because who doesn’t love a good glaze?

    And don’t forget about the last portion of sauce; you’ll want to boil it for a few minutes and serve it alongside the ribs for dipping. So simple, yet so incredibly satisfying. Just like that, you’ve turned simple ingredients into a BBQ masterpiece. Enjoy your tasty creation, and don’t be surprised if your friends start asking for your “secret” recipe.

    BBQ Sauce for Ribs Substitutions & Variations

    After mastering the basic BBQ sauce for ribs, it’s time to get a bit creative with substitutions and variations.

    If you want a sweeter touch, try adding honey or maple syrup instead of brown sugar. For a tangier kick, swap apple cider vinegar with balsamic or red wine vinegar.

    I love experimenting with different chili powders—smoked or chipotle can add depth. Want a fruitier flavor? Incorporate some crushed pineapple or peach puree.

    You can even adjust the heat by adding fresh jalapeños. Don’t hesitate to mix and match; the possibilities are endless, and your ribs will thank you!

    What to Serve with BBQ Sauce for Ribs

    While enjoying your delicious BBQ ribs slathered in that chili-infused sauce, you might wonder what side dishes will perfectly complement this mouthwatering meal.

    I love serving my ribs with classic coleslaw; its crunch and creaminess balance the heat of the sauce.

    Baked beans are another fantastic choice—sweet and smoky, they pair wonderfully with the spicy flavors.

    Don’t forget some cornbread; it’s ideal for soaking up any extra sauce.

    Finally, grilled corn on the cob adds a fresh touch and sweetness.

    These sides will elevate your BBQ experience, making it unforgettable and satisfying. Enjoy your feast!

    Additional Tips & Notes

    To guarantee your chili-infused BBQ sauce turns out perfectly, it’s important to taste as you go. Adjust the sweetness or heat according to your preference; a dash more sugar or chili powder can make a difference.

    If you like a smoky flavor, consider adding a touch of smoked paprika. When storing leftover sauce, use an airtight container, and it’ll keep in the fridge for about a week.

    For a richer flavor, let the sauce sit overnight before using it. Finally, don’t forget to boil any leftover sauce before serving to confirm it’s safe and delicious! Enjoy your ribs!

  • BBQ Pork Pizza Recipe With Jalapeño Kick

    BBQ Pork Pizza Recipe With Jalapeño Kick

    Why BBQ Pork Pizza Is a Must-make BBQ Recipe

    When you crave a unique twist on traditional barbecue, BBQ Pork Pizza is the perfect solution. It combines the smoky, rich flavors of barbecue with the comforting texture of pizza, creating a mouthwatering experience.

    I love how this dish brings together my favorite elements—tender pork, gooey cheese, and a hint of spice from jalapeños. Plus, it’s incredibly easy to prepare, making it a go-to for busy evenings or casual gatherings.

    Each bite delivers a delightful explosion of flavor, satisfying my cravings in a way that regular barbecue just can’t. Trust me, once you try it, you’ll be hooked!

    Ingredients of BBQ Pork Pizza

    When it comes to whipping up a delicious BBQ Pork Pizza, having the right ingredients on hand is key. Thankfully, this recipe requires just a handful of pantry staples and a few fresh items that really bring the flavor to life. You won’t need to trek to a specialty store or break the bank—most of these ingredients are likely already hanging out in your kitchen.

    So, let’s take a look at what you need to gather before diving into the cooking fun.

    Ingredients for BBQ Pork Pizza:

    • 1 medium sweet onion, sliced
    • 1 (18-ounce) container fully cooked shredded barbecued pork
    • 1 fully cooked whole wheat pizza crust
    • 1 cup cheddar cheese
    • 1/4 cup sliced jalapeño pepper

    Now, let’s chat about these ingredients for a second. The sweet onion adds a nice touch of flavor that balances the smoky pork, and who doesn’t love gooey cheddar cheese? It really ties everything together.

    If you’re feeling adventurous, you could mix in a different cheese or even throw on some extra toppings like bell peppers or mushrooms.

    And let’s not forget the jalapeños—if you’re like me and can’t handle too much heat, you can always dial back the amount or leave them off entirely.

    How to Make BBQ Pork Pizza

    bbq pork pizza recipe

    Alright, let’s get into the fun part—making that scrumptious BBQ Pork Pizza! First things first, preheat your oven to a cozy 400°F.

    While that’s heating up, grab 1 medium sweet onion and slice it into rings. I always find that slicing onions can feel like a mini workout—especially when the smell starts to hit you. Just keep a tissue handy, because those pesky onions can bring on the tears faster than a rom-com.

    Now, take a medium non-stick skillet and heat it over medium heat. Toss those onion rings in there and let them cook for about 3 minutes. We want them to soften just a bit, enough for their sweetness to start shining through.

    Meanwhile, pop open that 18-ounce container of fully cooked shredded barbecued pork and heat it in the microwave according to the package directions—usually about 2 minutes. If only everything in life could be this easy, right?

    Next up, grab your fully cooked whole wheat pizza crust and lay it out on a pizza pan or cookie sheet. This is where the magic happens. Spread those softened onions across the crust, making sure to cover every nook and cranny.

    Then, go ahead and add that BBQ pork on top—oh, the aroma is heavenly already. Now, sprinkle on 1 cup of cheddar cheese because, let’s be honest, cheese makes everything better. If you’re feeling bold, add 1/4 cup of sliced jalapeño peppers on top for a little kick. It’s like a party for your taste buds!

    Finally, slide that bad boy into the oven and bake for about 12 minutes. You’ll know it’s done when the pork is heated through and the cheese is all melty and gooey.

    Cut it into wedges, serve hot, and enjoy the deliciousness. Just don’t burn your mouth on that first slice—trust me, I’ve been there.

    BBQ Pork Pizza Substitutions & Variations

    After whipping up that mouthwatering BBQ Pork Pizza, you might find yourself wanting to mix things up a bit.

    You can easily swap out the BBQ pork for shredded chicken or even pulled jackfruit for a vegetarian twist.

    Try using a different cheese, like mozzarella or pepper jack, for a unique flavor.

    If you’re not a fan of jalapeños, how about roasted red peppers or banana peppers?

    For the crust, experiment with cauliflower or gluten-free options.

    Adding pineapple can give it a sweet kick, too.

    The possibilities are endless, so get creative and make it your own!

    What to Serve with BBQ Pork Pizza

    While BBQ Pork Pizza stands out on its own, pairing it with the right sides can elevate your meal experience.

    I love serving it with a fresh, crisp coleslaw; the tangy crunch complements the rich flavors beautifully. A side of garlic bread also adds a delightful touch, perfect for soaking up any extra BBQ sauce.

    If you’re in the mood for something lighter, a simple mixed green salad dressed with balsamic vinaigrette works wonders.

    And don’t forget some jalapeño poppers for an extra kick!

    These sides create a well-rounded meal that keeps everyone asking for more. Enjoy!

    Additional Tips & Notes

    To guarantee your BBQ Pork Pizza turns out perfectly, I’ve got a few handy tips to share.

    First, don’t skip the step of softening the onions; it really enhances their flavor. If you want an extra kick, try marinating the pork in your favorite BBQ sauce for a few minutes before using it.

    For a crispier crust, pre-bake the pizza crust for about 5 minutes before adding toppings. Use a mix of cheeses, like mozzarella and cheddar, for depth.

    Finally, let the pizza cool for a couple of minutes before cutting; it helps the cheese set and makes serving easier. Enjoy!

  • BBQ Chicken Tenders With Honey Mustard Recipe

    BBQ Chicken Tenders With Honey Mustard Recipe

    Why BBQ Chicken Tenders Is a Must-make BBQ Recipe

    Whether you’re firing up the grill for a summer cookout or just looking for a tasty weeknight dinner, BBQ chicken tenders are a must-make recipe.

    They’re incredibly versatile, satisfying both kids and adults alike. The sweet and tangy barbecue sauce pairs perfectly with the tender chicken, making each bite irresistible.

    Plus, they’re easy to prepare, allowing me to spend more time enjoying with family and friends. Whether served with fresh veggies or a side of fries, these tenders elevate any meal.

    Trust me, once you try them, you’ll find yourself making them again and again!

    Ingredients of BBQ Chicken Tenders

    When it comes to whipping up BBQ chicken tenders, gathering the right ingredients is the first step toward a mouthwatering experience. Let’s be real: the combination of juicy chicken and flavorful barbecue sauce is a game-changer. You’ll want to have these items ready to go before you plunge into the cooking process.

    Trust me, once you taste these tenders, they’ll become a regular in your meal rotation.

    Here’s what you’ll need:

    • 1 cup prepared barbecue sauce
    • 2 tablespoons Dijon mustard
    • 2 tablespoons honey
    • 1 1/2 lbs chicken tenders
    • 1/2 cup all-purpose flour
    • 1/2 teaspoon salt
    • 1/2 teaspoon fresh ground pepper
    • 2 large eggs
    • 1 3/4 cups coarse dry breadcrumbs (preferably whole-wheat)
    • Olive oil or canola oil cooking spray

    Now, a few things to keep in mind about these ingredients. When it comes to the barbecue sauce, feel free to choose your favorite brand or even make your own if you’re feeling adventurous.

    Dijon mustard adds a nice kick, but if you’re not a fan, you can swap it for yellow mustard—no judgment here. And those chicken tenders? They’re your canvas. If you can’t find tenders, chicken breasts cut into strips work just as well.

    Finally, if whole-wheat breadcrumbs aren’t available, regular ones will do just fine. The goal here is to enjoy the process and have fun in the kitchen, right? Cooking should be a joyful experience, even if it means a little flour on your shirt.

    How to Make BBQ Chicken Tenders

    bbq chicken tenders recipe

    Making BBQ chicken tenders is a breeze, and I promise, the end result is worth every minute spent in the kitchen. First things first, let’s talk about that marinade. In a large bowl, you’ll want to whisk together 1 cup of your favorite prepared barbecue sauce, 2 tablespoons of Dijon mustard, and 2 tablespoons of honey. This mixture is the secret sauce—literally—so don’t skip out on it.

    Now, take 1 ½ lbs of chicken tenders and, if any are particularly large, slice them in half lengthwise. Toss those tenders into the bowl with the marinade, making sure they’re all coated. Then, cover it up and let them chill in the refrigerator for about 30 minutes to an hour. This step is essential; it allows all those flavors to soak right into the chicken, making every bite so, so tasty.

    While the chicken is marinating, preheat your oven to 450°F. That’s the magic number for getting those tenders perfectly crispy. Next, grab a large rimmed baking sheet and coat it generously with cooking spray—this is where the tenders will bake, and we definitely don’t want them sticking.

    Now, in three separate shallow dishes, set up your dredging station: in one, combine ½ cup of all-purpose flour with ½ teaspoon of salt and ½ teaspoon of fresh ground pepper. In the second dish, lightly beat 2 large eggs. And in the third, pour in 1 ¾ cups of coarse dry breadcrumbs (whole-wheat, if you have them).

    Once your chicken is marinated, it’s time to get your hands a little messy. Take each tender, first coat it in the seasoned flour, shaking off any excess. Then, dip it in the egg, letting the extra drip off before rolling it in the breadcrumbs. Make sure they’re well-coated; this is what’ll give you that delightful crunch.

    Place the tenders on the prepared baking sheet, and don’t forget to generously spray both sides with cooking spray—this helps them crisp up beautifully. Bake them for 10 minutes, then flip them over and let them bake for another 10 minutes. By the end, you’ll have a plate of chicken tenders that aren’t only crispy on the outside but juicy on the inside.

    Serve them up with that reserved barbecue sauce for dipping, and you’re in for a treat. Honestly, you might just find yourself doing a little happy dance in the kitchen.

    BBQ Chicken Tenders Substitutions & Variations

    Have you ever thought about how easy it’s to switch things up with BBQ chicken tenders? You can try different marinades, like teriyaki sauce or a spicy chipotle blend, to give them a unique twist.

    For a healthier option, use almond flour instead of all-purpose flour, or bake them without breading for a lighter version. Want a smoky flavor? Add smoked paprika to your breadcrumbs.

    You can even substitute chicken tenders with turkey or tofu for a different protein. Don’t hesitate to experiment with your favorite seasonings and sauces; the possibilities are endless!

    What to Serve with BBQ Chicken Tenders

    Exploring different flavors for BBQ chicken tenders opens up a world of delicious possibilities, but pairing them with the right sides can elevate your meal even further.

    I love serving these tenders with a crisp coleslaw for a revitalizing crunch or a light potato salad for heartiness. Grilled corn on the cob adds a sweet touch, while baked beans offer a savory contrast.

    For a lighter option, I often include a fresh garden salad drizzled with vinaigrette. Finally, don’t forget some warm, crusty bread to soak up any leftover sauce—it’s the perfect finishing touch to a delightful meal!

    Additional Tips & Notes

    While preparing BBQ chicken tenders can be straightforward, a few additional tips can enhance your cooking experience and the final dish.

    First, make certain to marinate the chicken long enough; it really helps deepen the flavor.

    If you want extra crunch, consider double-breading the tenders. Simply dip them in egg and breadcrumbs twice!

    Also, don’t rush the cooking time; it guarantees the tenders are cooked through without burning.

    Finally, feel free to customize the barbecue sauce with your favorite spices for a unique twist.

    Trust me, these tweaks will elevate your BBQ chicken tenders to the next level!

  • BBQ Chicken Dip Cream Cheese Recipe

    BBQ Chicken Dip Cream Cheese Recipe

    Why BBQ Chicken Dip Is a Must-make BBQ Recipe

    When I think about must-make BBQ recipes, BBQ Chicken Dip instantly comes to mind. This dip’s creamy texture and smoky flavor make it a crowd favorite at any gathering.

    It’s so easy to whip up, yet it never fails to impress. I love how versatile it is, pairing perfectly with crackers, veggies, or even tortilla chips.

    Plus, it’s a fantastic way to use leftover chicken! Every time I set it out, I watch as people come back for seconds.

    Trust me, once you try it, you’ll understand why BBQ Chicken Dip deserves a spot at your next BBQ.

    Ingredients of BBQ Chicken Dip

    When it comes to making BBQ Chicken Dip, the ingredients are simple yet essential. You might already have some of these items hanging out in your fridge or pantry, which is a bonus. Each ingredient plays an important role in creating that creamy, smoky goodness that makes this dip so irresistible.

    So, let’s gather what we need to whip up this crowd-pleasing treat that’s sure to have your guests clamoring for more.

    Here’s what you’ll need for the BBQ Chicken Dip:

    • 1 (8 ounce) package cream cheese, softened
    • 1 cup sharp cheddar cheese, shredded
    • 1 tablespoon milk
    • 1/4 teaspoon garlic powder
    • 1/8 teaspoon cayenne pepper
    • 2 tablespoons barbecue sauce
    • 3/4 cup cooked chicken breast, chopped
    • 2 tablespoons green onions, sliced

    Now, a quick note about the ingredients. Feel free to get creative! If you’re not a fan of sharp cheddar, you can try a milder cheese or even a blend.

    And that barbecue sauce? Choose your favorite brand or flavor—sweet, smoky, or spicy. Also, if you have leftover rotisserie chicken, that’s a great shortcut. Just chop it up and you’re in business.

    It’s all about making this dip your own, so don’t stress too much about sticking to the list. After all, the best recipes are the ones that evolve with your taste and imagination.

    How to Make BBQ Chicken Dip

    bbq chicken dip recipe

    Making BBQ Chicken Dip is a breeze, and trust me, it’s a game-changer for parties or cozy nights in. First things first, grab that 8-ounce package of softened cream cheese. Now, you really want to make sure it’s softened—nobody wants to wrestle with a block of cold cream cheese. So, let it hang out at room temperature for a bit.

    Once it’s nice and fluffy (you’ll literally beat it with an electric mixer until it’s lighter than air), you can add in 1 cup of shredded sharp cheddar cheese. Feel free to mix it up with your favorite cheese if sharp isn’t your thing. Then, toss in 1 tablespoon of milk, 1/4 teaspoon of garlic powder (because garlic makes everything better, doesn’t it?), and a pinch—just 1/8 teaspoon—of cayenne pepper to give it a little kick.

    Now, mix everything together until it’s combined into a creamy, dreamy mixture. You want it to look like something you’d want to plunge into with a spoon (or maybe that’s just me).

    Once that’s done, spread the cheesy goodness in a 7-inch circle on your serving plate. This is where the fun really begins. Grab 2 tablespoons of barbecue sauce and drizzle it over the top. It’s like the icing on the cake, but, you know, a savory dip instead.

    Then, you’ll want to sprinkle on 3/4 cup of chopped cooked chicken breast—if you have leftover rotisserie chicken, even better! And don’t forget to add 2 tablespoons of sliced green onions for that fresh crunch.

    Now, you could just admire your masterpiece for a moment, but let’s be real; it’s time to dig in. Serve it up with some crunchy crackers, and watch as everyone gathers around, drawn in by the smoky aroma and cheesy goodness.

    Just a friendly heads-up, you might want to make a double batch because this dip disappears faster than my motivation to hit the gym after work. Enjoy your creation, and don’t be surprised if your friends start begging you to make it every time they come over!

    BBQ Chicken Dip Substitutions & Variations

    After whipping up that delicious BBQ Chicken Dip, you might find yourself wanting to switch things up or cater to different tastes.

    I often swap the cream cheese for Greek yogurt for a lighter version or use smoked gouda instead of cheddar for a richer flavor. If you’re feeling adventurous, try adding some diced jalapeños for a kick.

    For a vegetarian option, substitute the chicken with black beans or shredded veggies. You can even experiment with different BBQ sauces, like honey or spicy chipotle, to create a unique twist.

    The possibilities are endless, and I love trying new variations!

    What to Serve with BBQ Chicken Dip

    What’s the best way to enjoy BBQ Chicken Dip? I love serving it with crunchy tortilla chips or crispy crackers for that perfect texture contrast.

    Veggie sticks like celery and bell peppers are great too—they add freshness and a nice crunch. If you’re feeling adventurous, try it with soft pita bread or warm baguette slices.

    For a more substantial option, I sometimes pair it with mini sliders or grilled chicken skewers.

    Whatever you choose, just make sure there’s plenty to go around, because this dip’s a crowd-pleaser that always disappears fast! Enjoy your delicious spread!

    Additional Tips & Notes

    When it comes to BBQ Chicken Dip, a few extra tips can elevate your experience even more.

    First, feel free to experiment with different barbecue sauces; each one brings its unique flavor. If you want a bit more heat, add extra cayenne or toss in some chopped jalapeños.

    For a creamier texture, mix in a bit more milk. Don’t forget to garnish with fresh cilantro or parsley for a pop of color!

    Finally, if you’re prepping ahead, assemble the dip and refrigerate it until you’re ready to serve. Just remember to let it come to room temperature before enjoying!

  • Grilled BBQ Pizza With Savory Sausage Recipe

    Grilled BBQ Pizza With Savory Sausage Recipe

    Why BBQ Pizza Is a Must-make BBQ Recipe

    When I think about summer cookouts, BBQ pizza always stands out as a must-make dish. The combination of smoky flavors and fresh ingredients creates a unique twist on traditional pizza.

    It’s incredibly versatile; you can toss on any toppings you love, from grilled veggies to savory sausage. Plus, grilling the pizza adds that irresistible char and crispy crust that everyone craves.

    It’s a fun dish to prepare with friends, turning the cooking process into a lively event. Trust me, once you’ve tasted BBQ pizza straight off the grill, you’ll never want to go back to takeout again!

    Ingredients of BBQ Pizza

    When it comes to making BBQ pizza, having the right ingredients is key to achieving that perfect balance of flavors and textures. You’ll want to gather some essentials that won’t only satisfy your taste buds but also make the cooking process a breeze.

    Whether you’re a seasoned cook or a kitchen newbie, these ingredients will help you create a delicious, mouthwatering BBQ pizza right on your grill. So, let’s plunge into what you’ll need to whip up this summer favorite.

    Ingredients for BBQ Pizza

    • 1 lb pizza dough (make sure it’s at room temperature)
    • 2 tablespoons olive oil
    • 1/2 lb cooked sausage, cut into 1/2 inch pieces
    • 1 cup assorted grilled vegetables (feel free to get creative)
    • 6 ounces colby-monterey jack cheese (or more if you love cheese)
    • 1 teaspoon basil (dried or fresh, your choice)
    • 1/4 teaspoon dried chili pepper flakes (for a little kick)

    Now, before you rush off to the grocery store, let’s chat about some ingredient considerations.

    First off, the type of sausage you choose can really change the game. I’ve tried spicy Italian sausage, and boy, did it add a zing that made my taste buds dance.

    And those grilled veggies? Don’t skimp here. Zucchini, bell peppers, red onions—you name it. The more colorful your toppings, the more fun your pizza will be.

    Plus, it’s a sneaky way to add some veggies into your meal, right? And if cheese is your love language, go ahead and pile on more than the recipe suggests. Life’s too short to skimp on cheese.

    How to Make BBQ Pizza

    grilled bbq pizza delight

    Making BBQ pizza on the grill isn’t just a cooking task; it’s an adventure, one that fills your backyard with mouthwatering aromas and your heart with joy.

    Let’s get started with the basics. First, grab that 1 lb of pizza dough and let it come to room temperature. I know, I know—waiting is the hardest part. But trust me, it’s worth it for a dough that’s easier to stretch. Once it’s ready, roll it out into a rectangle about 12×15 inches. You want it thin enough to get crispy but thick enough to hold all those delicious toppings. Now, brush the top with 2 tablespoons of olive oil, which is like giving it a spa treatment before it hits the grill.

    Now, for the fun part: grilling! Preheat your grill to medium-high heat. This is where the magic happens. Carefully place your oiled dough on the grill, oil side down, and let it cook for about 3 minutes. Keep an eye on it—no one likes a burnt pizza. If you see some bubbles forming, just punch them down gently like you’re showing them who’s boss.

    After that bottom gets all nice and brown, it’s time to flip it! Brush the top with olive oil again, then pile on your toppings: that 1/2 lb of cooked sausage, your colorful 1 cup of assorted grilled vegetables, and the pièce de résistance—6 ounces of colby-monterey jack cheese. Don’t be shy; if you love cheese as much as I do, sprinkle on more. Top it off with 1 teaspoon of basil and a dash of 1/4 teaspoon dried chili pepper flakes for a kick. Cover the grill and let it cook until the cheese is all melty and gooey.

    And just like that, in about 10 minutes, you’ll have a BBQ pizza that’s so good you might just consider opening your own pizzeria. Okay, maybe that’s a stretch, but you get the idea.

    When it’s done, carefully remove it from the grill, slice it up, and dig in. You’ve just created something incredible, and I promise, your friends will be asking for seconds. Just don’t forget to save a slice for yourself—unless you want to be the one left with crumbs.

    BBQ Pizza Substitutions & Variations

    Have you ever thought about how many different ways you can customize your BBQ pizza? I love experimenting with various toppings.

    Instead of sausage, try shredded chicken or pulled pork for a different protein. If you’re craving something lighter, fresh arugula or spinach adds a nice touch. You can switch up the cheese too; feta or goat cheese can bring a unique flavor.

    For those who enjoy a spicy kick, toss in jalapeños or a drizzle of sriracha. Don’t forget about the sauce—BBQ sauce can be replaced with pesto or even a white garlic sauce.

    The possibilities are endless!

    What to Serve with BBQ Pizza

    What pairs perfectly with BBQ pizza to elevate your meal? I love serving a fresh, crisp salad alongside it. A simple arugula salad with cherry tomatoes and a light vinaigrette cuts through the richness of the pizza.

    Sometimes, I’ll whip up a side of garlic knots for that extra indulgence. If you’re in the mood for something heartier, grilled corn on the cob adds a sweet touch.

    And don’t forget your favorite beverage! A cold craft beer or a cool iced tea complements the flavors beautifully. Trust me, these sides make your BBQ pizza experience even better!

    Additional Tips & Notes

    While grilling BBQ pizza is a fun and rewarding experience, a few tips can make it even better.

    First, make certain your grill is preheated properly; a hot grill guarantees a crispy crust. I recommend using a pizza stone if you have one, as it helps distribute heat evenly.

    Don’t overload your pizza with toppings; a lighter hand allows everything to cook uniformly. If you’re experimenting with vegetables, try marinating them beforehand for extra flavor.

    Finally, let the pizza rest for a couple of minutes after grilling—this allows the cheese to set, making it easier to slice. Enjoy your creation!

  • BBQ Baked Beans With Ground Beef Recipe

    BBQ Baked Beans With Ground Beef Recipe

    Why BBQ Baked Beans Is a Must-make BBQ Recipe

    Why should BBQ baked beans be a staple at your next cookout? Well, they’re the perfect side dish that complements any grilled meat.

    The rich, smoky flavor and hearty texture create a satisfying experience for your guests. Plus, they’re incredibly easy to prepare! I often make a big batch, letting the beans simmer while I focus on the main course.

    They’re also versatile—add in your favorite spices or meats for a personalized touch. And let’s be honest, who doesn’t love a warm, comforting bowl of BBQ baked beans?

    Trust me, your cookout won’t feel complete without them!

    Ingredients of BBQ Baked Beans

    When it comes to BBQ baked beans, the ingredients are the real stars of the show. They come together to create a mouthwatering medley of flavors that just screams summer cookouts. Not only are they packed with hearty goodness, but they also have that perfect balance of sweetness and tang that pairs wonderfully with grilled meats.

    Plus, with just a handful of pantry staples and a dash of love, you can whip up a batch that will have your friends and family coming back for seconds… or thirds. So, let’s gather our ingredients and get ready to prepare something delicious.

    Here’s what you’ll need to make BBQ Baked Beans:

    • 4 (15 ounce) cans of pinto beans (with liquid)
    • 2 tablespoons water
    • 2 teaspoons cornstarch
    • 1/2 cup ketchup
    • 1/4 cup barbecue sauce (like Sonny’s Sweet BBQ Sauce)
    • 1/3 cup white vinegar
    • 1/4 cup brown sugar
    • 2 tablespoons diced onions
    • 1 teaspoon mustard
    • 1/2 teaspoon chili powder
    • 1/4 teaspoon salt
    • 1/4 teaspoon fresh coarse ground black pepper
    • 1 lb cooked ground beef

    Now, before you plunge into cooking, let’s chat about the ingredients a bit more. If you’re feeling adventurous, you can totally swap out the pinto beans for black beans or navy beans, depending on your taste.

    And, if you prefer a vegetarian option, simply leave out the ground beef or replace it with some sautéed mushrooms for that hearty texture. Don’t hesitate to play around with the spices, too! Maybe you like it a little spicier? Toss in some cayenne or jalapeños.

    The beauty of BBQ baked beans is their versatility; you can truly make them your own. Just remember, the key is to balance those flavors so every bite is a little piece of heaven.

    How to Make BBQ Baked Beans

    delicious bbq baked beans

    Making BBQ Baked Beans is a wonderfully simple process that can turn your kitchen into a cozy haven of delicious aromas. First off, preheat your oven to 350 degrees. While that’s warming up, grab a casserole dish and pour in the entire contents of 4 (15 ounce) cans of pinto beans, including the liquid. Trust me, that liquid is like liquid gold—it helps create a rich, flavorful sauce.

    Now, in a small bowl, mix 2 teaspoons of cornstarch with 2 tablespoons of water. This little mixture will aid in thickening the beans as they bake, giving you that perfect, saucy texture. Stir it into the beans, and make sure everything is well combined.

    Next, it’s time to add some punchy flavors. Toss in 1/2 cup of ketchup, 1/4 cup of your favorite barbecue sauce (I’m partial to Sonny’s Sweet BBQ Sauce), 1/3 cup of white vinegar, and 1/4 cup of brown sugar. Then, sprinkle in 2 tablespoons of diced onions, 1 teaspoon of mustard, 1/2 teaspoon of chili powder, and season with 1/4 teaspoon each of salt and fresh coarse ground black pepper.

    And let’s not forget the 1 pound of cooked ground beef. Mix it all together, and oh boy, the smell is already starting to get your taste buds tingling. Once everything is well blended, cover your casserole dish with foil and pop it in the oven.

    Now, here’s the key part: you’ll want to bake these beauties for about 90 minutes. But don’t just set it and forget it; stir the beans every 30 minutes. This helps those flavors mingle and guarantees that the sauce thickens nicely.

    Once the timer goes off, take the beans out and let them cool for about 5 to 10 minutes before diving in. This is the hardest part, I swear. You’ll want to dig right in, but trust me, letting them cool just a bit helps the flavors settle.

    And there you have it—BBQ Baked Beans that are sure to impress at any gathering. Just be prepared for everyone to ask for seconds, because these beans are downright addictive.

    BBQ Baked Beans Substitutions & Variations

    After whipping up a batch of those delicious BBQ Baked Beans, you might find yourself wanting to switch things up a bit.

    You can easily swap pinto beans for black beans or navy beans for a different texture. If you’re looking for a vegetarian option, replace the ground beef with sautéed mushrooms or lentils.

    For a smoky flavor, try adding chopped bacon or smoked sausage. Feeling adventurous? Experiment with different barbecue sauces or add a dash of hot sauce for heat.

    You can even toss in some diced bell peppers or jalapeños for a fresh twist. Enjoy your culinary creativity!

    What to Serve with BBQ Baked Beans

    There’s something truly satisfying about BBQ Baked Beans, and pairing them with the right sides can elevate your meal.

    I love serving them alongside cornbread; the sweetness complements the beans perfectly. Grilled hot dogs or sausages are also a hit, adding that classic BBQ vibe.

    For a lighter touch, a fresh coleslaw adds crunch and balances the richness. If you want something heartier, try some smoky BBQ ribs.

    Don’t forget a rejuvenating potato salad, which rounds out the plate nicely. Each of these sides enhances the experience, making your BBQ baked beans the star of the show!

    Additional Tips & Notes

    While BBQ Baked Beans are delicious as-is, there are several tips and notes that can enhance your experience.

    First, consider adding bacon for a smoky flavor—just cook it first and mix it in with the ground beef. You might also experiment with different barbecue sauces to match your taste.

    If you like a bit of heat, toss in some jalapeños or a dash of hot sauce.

    Finally, letting the beans sit for a few hours or overnight allows the flavors to meld beautifully. Trust me, these little tweaks can elevate your dish to a whole new level!

  • Whiskey Bourbon BBQ Sauce Recipe

    Whiskey Bourbon BBQ Sauce Recipe

    Why Whiskey BBQ Sauce Is a Must-make BBQ Recipe

    When you’re grilling up your favorite meats, having the right sauce can make all the difference. That’s why I swear by whiskey BBQ sauce.

    Its rich, smoky flavor elevates everything from ribs to chicken. The combination of sweet and tangy notes creates a balanced taste that keeps everyone coming back for more.

    Plus, it’s incredibly easy to make, and you can customize it to your liking. Whether you’re hosting a backyard barbecue or just enjoying a weeknight dinner, this sauce adds a touch of sophistication that’s hard to beat.

    Trust me, once you try it, you won’t want to grill without it!

    Ingredients of Whiskey BBQ Sauce

    When it comes to whipping up a delicious BBQ sauce, the ingredients you choose can make or break the flavor. For my go-to whiskey bourbon BBQ sauce, you’ll find that the combination of sweet, tangy, and smoky elements creates a symphony of taste that dances on your taste buds.

    Plus, most of these ingredients are likely in your pantry already, which makes this recipe even more appealing. Let’s plunge into what you’ll need to gather to create this mouthwatering sauce.

    Here’s what you’ll need:

    • 1 cup diced onion
    • 3 tablespoons butter
    • 3/4 cup ketchup
    • 1/2 cup orange juice
    • 1/2 cup cider vinegar
    • 1/2 cup whiskey or bourbon
    • 1/3 cup brown sugar
    • 1/4 cup molasses
    • 2 tablespoons Worcestershire sauce

    Now, before you start reaching for the whiskey (which, let’s be honest, is the best part), there are a couple of things to reflect on.

    First, the type of whiskey or bourbon you use can really influence the flavor of your sauce. A good quality bourbon can add fantastic depth, while a lighter whiskey might keep it a bit more mellow.

    If you’re feeling adventurous, try experimenting with different types to find your perfect match. And don’t forget about the onions—cooking them until they’re soft and fragrant is key to building that rich base flavor.

    How to Make Whiskey BBQ Sauce

    whiskey bbq sauce recipe

    Alright, let’s explore making this delicious Whiskey BBQ Sauce. First off, you’ll want to grab your trusty skillet and get it nice and warm over medium heat. Toss in 3 tablespoons of butter and let it melt down until it’s bubbly and frothy. This is the moment where your kitchen will start smelling divine.

    Next, add in that 1 cup of diced onion, and cook them until they’re soft and translucent. This usually takes about 5 to 7 minutes, and trust me, it’s worth the wait. Just remember to stir them occasionally so they don’t stick to the bottom and turn into a crispy mess. No one wants burnt onions in their sauce, right?

    Once those onions are gloriously soft and fragrant, it’s time to bring in the star of the show: the sauce itself. Pour in 3/4 cup of ketchup, 1/2 cup of orange juice, and 1/2 cup of cider vinegar. Then, add in 1/2 cup of whiskey or bourbon—your choice, but let’s be honest, this is where the magic happens.

    Now, sprinkle in 1/3 cup of brown sugar and 1/4 cup of molasses for that perfect sweet and smoky balance. Finally, stir in 2 tablespoons of Worcestershire sauce to tie everything together. Bring this mixture to a boil, and oh boy, try not to drool.

    After it’s bubbling away, lower the heat and let it simmer for about 10 minutes. This simmering time is essential—it allows all those flavors to meld together beautifully. If you prefer a smoother sauce, just grab an immersion blender and give it a quick whirl.

    Voilà! You’ve got yourself a tasty Whiskey BBQ sauce that’s perfect for slathering on grilled meats or even just dipping some fries into. Enjoy!

    Whiskey BBQ Sauce Substitutions & Variations

    After whipping up that delicious Whiskey BBQ sauce, you might find yourself wondering how to customize it to fit your taste or what you have on hand.

    For a smoky flavor, try adding a bit of smoked paprika or chipotle powder. If you’re out of whiskey, bourbon works just as well, or you can substitute with apple juice for a sweeter twist.

    For a tangier sauce, increase the cider vinegar or toss in some mustard.

    Feeling adventurous? Add a splash of hot sauce for heat or swap the molasses for honey to change the sweetness profile.

    Enjoy experimenting!

    What to Serve with Whiskey BBQ Sauce

    To truly elevate your meals, pairing dishes with Whiskey BBQ sauce can be a game changer. I love drizzling it over grilled chicken or ribs, where its sweet, smoky essence shines.

    It also works wonders with pulled pork sandwiches, bringing a rich depth to each bite. I’ve found that roasted vegetables, like carrots and Brussels sprouts, become irresistible with a splash of this sauce.

    For a fun twist, try it on burgers—trust me, your guests will be impressed!

    Don’t forget to serve it as a dipping sauce for crispy fries or onion rings; it’s a crowd-pleaser every time.

    Additional Tips & Notes

    When using Whiskey BBQ sauce to elevate your dishes, a few additional tips can enhance your experience even more.

    First, don’t hesitate to tweak the sweetness by adding more brown sugar or molasses if you prefer a richer flavor. If you want a smoky kick, consider adding a dash of smoked paprika or chipotle powder. For a tangy twist, try a splash of hot sauce.

    When storing leftovers, keep the sauce in an airtight container in the fridge for up to a week.

    Finally, don’t forget to experiment—this sauce pairs beautifully with chicken, ribs, and even grilled vegetables!

  • Lemongrass Thai BBQ Chicken Recipe

    Lemongrass Thai BBQ Chicken Recipe

    Why Thai BBQ Chicken Is a Must-make BBQ Recipe

    When you crave something that’s bursting with flavor, Thai BBQ chicken is a must-make recipe. The combination of aromatic herbs and spices creates a mouthwatering experience that never disappoints.

    The sweetness from the marinade pairs perfectly with the smoky grilled chicken, delivering a taste explosion in every bite. Plus, it’s surprisingly easy to prepare!

    I love how the marinating process infuses the chicken with vibrant flavors, making it a standout dish at any gathering. Whether it’s a summer barbecue or a cozy dinner, this Thai BBQ chicken will impress your guests and leave everyone asking for seconds!

    Ingredients of Thai BBQ Chicken

    When it comes to whipping up an unforgettable dish, the ingredients you choose can make all the difference. For this delightful Thai BBQ chicken, you’ll want to gather a medley of fresh herbs and pantry staples that come together to create a flavor-packed marinade. Seriously, the aroma alone will have your taste buds doing a happy dance!

    So, let’s plunge into what you’ll need to make this mouthwatering dish.

    Ingredients for Thai BBQ Chicken:

    • 2 stalks fresh lemongrass
    • 2 tablespoons chopped fresh ginger
    • 2 tablespoons chopped cilantro
    • 1 1/2 cups light soy sauce
    • 1 tablespoon sugar
    • 1 teaspoon fresh ground black pepper
    • 2 tablespoons red curry paste
    • 2 lbs bone-in chicken breasts and bone-in chicken thighs
    • 1 tablespoon finely chopped chile
    • 1/2 cup white vinegar
    • 1 teaspoon salt
    • 2 tablespoons sugar (yes, a second time!)
    • 1 teaspoon finely chopped very fresh garlic

    Now, let’s chat about these ingredients for a moment. Fresh lemongrass is like the superstar of this dish; it brings a zesty, citrusy punch that you just can’t replicate with dried herbs. If you’re in a pinch, I get it, but do your taste buds a favor and go for the fresh stuff when you can.

    And let’s not forget about the red curry paste—it’s the secret sauce (pun intended) that gives this recipe its unique Thai flavor. Feel free to adjust the level of spice by adding more or less of the chopped chile, depending on how fiery you like your food.

    Finally, if you’re not a fan of bone-in chicken, you can always opt for boneless pieces; just remember that marinating time might vary.

    How to Make Thai BBQ Chicken

    thai bbq chicken delight

    Alright, let’s plunge into the delightful process of making this Thai BBQ chicken. First things first, you’ll need to prep your fresh ingredients. Grab those two stalks of fresh lemongrass and chop off the grassy tops, leaving about 6 inches. Then, give them a good bruise with the blunt edge of a large knife or cleaver. This part can be oddly satisfying, like you’re tenderizing a piece of meat, except you’re just releasing those zesty oils.

    Once you’ve bruised those stalks, chop them into smaller pieces and toss them in a blender. Next up, add 2 tablespoons of chopped fresh ginger, 2 tablespoons of chopped cilantro, 1 ½ cups of light soy sauce, the sugar (just 1 tablespoon for now), a teaspoon of fresh ground black pepper, and 2 tablespoons of red curry paste. Blend everything until it’s nice and smooth, like a silky potion of flavor.

    Now, let’s talk chicken. You’ll need 2 pounds of bone-in chicken breasts and thighs for this recipe. Place the chicken in a nonreactive bowl (no metal, please). Pour that luscious marinade over the chicken and give it a good turn to coat every single piece. Cover it up and let it chill in the fridge for at least 4 hours or, if you’re feeling fancy, overnight. This is when the magic happens; the chicken absorbs all those wonderful flavors.

    While you’re waiting, you can prepare the sweet and spicy sauce. In a small saucepan, combine ½ cup of white vinegar, 1 teaspoon of salt, 2 tablespoons of sugar (yes, that second round of sugar), and 1 teaspoon of finely chopped fresh garlic. Bring it to a boil while stirring, then reduce the heat and let it simmer for a couple of minutes until it thickens slightly. Just think, in a few hours, you’ll have something extraordinary.

    Once you’re ready to grill, preheat your grill or broiler. Remove the chicken from the marinade (and don’t forget to lightly season with salt) and place those gorgeous pieces on the grill or under the broiler. Start with the skin side down over high heat; this will give you that beautiful golden-brown color we all crave.

    After a few minutes, flip the chicken and move it to a medium-hot part of the grill or broiler, where it can cook through slowly without burning. You’re looking at about 20 to 30 minutes in total. Just keep an eye on it, because nobody wants a chicken disaster on their hands.

    When it’s all cooked through and the juices run clear, you’re ready to serve it up with that sweet and spicy sauce. Just imagine the flavors dancing on your taste buds, and you’ll be in BBQ heaven. Enjoy!

    Thai BBQ Chicken Substitutions & Variations

    After enjoying the delicious Thai BBQ chicken, you might want to switch things up or cater to specific dietary needs.

    You can swap chicken for tofu or tempeh for a plant-based option. If you’re avoiding soy, try coconut aminos instead of light soy sauce.

    For a spicy kick, add more chopped chiles or a splash of sriracha. Want a citrus twist? Use lime juice in place of vinegar.

    If lemongrass is hard to find, fresh ginger can also enhance the flavor. Feel free to experiment with different herbs like basil or mint to create your unique version!

    What to Serve with Thai BBQ Chicken

    Serving Thai BBQ chicken brings a burst of flavor to your table, and pairing it with the right sides can elevate the whole meal.

    I love serving it with fragrant jasmine rice, which soaks up the delicious juices. A fresh cucumber salad adds a rejuvenating crunch, balancing the rich flavors of the chicken.

    For a touch of heat, I often whip up some spicy chili dip or serve it with sweet chili sauce.

    Don’t forget about grilled veggies or a Thai-style slaw for added texture. These sides not only complement the dish but also create a vibrant and colorful presentation!

    Additional Tips & Notes

    Pairing your Thai BBQ chicken with the right sides can enhance the meal experience, but there are a few additional tips that can make your dish even better.

    First, marinating overnight really intensifies the flavors, so don’t skip that step!

    When grilling, use a meat thermometer to verify the chicken reaches 165°F for perfect juiciness.

    If you have leftover marinade, simmer it to create a delicious glaze.

    Finally, don’t forget to garnish with fresh cilantro and lime for that extra zing.

    Trust me, these little details can elevate your BBQ chicken to a whole new level! Enjoy!

  • Smoky BBQ Sauce Recipe With Maple Twist

    Smoky BBQ Sauce Recipe With Maple Twist

    Why Smoky BBQ Sauce Is a Must-make BBQ Recipe

    When it comes to BBQ, I can’t stress enough how essential a smoky BBQ sauce is to elevate your grilling game. It adds depth and richness to meats, transforming an ordinary meal into something unforgettable.

    The moment that tangy, sweet, and smoky flavor hits your palate, you’ll understand why it’s a staple. Plus, it’s incredibly versatile—it works wonders on ribs, chicken, and even veggies.

    I love how it effortlessly enhances my grilled dishes, making them more enjoyable for family and friends. Trust me, once you try making your own smoky BBQ sauce, you’ll never want to go back to store-bought!

    Ingredients of Smoky BBQ Sauce

    When it comes to crafting your own smoky BBQ sauce, the ingredients you choose are essential—like the opening act of a concert, they set the stage for what’s to come. You’ll want to gather a handful of simple yet flavorful components that will work together to create that perfect balance of sweet, tangy, and smoky taste.

    Honestly, it’s kind of magical how just a few pantry staples can turn a basic BBQ into something downright drool-worthy. So, let’s explore what you’ll need for this delicious sauce that’s sure to impress at your next cookout.

    Here’s your ingredient list for smoky BBQ sauce:

    • 1 cup ketchup
    • 1 tablespoon molasses
    • 1 tablespoon maple syrup (or other sweetener) or 1 tablespoon honey (or other sweetener)
    • 1 teaspoon liquid smoke
    • 1/2 teaspoon garlic powder

    Now, while these ingredients are pretty standard, you can definitely play around with them based on your taste preferences. For example, if you like it a bit spicier, tossing in a pinch of cayenne pepper or some hot sauce can elevate the heat factor.

    Or, maybe you want a more pronounced sweetness—consider adding a bit more honey or using a sweeter ketchup. It’s all about experimenting till you find that perfect blend that makes your taste buds sing.

    And let’s not forget, if you don’t have liquid smoke on hand, you can always skip it, but that smoky essence really does add a unique flair. Just remember, cooking is all about having fun and making the dish your own!

    How to Make Smoky BBQ Sauce

    smoky bbq sauce recipe

    Now that you’ve gathered your ingredients for that smoky BBQ sauce, it’s time to roll up your sleeves and get cooking! Making this sauce is almost too easy; you might even feel like a BBQ wizard by the end.

    Start by grabbing a mixing bowl—because who doesn’t love a little bowl action in the kitchen? In that bowl, pour in 1 cup of ketchup. This is the base of your sauce and sets the stage for all that flavor to come.

    Next, add 1 tablespoon of molasses. Ah, the rich, dark sweetness of molasses—it’s like the secret handshake of BBQ sauce. Then, throw in 1 tablespoon of maple syrup or honey, depending on what you’re feeling. Sweetness is key here, but don’t go overboard unless you want to create a dessert sauce (which could be a fun experiment, but not what we’re after today).

    Now, it’s time for the star of the show: 1 teaspoon of liquid smoke. This is where the magic happens—this little ingredient adds that smoky depth we crave in BBQ sauce. If you don’t have liquid smoke on hand, don’t panic! You can still make a delicious sauce; it just won’t have that signature smoky flavor.

    Finally, sprinkle in 1/2 teaspoon of garlic powder. Garlic is like the trusty sidekick of flavors; it just makes everything better.

    Once you have all your ingredients in the bowl, grab a whisk (or a fork if you’re feeling adventurous) and mix everything together until it’s all blended into a beautiful, glossy sauce. It’s like painting a masterpiece, but instead of a canvas, you have a bowl of deliciousness.

    Give it a taste—this is the moment of truth. If you want more sweetness or a hint of spice, feel free to adjust the ingredients. Maybe a little pinch of cayenne pepper for heat? Or an extra drizzle of honey for sweetness? You do you.

    Once you’re satisfied, you can use this sauce to baste your meats while they grill or simply serve it as a dipping sauce. Either way, you’re going to be the star of the cookout.

    Smoky BBQ Sauce Substitutions & Variations

    After whipping up that delicious smoky BBQ sauce, you might find yourself wondering how to customize it to fit your taste or what you have on hand.

    For a spicy kick, try adding cayenne pepper or hot sauce. If you prefer a tangy twist, swap some ketchup for apple cider vinegar. You can also experiment with different sweeteners like agave nectar or brown sugar.

    For a fruitier flavor, consider adding puréed peaches or apricots. Feel free to adjust the liquid smoke based on your preference for smokiness.

    These substitutions can elevate your BBQ sauce to new heights! Enjoy the creative process!

    What to Serve with Smoky BBQ Sauce

    Whether you’re grilling up some juicy meats or looking for a tasty dip, smoky BBQ sauce pairs perfectly with a variety of dishes.

    I love slathering it on grilled chicken or ribs; the flavors meld beautifully. It’s also fantastic as a dipping sauce for crispy fries or onion rings.

    If you’re in the mood for something lighter, try it with roasted vegetables or a fresh salad.

    Even burgers get a delightful twist with a drizzle of this sauce.

    Don’t forget about pulled pork sandwiches—my personal favorite!

    The possibilities are endless, and I’m sure you’ll find your own perfect pairings.

    Additional Tips & Notes

    When enjoying smoky BBQ sauce with your favorite dishes, keep in mind a few handy tips to elevate your experience.

    First, don’t be shy with the sauce—generously baste your meats while grilling for that rich flavor. I love adding a pinch of cayenne for an extra kick, but adjust the heat to your taste.

    If you have leftovers, store them in an airtight container in the fridge; it’ll last a week or so.

    Finally, try experimenting with different sweeteners like brown sugar or agave for unique twists.

    Enjoy every bite and let your taste buds savor the magic!

  • Unique Onion Garlic Barbecue Sauce Recipe

    Unique Onion Garlic Barbecue Sauce Recipe

    Why Easy Barbecue Sauce Is a Must-make BBQ Recipe

    When it comes to grilling, I can’t help but think that having a great barbecue sauce on hand is essential. It elevates every meal, turning simple grilled meat into a mouthwatering feast.

    I love how a good sauce can balance flavors, adding sweetness, tang, and depth. Plus, it’s incredibly versatile—perfect for ribs, chicken, or even veggies.

    Making your own easy barbecue sauce means you can customize it to suit your taste, ensuring it’s always fresh and delicious. Trust me, when you whip up a batch, you’ll wonder how you ever grilled without it.

    It’s a game changer for any BBQ!

    Ingredients of Easy Barbecue Sauce

    When it comes to whipping up a delightful barbecue sauce, the ingredients you choose can make all the difference. This Onion Garlic Barbecue Sauce isn’t just a regular sauce; it’s a blend of flavors that will make your taste buds dance. The beauty lies in the simplicity of the ingredients. You likely have most of these items in your pantry already, and if not, they’re easy to find.

    Let’s take a closer look at what you’ll need for this mouthwatering concoction.

    Here’s a handy list of the ingredients you’ll want to gather:

    • 1 onion, finely chopped
    • 2 tablespoons fresh minced garlic (optional or to taste)
    • 2 tablespoons butter
    • 1 cup dark corn syrup
    • 1 cup ketchup
    • 1/2 cup cider vinegar
    • 1/2 cup prepared yellow mustard
    • 1/3 cup Worcestershire sauce
    • Salt and pepper to taste

    Now, let’s chat about these ingredients a bit. First off, if you’re not a fan of onions or garlic, you can totally skip them or reduce their amounts, though I must say, they add a wonderful depth of flavor.

    Don’t let the dark corn syrup scare you; it brings a rich sweetness that balances out the tangy vinegar and mustard beautifully. And if you’re feeling adventurous, you can even tweak the recipe by adding in spices or herbs that you love, like smoked paprika for a kick or a dash of cayenne if you’re looking for a spicy twist.

    Just remember, cooking is all about experimentation and finding what works for your palate. So, gather your ingredients, and let’s get ready to plunge into making this fantastic sauce.

    How to Make Easy Barbecue Sauce

    homemade onion garlic barbecue sauce

    Making your own Onion Garlic Barbecue Sauce isn’t only fun, but it also allows you to customize flavors to your liking. So, let’s get started on this delicious journey.

    First, grab a saucepan and melt 2 tablespoons of butter over medium heat. Once the butter is all melted and bubbly, toss in 1 finely chopped onion and, if you’re feeling up to it, 2 tablespoons of fresh minced garlic.

    Saute those for about 3 minutes, stirring occasionally until the onion becomes soft and translucent. You’ll know you’re on the right track when your kitchen starts smelling like a little slice of heaven. Seriously, if you could bottle that scent, you’d be a millionaire.

    Now that the aromatic base is ready, it’s time to add the star players of this barbecue sauce. Pour in 1 cup of dark corn syrup, 1 cup of ketchup, 1/2 cup of cider vinegar, 1/2 cup of prepared yellow mustard, and 1/3 cup of Worcestershire sauce.

    Yes, it sounds like a lot, but trust me, this combo is where the magic happens. Stir everything together until nicely combined, and then let it simmer over low heat for about 25 to 30 minutes. This is when the flavors meld together, creating that rich, tangy, slightly sweet goodness we all crave in a barbecue sauce.

    Just keep an eye on it, give it a stir occasionally, and maybe even sneak a taste. Who could resist?

    Once your sauce has thickened up and you’re happy with the flavor, it’s time to adjust the seasoning. Add salt and pepper to taste—don’t be shy. This is your sauce, after all.

    If you think it needs a little something extra, feel free to channel your inner chef and toss in some spices or herbs that you love. Maybe a pinch of smoked paprika or a dash of cayenne for a kick? The world is your oyster, or should I say, your barbecue sauce!

    Once it’s just right, you can let it cool and store it in the fridge or slather it on your favorite grilled meats. Enjoy the delightful journey of flavors you created!

    Easy Barbecue Sauce Substitutions & Variations

    How can you elevate your barbecue sauce game? I love to experiment with substitutions and variations!

    For a smoky twist, I add a dash of liquid smoke or smoked paprika. If you want a spicy kick, try incorporating chipotle peppers or cayenne pepper.

    To enhance sweetness, honey or brown sugar works wonders. You can also swap the mustard for Dijon or spicy brown mustard for a tangier flavor.

    For a fruity note, consider adding pureed peaches or pineapple. Don’t shy away from adjusting the vinegar type – balsamic or red wine vinegar can bring a unique depth.

    Enjoy your creative journey!

    What to Serve with Easy Barbecue Sauce

    After experimenting with various substitutions and variations for your barbecue sauce, it’s time to think about what to serve it with.

    I love pairing this easy barbecue sauce with grilled chicken or pork ribs, as the flavors meld beautifully. You can’t go wrong with smoky pulled pork sandwiches, either!

    For a lighter option, try it drizzled over roasted vegetables or grilled corn on the cob. Don’t forget classic sides like coleslaw or potato salad to balance the richness.

    Even a simple baked potato can shine with a generous scoop of this flavorful sauce. Enjoy your delicious creations!

    Additional Tips & Notes

    While experimenting with flavors, you’ll find that adjusting the ingredients in your barbecue sauce can elevate it to new heights.

    For a spicier kick, try adding cayenne pepper or your favorite hot sauce. If you prefer a sweeter sauce, increase the corn syrup or add brown sugar.

    Don’t forget to taste as you go; I often adjust the vinegar for tanginess or the mustard for a sharper flavor. Letting the sauce sit overnight allows the flavors to meld beautifully.

    Finally, don’t hesitate to customize this recipe with herbs like thyme or rosemary for a unique twist. Enjoy your culinary adventure!

  • Chipotle BBQ Sauce With Rich Coffee Recipe

    Chipotle BBQ Sauce With Rich Coffee Recipe

    Why Chipotle BBQ Sauce Is a Must-make BBQ Recipe

    When you want to elevate your BBQ game, Chipotle BBQ sauce is an absolute must. This sauce packs a punch with its smoky, spicy flavor, transforming ordinary grilled meats into extraordinary dishes.

    I love how it balances sweetness and heat, making each bite memorable. Plus, it’s incredibly versatile; whether you’re slathering it on ribs or using it as a marinade, it never disappoints.

    I’ve found that it adds depth and richness that other sauces just can’t match. Trust me, once you try it, you’ll wonder how you ever BBQ’d without it.

    Get ready to impress your friends and family!

    Ingredients of Chipotle BBQ Sauce

    When it comes to making your own Chipotle BBQ sauce, the first step is gathering all the right ingredients. Trust me, having everything prepped and ready to go makes the cooking process a breeze.

    Plus, there’s something satisfying about having all those colorful ingredients laid out, just waiting to be transformed into something delicious. So, let’s plunge into what you’ll need to whip up this fantastic sauce.

    Here’s the ingredient list for Chipotle BBQ Sauce:

    • 1 tablespoon canola oil
    • 2 cups diced yellow onions
    • 7 garlic cloves, minced
    • 1 cup ketchup
    • 1/2 cup Worcestershire sauce
    • 1/2 cup strong coffee
    • 1/3 cup packed brown sugar
    • 1/4 cup cider vinegar
    • 1/4 cup fresh lemon juice
    • 1 1/2 teaspoons Dijon mustard
    • 2 teaspoons kosher salt
    • 4 ancho chilies, seeded and stems removed
    • 4 dry Mexican chilies, seeded and stems removed
    • 3 cups chicken stock
    • 1/2 white onion, diced
    • 3 garlic cloves, minced
    • 2 chipotle peppers, seeded and stems removed

    Now, let’s talk about these ingredients. You might be wondering where to find those ancho and dry Mexican chilies; don’t worry, they’re usually available in the international aisle of your grocery store or at specialty markets.

    If you can’t find them, you can always substitute with other dried chilies, but keep in mind that the flavor profile might shift a bit.

    And don’t skimp on the coffee; it adds a rich depth that really makes the sauce stand out. Also, if you’re not a fan of too much heat, adjust the number of chipotle peppers to your liking.

    Cooking should be fun, so feel free to experiment and make this sauce your own! Happy cooking!

    How to Make Chipotle BBQ Sauce

    chipotle bbq sauce recipe

    Alright, let’s get our hands a little saucy with this delicious Chipotle BBQ Sauce recipe. You’ll want to grab a large, heavy saucepan for this, because we’re going to be doing some serious sautéing and simmering.

    First, pour in 1 tablespoon of canola oil and set your heat to medium. Once the oil is hot and shimmering, toss in 2 cups of diced yellow onions and 7 minced garlic cloves. Now, here’s where the magic begins—sauté them until they start to wilt and fill your kitchen with that heavenly aroma. Seriously, if you could bottle that smell, you’d be a millionaire.

    Next, it’s time to add a bit of tang and sweetness to our mixture. Stir in 1 cup of ketchup and the chili paste (which you’ll make in a bit) and let it sauté for about 4 minutes. You might be wondering what this chili paste is all about, and trust me, it’s the secret weapon that takes this sauce from good to finger-licking great.

    After that slight sauté, it’s time to add in the real flavor bomb: the rest of your ingredients. So, grab 1/2 cup of Worcestershire sauce, 1/2 cup of strong coffee (don’t worry, it won’t taste like a morning brew), 1/3 cup of packed brown sugar, 1/4 cup of cider vinegar, 1/4 cup of fresh lemon juice, 1 1/2 teaspoons of Dijon mustard, and 2 teaspoons of kosher salt.

    Mix everything together well, and then let it simmer on low heat for about 30 to 40 minutes. As the sauce thickens, keep an eye on it and stir more often—nobody wants scorched sauce.

    While that’s bubbling away, let’s whip up that chili paste. You’ll need 4 ancho chilies and 4 dry Mexican chilies, both seeded and with their stems removed. Place them in a saucepan with 3 cups of chicken stock, along with 1/2 a diced white onion and 3 minced garlic cloves. Bring it all to a boil and then reduce the heat to let it simmer for about 15 minutes until the chiles are nice and soft.

    Once that’s done, blend the mixture with 2 chipotle peppers until it’s smooth and creamy. Combine your chili paste with the simmering sauce, and give it a final stir. Just like that, you’ve created a masterpiece.

    Let the sauce cool a bit, then pour it into a blender to puree it until it’s silky smooth. Store it in the fridge, and get ready for a BBQ party that’ll have everyone begging for the recipe. Enjoy the flavorful journey you just started.

    Chipotle BBQ Sauce Substitutions & Variations

    Now that you’ve mastered the art of creating that mouthwatering Chipotle BBQ Sauce, let’s explore some substitutions and variations that can take your sauce to even greater heights.

    If you’re out of Worcestershire sauce, try soy sauce for a similar umami kick. For a sweeter twist, maple syrup can replace brown sugar.

    Don’t have chipotle peppers? Smoked paprika offers a nice smoky flavor, too. You can even add a splash of bourbon for an extra depth.

    Finally, experiment with different vinegar types—apple cider or red wine vinegar can change the sauce’s profile.

    Get creative, and enjoy the process!

    What to Serve with Chipotle BBQ Sauce

    As you plunge into the delicious world of Chipotle BBQ Sauce, you’ll find it’s the perfect companion for a variety of dishes.

    I love slathering it on grilled chicken or ribs, as the smoky flavors elevate the meat beautifully. It’s also fantastic with pulled pork sandwiches, adding a spicy kick that keeps everyone coming back for more.

    For a vegetarian option, drizzle it over roasted vegetables or mix it into a hearty bean chili. Honestly, even dipping crispy fries in this sauce is a treat!

    Explore these pairings, and you’ll discover countless ways to enjoy this rich, flavorful sauce.

    Additional Tips & Notes

    Whether you’re making Chipotle BBQ Sauce for a special occasion or just a weeknight dinner, a few tips can enhance your experience.

    First, don’t rush the simmering process; letting the sauce develop flavors for 30 to 40 minutes makes a difference. I also recommend tasting and adjusting seasonings as you go—everyone’s palate is different!

    If you prefer a smoother texture, feel free to blend the sauce longer.

    Finally, store any leftovers in an airtight container in the fridge; the flavors deepen over time. Trust me, this sauce is even better the next day!

    Enjoy your cooking adventure!

  • Unique Blackberry BBQ Sauce Recipe

    Unique Blackberry BBQ Sauce Recipe

    Why Blackberry BBQ Sauce Is a Must-make BBQ Recipe

    If you’re looking to elevate your BBQ game, blackberry BBQ sauce is a must-try. This sauce brings a balance of sweetness and tang that transforms any dish.

    Whenever I slather it on ribs or chicken, I can’t help but smile as the flavors meld perfectly during cooking. The rich, fruity notes create an irresistible glaze that caramelizes beautifully on the grill.

    Trust me, your guests will be begging for the recipe! Plus, it’s incredibly easy to whip up, making it perfect for both casual cookouts and special occasions.

    Give it a shot, and you won’t be disappointed!

    Ingredients of Blackberry BBQ Sauce

    When it comes to making a delicious blackberry BBQ sauce, having the right ingredients is key. Luckily, you probably have most of these items in your pantry already, and if not, they’re easy to find at your local grocery store.

    What’s great about this sauce is how you can mix and match flavors to suit your taste. So let’s explore what you’ll need to create this sweet and tangy masterpiece.

    Here’s your ingredient list for the blackberry BBQ sauce:

    • 1/2 cup blackberry preserves
    • 1 cup ketchup
    • 1 1/2 teaspoons brown sugar
    • 1/4 teaspoon cayenne pepper
    • 1/4 teaspoon mustard powder
    • 1 1/2 tablespoons red wine vinegar

    Now, while gathering these ingredients, take a moment to appreciate the beauty of cooking. The blackberry preserves will bring that lovely sweetness, while the ketchup adds the classic BBQ base we all love.

    And let’s not forget the cayenne pepper; it’s like a little party in your mouth, giving just the right kick. If you’re feeling adventurous, you can adjust the cayenne to suit your spice tolerance.

    Want it hotter? Go ahead and add a pinch more. Not so much? Just leave it out entirely. Cooking should be fun, right? So, don’t stress about it; experiment a little.

    And if you really want to impress, consider using homemade blackberry preserves if you have them. Because who doesn’t love a little bragging rights when it comes to cooking?

    How to Make Blackberry BBQ Sauce

    blackberry bbq sauce recipe

    Making your own Blackberry BBQ Sauce is as easy as pie—well, maybe easier, because you don’t even need to bake anything. First, grab a mixing bowl, and let’s get started. You’ll need 1/2 cup of blackberry preserves. If you’ve ever tasted them, you know they’re like a burst of summer in a jar. Scoop those sweet, sticky preserves into the bowl.

    Next up, add a full cup of ketchup. Now, I know what you’re thinking: ketchup? Really? But trust me, it’s the backbone of BBQ sauce and gives it that classic flavor we all love.

    Now, it’s time to bring in the sweet and spicy elements. Sprinkle in 1 1/2 teaspoons of brown sugar, which will balance out the acidity of the ketchup. Then, for a little kick, toss in 1/4 teaspoon of cayenne pepper. Don’t worry; it’s just a pinch, but feel free to adjust if you like it hotter.

    And let’s not forget 1/4 teaspoon of mustard powder—this adds a nice depth to the sauce, almost like a secret weapon. Finally, drizzle in 1 1/2 tablespoons of red wine vinegar. This tangy touch is what makes the sauce pop.

    Once you’ve got all your ingredients in the bowl, grab a whisk or a spoon and mix everything together until it’s blended smoothly. You want to see that beautiful, rich color come together, and it should smell absolutely divine.

    If you’re feeling fancy, you could even taste it at this point and adjust any flavors to your liking. Want it sweeter? Add more preserves. Need more tang? A splash more vinegar will do. This sauce is your canvas, so feel free to get creative.

    When you’re satisfied with the flavor, it’s ready to use as a basting sauce for your pork ribs or chicken. Grill or bake as desired, and just like that, you’ve got a delicious homemade sauce that will have everyone asking for seconds.

    Blackberry BBQ Sauce Substitutions & Variations

    While I love the classic Blackberry BBQ Sauce, there are plenty of substitutions and variations you can try to tailor the recipe to your taste.

    For a fruit twist, swap blackberry preserves for raspberry or peach preserves. If you want a spicier kick, add a dash of hot sauce or increase the cayenne pepper.

    For a smoky flavor, incorporate smoked paprika. You can also replace ketchup with a homemade tomato sauce for a fresher taste.

    Finally, experiment with different vinegars; apple cider vinegar can add a nice zing.

    Enjoy crafting your personalized version of this delicious sauce!

    What to Serve with Blackberry BBQ Sauce

    After experimenting with substitutions and variations for the Blackberry BBQ Sauce, it’s time to think about what to serve it with.

    I’ve found that this sauce pairs beautifully with grilled pork ribs, bringing a sweet and tangy twist. Chicken is another great option; slather it on before grilling for a burst of flavor.

    You can even use it with roasted vegetables or as a dipping sauce for crispy fries. For something unique, try it as a glaze on salmon.

    Trust me, the combination is delightful and adds a gourmet touch to simple dishes! Enjoy the flavor adventures!

    Additional Tips & Notes

    To enhance your Blackberry BBQ Sauce experience, consider adjusting the sweetness or heat to suit your taste. If you like it sweeter, add a bit more brown sugar or preserves. For heat, a dash of cayenne or some hot sauce can really amp things up.

    I’ve found that letting the sauce sit for a few hours—or even overnight—allows the flavors to meld beautifully. Don’t forget to taste as you go; everyone’s palate is different!

    Finally, this sauce can be stored in the fridge for up to a week, making it perfect for meal prep or last-minute grilling sessions. Enjoy!

  • BBQ Potatoes With Buttered Onions Recipe

    BBQ Potatoes With Buttered Onions Recipe

    Why BBQ Potatoes Is a Must-make BBQ Recipe

    When it comes to BBQ recipes, I can’t help but rave about BBQ Potatoes. They’re the perfect side dish that complements any grilled meat.

    The smoky flavor from the BBQ, combined with tender, buttery potatoes and sweet onions, creates a symphony of taste that you can’t resist. Plus, they’re incredibly easy to prepare! Just slice, season, and wrap them in foil.

    I love how they cook evenly, absorbing all those delicious flavors. Whether you’re hosting a backyard cookout or just enjoying a quiet dinner, BBQ Potatoes always steal the show and leave everyone asking for seconds.

    You’ve got to try them!

    Ingredients of BBQ Potatoes

    When it comes to making BBQ Potatoes, the ingredients are simple yet oh-so-delicious. You don’t need a ton of fancy stuff; just some good, hearty potatoes and a few flavor-packed additions.

    Trust me, the combination of these ingredients makes for a side dish that’s hard to resist. So, if you’re ready to impress your friends or just want to treat yourself, here’s what you’ll need.

    Ingredients:

    • 6-8 potatoes (russet or red work great)
    • 2-3 tablespoons butter
    • 1-2 onions (I recommend using 3 if you’re an onion lover like me)
    • 1 teaspoon black pepper
    • 1 teaspoon table salt

    Now, while these ingredients are pretty straightforward, you can totally customize them to suit your taste.

    For instance, if you’re feeling adventurous, why not throw in some garlic powder or even a sprinkle of cheese on top? And if you like a little kick, a dash of cayenne pepper could add just the right amount of heat.

    Plus, if you’re trying to cut down on butter, you could swap it out for olive oil, but let’s be real: butter just makes everything better, doesn’t it?

    How to Make BBQ Potatoes

    bbq potatoes wrapped in foil

    Making BBQ Potatoes is easier than you might think, and trust me, your taste buds will thank you. First things first, grab those 6-8 potatoes. I usually go for russet potatoes because they’re nice and fluffy, but red potatoes can work too if that’s what you have on hand. Slice them up into about 1/4 inch thick rounds. Don’t stress if they’re not perfect; it’s all going to taste amazing in the end anyway.

    Now, take a large piece of tinfoil and give it a good spray with cooking spray. This will help prevent any potato disasters from sticking. Layer your sliced potatoes on one half of the foil, and then it’s time to bring in the flavor with 1-2 onions (or 3 if you love onions like I do). Just slice them up and spread them on top of the potatoes.

    Next up, let’s not forget the magic ingredient: butter. You’ll need 2-3 tablespoons of it, and if you’re like me, you might be tempted to add just a bit more. Cut the butter into small pieces and scatter it across the potatoes and onions. Now, sprinkle on 1 teaspoon of black pepper and 1 teaspoon of table salt. This is where the flavor really starts to shine.

    Once you’ve got everything layered nicely, fold the tinfoil over to create a little pocket, and make sure it’s sealed tight. You don’t want any steam escaping. Preheat your oven to 375°F or fire up the BBQ if you’re feeling adventurous. Either way, let those potatoes cook for about 45 minutes. You’ll know they’re ready when they’re tender and bursting with flavor.

    The smell wafting through your kitchen or backyard is going to drive everyone wild with anticipation. Just be careful when you open that foil packet—it’s like a treasure chest of deliciousness, but that steam can be hot. As you dig in, you’ll find perfectly cooked potatoes, infused with buttery, oniony goodness. It’s such a simple dish, yet it brings so much joy.

    And if you happen to have leftovers (which is rare), they make for a great addition to breakfast or even a side for lunch. Who knew BBQ Potatoes could be this versatile? Happy cooking!

    BBQ Potatoes Substitutions & Variations

    After you’ve mastered the basic BBQ Potatoes recipe, it’s time to get creative with substitutions and variations.

    For a twist, try using sweet potatoes instead of russets; their natural sweetness adds a delightful contrast.

    If you’re not a fan of onions, consider adding garlic or bell peppers for flavor.

    You can also experiment with different seasonings, like paprika or garlic powder, to spice things up.

    Adding cheese, such as cheddar or feta, before serving can elevate the dish too.

    Don’t hesitate to mix in fresh herbs like rosemary or thyme for an extra burst of flavor—delicious!

    What to Serve with BBQ Potatoes

    While BBQ potatoes are a delicious side on their own, pairing them with the right dishes can elevate your meal.

    I love serving them alongside grilled meats like chicken or steak, as the smoky flavors complement each other perfectly. A fresh garden salad adds a crisp contrast, and I often include some tangy coleslaw for extra crunch.

    If you’re feeling adventurous, try pairing them with BBQ ribs for a hearty feast.

    Don’t forget a zesty dipping sauce on the side; it’ll bring everything together beautifully. Trust me, these combinations will make your BBQ experience unforgettable!

    Additional Tips & Notes

    To guarantee your BBQ potatoes turn out perfectly every time, I recommend using a mix of different potato varieties for added flavor and texture.

    Don’t forget to adjust the seasoning to your taste; sometimes I add a pinch of garlic powder for an extra kick.

    If you’re short on time, you can pre-cook the potatoes in the microwave for a few minutes before grilling. This way, they’ll cook faster on the BBQ.

    Finally, keep an eye on the cooking time; every grill is different, so check for tenderness.

    Enjoy experimenting until you find your perfect combination!

  • Cheesy BBQ Pork Chop Recipe With a Twist

    Cheesy BBQ Pork Chop Recipe With a Twist

    Why BBQ Pork Chop Is a Must-make BBQ Recipe

    Whether you’re firing up the grill for a summer cookout or just craving a quick weeknight dinner, BBQ pork chops are a must-make recipe.

    They’re incredibly simple to prepare and deliver an explosion of flavor that satisfies every time. The combination of tender, juicy pork and rich BBQ sauce creates a delicious contrast that’s hard to resist.

    Plus, they cook quickly, making them perfect for busy nights. You can customize the toppings, making each chop unique.

    Trust me, once you try these BBQ pork chops, they’ll become a staple in your cooking repertoire. You won’t regret it!

    Ingredients of BBQ Pork Chop

    When it comes to whipping up a delicious meal in no time, the Cheesy BBQ Pork Chop is a winner every single time. You’ll love how simple the ingredients are, and it’s likely you already have some of them in your kitchen.

    Imagine this: a juicy pork chop, smothered in tangy BBQ sauce, topped with gooey melted cheese. Sounds mouthwatering, right? This dish isn’t only satisfying but also perfect for any night of the week. So, let’s explore what you’ll need to make this tasty treat.

    Here’s what you’ll need for the Cheesy BBQ Pork Chop:

    • 1 pork chop
    • 1 slice cheese (like Dairylea or Kraft singles)
    • Ready-made barbecue sauce (the kind you use for chips or fries)

    Now, while the ingredient list is short and sweet, there are a few things to keep in mind.

    First, you can totally switch up the cheese if you prefer something different—maybe a sharp cheddar or even pepper jack for a little kick.

    And while BBQ sauce is a classic, don’t be afraid to experiment with other sauces like a spicy chipotle or even a sweet teriyaki if you’re feeling adventurous.

    This recipe is all about what you enjoy, so feel free to make it your own. Just remember, the key to a great BBQ pork chop isn’t just the ingredients but also the love and fun you put into cooking it!

    How to Make BBQ Pork Chop

    delicious bbq pork chop

    While it’s grilling, you might want to think about what you’ll serve it with.

    Some crispy fries or a fresh green salad would complement this dish perfectly, don’t you think?

    And just like that, you have a delicious Cheesy BBQ Pork Chop ready to devour.

    So, plate it up, dig in, and maybe even give yourself a little pat on the back for a job well done.

    Cooking doesn’t have to be complicated, and this recipe proves just that.

    Enjoy your meal, and remember, the best part is that you made it yourself!

    BBQ Pork Chop Substitutions & Variations

    If you’re looking to mix things up, there are plenty of substitutions and variations you can try with your BBQ pork chop.

    For instance, swap the pork for chicken breast or even tofu for a vegetarian option. Instead of using a single slice of cheese, try blending different cheeses like cheddar or pepper jack for extra flavor.

    If you want a kick, add some hot sauce to your barbecue sauce. You can also experiment with marinades—teriyaki or honey mustard work great too!

    The possibilities are endless, so don’t hesitate to get creative and find your perfect flavor combination!

    What to Serve with BBQ Pork Chop

    Serving BBQ pork chops can be a delightful experience, especially when you pair them with the right sides.

    I love serving mine with crispy fries for that classic combo; the crunch complements the juicy pork perfectly. If I want something lighter, a fresh green salad with a tangy vinaigrette does wonders.

    Sometimes, I add coleslaw for that creamy crunch, which balances the flavors beautifully. You can also throw in some grilled vegetables for a colorful, healthy touch.

    No matter what you choose, these sides enhance the BBQ pork chop experience and keep everyone coming back for more!

    Additional Tips & Notes

    To make your BBQ pork chop experience even better, consider a few tips that can elevate the dish.

    First, marinate the pork chop for a few hours before grilling to enhance its flavor—simple spices or a store-bought marinade work wonders.

    If you love heat, try adding some sliced jalapeños before covering it with cheese. For a smoky twist, experiment with smoked cheese.

    Don’t forget to let the cooked chop rest for a few minutes—it helps keep it juicy.

    Finally, pair it with a tangy coleslaw to balance the richness. Enjoy your delicious creation!

  • Garlic Butter BBQ Oysters Recipe

    Garlic Butter BBQ Oysters Recipe

    Why BBQ Oysters Is a Must-make BBQ Recipe

    Although I’ve tried many BBQ recipes, BBQ oysters stand out as a must-make dish. There’s something magical about the smoky flavor mingling with the briny taste of the oysters.

    When I fire up the grill, the anticipation builds as I prepare these tasty morsels. The moment those shells begin to open, I can hardly contain my excitement.

    The aroma of garlic butter wafts through the air, inviting everyone to gather around. Whether it’s a casual get-together or a summer celebration, BBQ oysters always impress.

    Trust me, once you try them, you’ll understand why they’re a BBQ essential!

    Ingredients of BBQ Oysters

    When it comes to making BBQ oysters, choosing the right ingredients is key to getting that delicious, smoky flavor just right. You want to keep it simple but flavorful, so let’s plunge into what you’ll need for this mouthwatering recipe. Trust me, once you have everything ready, the anticipation of grilling those oysters will have you practically drooling.

    Here’s what you’ll need to whip up these tasty BBQ oysters:

    • 24 large oysters (the larger, the better)
    • Garlic butter (store-bought or homemade, your call)
    • Lemon wedges (because who doesn’t love a little zing?)
    • Hot sauce (for those who like a spicy kick)
    • Lea & Perrins Worcestershire Sauce (adds that umami flavor)

    Now, while these ingredients are essential, there are a few things to keep in mind. First, make sure your oysters are fresh. Nothing ruins a feast quicker than a bad oyster. If you’re unsure how to tell if they’re fresh, ask your fishmonger for help.

    And don’t be afraid to play around with the toppings. If you’re a fan of herbs, sprinkle some fresh parsley or chives on top after grilling. Want to try a twist? Maybe add crumbled bacon or cheese. The world is your oyster. (See what I did there?)

    How to Make BBQ Oysters

    grilled oysters with toppings

    Alright, let’s plunge into the delightful world of BBQ oysters. First things first, you’ll want to scrub those 24 large oysters like you’re getting them ready for a fancy dinner party. A wire brush works wonders here. You’re not just cleaning; you’re giving them a little pep talk. After all, they’re about to be transformed into something delicious on the grill.

    Next, fire up the BBQ. You’ll want to place the oysters on the grill with the bowed side of the shell facing down. This is where the magic happens. As they heat up, the shells will begin to pop open, revealing their tender, briny goodness inside. Keep an eye out—discard any that stubbornly refuse to open. We only want the willing participants at this feast.

    Once your oysters are opened and ready, it’s time to get creative with your toppings. I mean, who doesn’t love a little garlic butter? Drizzle or slather it generously over each oyster, letting that rich, savory flavor seep in. Don’t forget to squeeze some lemon juice on top for that zesty punch.

    If you’re like me and enjoy a bit of heat, a few drops of hot sauce will do the trick. And for those who appreciate a touch of umami, a dash of Lea & Perrins Worcestershire Sauce can elevate the experience to a whole new level. Seriously, this is like the icing on the cake—or in this case, the sauce on the oyster.

    Close the lid of the BBQ and let everything mingle for a few minutes. You’ll know they’re done when they’re nice and hot, and your kitchen—or backyard, let’s be honest—smells like a seaside paradise.

    Now, grab a fork (or your fingers, no judgment here), and dig in. You’ve just made BBQ oysters that could make anyone feel like a culinary genius. Enjoy!

    BBQ Oysters Substitutions & Variations

    If you’re feeling adventurous, there are plenty of substitutions and variations you can try with BBQ oysters to suit your taste buds.

    For instance, swap out garlic butter for herb-infused olive oil or a spicy chili butter for a kick. You can also experiment with different cheeses like feta or pepper jack instead of the traditional toppings.

    If you’re not a fan of Worcestershire sauce, try a tangy balsamic glaze or soy sauce. For an extra zing, add fresh herbs like cilantro or parsley.

    The possibilities are endless, so feel free to get creative and make it your own!

    What to Serve with BBQ Oysters

    After experimenting with various toppings and flavors for BBQ oysters, it’s time to contemplate what to serve alongside them.

    I love pairing them with a delightful side salad, like a simple arugula salad tossed in lemon vinaigrette. A crusty baguette is fantastic for soaking up any leftover garlic butter too.

    If you’re feeling adventurous, grilled corn on the cob adds a sweet, smoky touch that complements the oysters perfectly.

    For drinks, I often go for a chilled white wine or a crisp beer. These choices really elevate the experience and balance the rich flavors of the BBQ oysters.

    Enjoy!

    Additional Tips & Notes

    While you’re preparing your BBQ oysters, keep in mind a few extra tips to enhance your experience.

    First, make sure to use fresh oysters; they’ll taste best. If you’re new to shucking, practice a bit beforehand to avoid injury.

    For extra flavor, try adding herbs like parsley or dill to your garlic butter. If you’re feeling adventurous, mix in some Parmesan cheese for a cheesy twist!

    Don’t forget to have plenty of lemon wedges and hot sauce on hand for serving.

    Finally, remember to enjoy the process—BBQ oysters are all about good food and great company!

  • BBQ Green Beans With Bacon Recipe

    BBQ Green Beans With Bacon Recipe

    Why BBQ Green Beans Is a Must-make BBQ Recipe

    When you’re firing up the grill for a summer cookout, BBQ green beans with bacon are a must-have side dish that you won’t want to skip. They bring a smoky, savory flavor that perfectly complements grilled meats.

    Plus, the combination of tender green beans and crispy bacon is simply irresistible. I love how they add a pop of color to the table, making everything feel festive.

    It’s an easy dish that lets me spend more time with friends and family rather than slaving in the kitchen. Trust me, once you try them, they’ll become a staple at your BBQs!

    Ingredients of BBQ Green Beans

    When it comes to whipping up a side dish that steals the show, BBQ green beans with bacon are simply unbeatable. They’re a delightful mix of flavors that come together with just a handful of ingredients. You’ll find that the smoky, rich taste of bacon elevates the fresh, crisp green beans to a whole new level.

    Plus, it’s really simple to put together, which means more time enjoying the sunshine and less time stuck in the kitchen. So, let’s explore what you’ll need to create this tasty treat.

    Ingredients:

    • 3 quarts of fresh green beans
    • 1 onion, chopped
    • 6 slices of bacon, cut into pieces (uncooked)
    • 1 cup of ketchup
    • 1 cup of brown sugar

    Now, before you head to the grocery store, let’s chat about a few things regarding these ingredients. Fresh green beans are definitely the star of the show here, so try to pick the brightest, crispest ones you can find.

    If you’re feeling adventurous, you could even mix in some other veggies for added flavor and texture. And don’t be shy about adjusting the bacon; if you’re a bacon lover, go ahead and add a bit more.

    The beauty of this dish lies in its flexibility, so make it your own. Just remember, the balance of sweet from the brown sugar and tangy from the ketchup is what makes this recipe sing. Happy cooking!

    How to Make BBQ Green Beans

    bbq green beans with bacon

    Making BBQ green beans with bacon is as simple as it’s delicious. First things first, gather your ingredients: you’ll need 3 quarts of fresh green beans, 1 chopped onion, 6 slices of uncooked bacon cut into pieces, 1 cup of ketchup, and 1 cup of brown sugar.

    Now, if you’re like me and tend to get a little too excited in the grocery store, just remember to pick the green beans that look fresh and vibrant. Trust me, it makes a difference. Once you have everything, it’s time to get cooking.

    Start by washing and trimming those green beans. You want to make sure they’re clean and ready to soak up all that glorious flavor. After that, grab a casserole dish—something big enough to hold all those beans and the other goodies.

    Combine the trimmed green beans with the chopped onion, and then toss in the bacon pieces. The smell of raw bacon alone is enough to make your mouth water, isn’t it? Next, pour in the ketchup and sprinkle the brown sugar over the top. Give it all a good mix, so every green bean gets coated with that sweet and tangy goodness.

    Now, here’s where the magic happens: cover the dish and pop it into the oven set at 275 degrees. Let it cook for about 4 hours. Yes, 4 hours. I know it sounds like a long time, but during that wait, your home will be filled with the aroma of BBQ bliss, and you’ll be the hero of the dinner table.

    While it’s cooking, you can kick back and relax, or maybe even tackle that pile of laundry that’s been judging you from the corner of the room. Just remember to check in every once in a while, and maybe give it a stir if you feel inspired.

    When the timer goes off, and you finally pull that casserole dish out of the oven, prepare yourself for an epic feast. The green beans will be tender, the bacon crispy, and the flavors will have melded together in a way that’s downright magical.

    Serve it up as a side dish or make it the star of your BBQ spread—either way, you’re in for a treat. Enjoy!

    BBQ Green Beans Substitutions & Variations

    There are plenty of ways to customize BBQ green beans with bacon to suit your tastes or use what you have on hand.

    If you want a healthier twist, try turkey bacon or even a plant-based bacon alternative. For a spicy kick, add crushed red pepper flakes or diced jalapeños.

    You can swap out ketchup for barbecue sauce or even a homemade tomato sauce for a different flavor profile. If you’re not a fan of brown sugar, honey or maple syrup works well too.

    Don’t hesitate to toss in other veggies like bell peppers or corn for added texture and taste!

    What to Serve with BBQ Green Beans

    While BBQ green beans with bacon are a delicious side on their own, pairing them with the right dishes can elevate your meal.

    I love serving them alongside grilled chicken or smoked ribs for a classic BBQ feast. A creamy potato salad adds a nice contrast, while cornbread brings a comforting touch.

    If I’m feeling adventurous, I’ll whip up some coleslaw for a crunchy bite. For a lighter option, consider a fresh garden salad with a tangy vinaigrette.

    Each of these dishes complements the smoky, sweet flavors of the green beans, creating a memorable dining experience. Enjoy your meal!

    Additional Tips & Notes

    To guarantee your BBQ green beans turn out perfectly every time, I recommend a few key tips. First, don’t skimp on washing and trimming the beans; it makes a big difference in flavor and presentation.

    When mixing the ingredients, make sure the bacon pieces are evenly distributed for consistent taste. If you prefer a spicier kick, add a dash of cayenne pepper or your favorite hot sauce.

    Finally, if you’re short on time, you can cook them at a higher temperature, but keep an eye on them to avoid burning. Enjoy the smoky, sweet goodness of these delightful green beans!

  • BBQ Burgers With Corned Beef Recipe

    BBQ Burgers With Corned Beef Recipe

    Why BBQ Burgers Is a Must-make BBQ Recipe

    When it comes to summer cookouts, I can’t help but think BBQ burgers are an absolute must-make recipe.

    There’s something about the smoky flavor and juicy texture that just screams summertime. Plus, they’re incredibly versatile! You can dress them up with your favorite toppings or keep it classic with just cheese and ketchup.

    Everyone loves a good burger, and they’re easy to whip up for a crowd. I’ve found that BBQ burgers spark conversation and bring people together.

    Trust me, when you fire up the grill, your guests will be enthusiastically awaiting those delicious patties sizzling away!

    Ingredients of BBQ Burgers

    When it comes to making BBQ burgers, having the right ingredients is key to achieving that mouthwatering flavor we all crave. The great thing about this recipe is that it combines the classic elements of a juicy burger with a unique twist that makes everyone come back for seconds.

    Whether you’re planning a backyard BBQ or just a casual dinner at home, these ingredients are sure to hit the spot. So, let’s gather everything you need to get started on these delicious burgers that will have your taste buds dancing.

    Here’s a handy list of what you’ll need to whip up these BBQ burgers:

    • 1 lb ground beef
    • 2 small onions, diced
    • 12 ounces corned beef, canned
    • 1/4 cup brown sugar
    • 2 teaspoons chili powder
    • 14 ounces ketchup
    • 1 cup water
    • 1 tablespoon vinegar

    Now, before you start cooking, let’s chat about a few considerations regarding these ingredients.

    First off, the ground beef is the star of the show, so choosing a good quality meat can really elevate your burgers. Don’t be afraid to ask your butcher for suggestions if you’re unsure.

    And while canned corned beef might sound a bit unconventional, it adds a lovely depth of flavor and texture that pairs beautifully with the ground beef.

    Also, feel free to adjust the spices to your liking; if you love a bit of heat, maybe throw in some cayenne pepper or hot sauce. Remember, cooking is all about experimentation, so have fun with it!

    How to Make BBQ Burgers

    bbq burgers with corned beef

    Alright, let’s plunge into the delicious world of BBQ burgers. First things first, you’ll want to start by browning 1 lb of ground beef with 2 small onions that you’ve diced up.

    Now, I know what you might be thinking—browning meat seems easy enough, but trust me, there’s an art to it. Get your skillet nice and hot over medium heat, toss in the ground beef, and let it sizzle. Stir it occasionally, and let those onions soften and become translucent. The aroma will be heavenly, and your taste buds will start doing a little happy dance.

    Once the ground beef and onions are cooked, it’s time to bring everything together. In a large baking dish, combine 12 ounces of canned corned beef (yes, I said canned—don’t knock it until you try it), 1/4 cup of brown sugar, 2 teaspoons of chili powder, 14 ounces of ketchup, 1 cup of water, and 1 tablespoon of vinegar.

    Stir that mixture up until it’s all blended nicely. Now, here’s where the magic happens: add the browned hamburger mixture to this flavorful concoction. Give it a gentle mix, and then slide the whole thing into a preheated oven at 350°F.

    Let it bake for about an hour. Yes, it’s a bit of a wait, but think of it as a little time for you to relax or maybe even do a happy dance in your kitchen.

    When the hour is up (and your kitchen smells like a BBQ paradise), take it out and get ready to serve. Grab some buns—because, let’s be real, BBQ burgers are meant to be enjoyed as a sandwich—and scoop that delicious mixture onto them.

    You can add your favorite toppings, from lettuce to pickles, or even some extra BBQ sauce if you’re feeling adventurous. Everyone at your table will be begging for seconds, and you might just find yourself patting yourself on the back for pulling off such a tasty dish.

    Enjoy every bite, and remember, the secret ingredient is always a little love (and maybe a dash of humor).

    BBQ Burgers Substitutions & Variations

    If you’re looking to mix things up with your BBQ burgers, you’re in for a treat.

    Swap out ground beef for turkey or chicken for a leaner option. You can also use veggie patties or black beans for a delicious plant-based twist.

    For a smoky flavor, try adding chipotle peppers or smoked paprika. If you want to get adventurous, top your burgers with jalapeños or pineapple slices for a sweet-spicy kick.

    Don’t forget about different cheeses! Swiss, cheddar, or even blue cheese can elevate your burger experience.

    Experiment with these variations and find your perfect BBQ burger combination!

    What to Serve with BBQ Burgers

    While BBQ burgers are a mouthwatering main attraction, pairing them with the right sides can elevate your meal to new heights.

    I love serving my burgers with crispy homemade fries or sweet potato wedges for that perfect crunch. A revitalizing coleslaw adds a nice tang, balancing the flavors beautifully.

    For something lighter, a simple green salad with a zesty vinaigrette is always a hit. Don’t forget some grilled corn on the cob; it’s a classic!

    And of course, a selection of pickles and condiments can take your BBQ burgers to the next level, making every bite even more enjoyable.

    Additional Tips & Notes

    Pairing your BBQ burgers with the right sides is just the beginning; there are a few additional tips that can take your grilling game to the next level.

    First, let your patties rest for a few minutes after cooking to lock in those juices.

    Don’t skimp on toasting your buns; it adds that perfect crunch.

    If you’re feeling adventurous, try adding a slice of pepper jack cheese for a spicy kick.

    Finally, don’t forget fresh toppings like avocado or jalapeños to elevate your burgers.

    Trust me, these simple tweaks make a world of difference in flavor and enjoyment!

  • Coca-Cola Barbecue Beef Recipe

    Coca-Cola Barbecue Beef Recipe

    Why Barbecue Beef Is a Must-make BBQ Recipe

    When it comes to summer gatherings, I can’t help but think of barbecue beef as a must-have dish.

    It’s not just about the taste; it’s the joy it brings to everyone around the table. The rich, smoky flavor melds perfectly with the tender meat, making each bite unforgettable.

    Plus, it’s incredibly easy to prepare, freeing up my time to enjoy the company of friends and family. I love how it pairs effortlessly with sides like coleslaw and cornbread.

    Honestly, no barbecue is complete without it. Once you try it, you’ll understand why barbecue beef deserves a spot at every gathering!

    Ingredients of Barbecue Beef

    When you’re gearing up to make Coca-Cola Barbecue Beef, it all starts with gathering the right ingredients. Trust me, this dish is about to become your new go-to for gatherings and family dinners. The combination of savory flavors from the meat and the sweet tang of the Coke and ketchup creates a surprisingly delightful taste that will leave everyone asking for seconds.

    Plus, you probably already have some of these items in your kitchen, making it even easier to whip up this crowd-pleaser.

    Here’s what you’ll need for this recipe:

    • 1 (3 lb) roast beef or 1 (3 lb) pork
    • 1 1/2 cups ketchup
    • 1 (12 ounce) can Coke
    • 1 small onion, diced
    • 1 teaspoon garlic powder

    Now, let’s talk about the ingredients a bit more. You can really make this recipe your own. For instance, if you’re not a fan of pork or beef, you could try it with chicken or even a plant-based meat substitute for a vegetarian twist.

    And if you want to kick up the flavor, feel free to add your favorite barbecue spices or a dash of hot sauce for some heat. The beauty of this recipe is its versatility. You can adjust the sweetness or tanginess by playing around with the amount of ketchup or Coke.

    Just remember, it’s all about finding that delicious balance that suits your taste buds. Happy cooking!

    How to Make Barbecue Beef

    coca cola barbecue beef recipe

    Alright, let’s plunge into making that mouthwatering Coca-Cola Barbecue Beef. First things first, preheat your oven to a cozy 350°F. This guarantees that your roast beef or pork is greeted with a warm embrace when it enters the oven.

    Speaking of which, grab your 3-pound roast beef or pork and nestle it into a baking dish—if you have a bean pot, that works like a charm. It’s like giving your meat a little throne for its culinary adventure.

    Now, let’s whip up that magical sauce. In a mixing bowl, combine 1 1/2 cups of ketchup, a 12-ounce can of Coke, your diced small onion, and a teaspoon of garlic powder. It’s a little sweet, a little tangy, and a whole lot of delicious. As you mix, take a moment to appreciate how this concoction transforms ordinary meat into something extraordinary.

    Pour this sauce over your roast, making sure it gets all cozy in those flavorful juices—just imagine how amazing it’s going to smell in your kitchen. Cover the dish with foil to keep all that goodness inside, and pop it into the oven for a solid three hours. That’s right, three hours of pure anticipation.

    While it cooks, you can kick back, relax, and maybe daydream about how you’ll impress everyone at dinner with your culinary skills. Just remember, every so often, you might want to peek at it (but don’t open the oven too much; we want to keep that heat locked in).

    After three hours, your patience will pay off as you pull out a beautifully tender roast that’s just begging to be shredded and served. Whether you’re having it on a bun, alongside some veggies, or straight out of the dish, get ready for some serious flavor. Happy eating!

    Barbecue Beef Substitutions & Variations

    After savoring that Coca-Cola Barbecue Beef, you might find yourself wanting to mix things up a bit.

    Try swapping the beef for pork or even chicken for a lighter option. If you’re aiming for a tangy twist, add some pineapple juice or switch the ketchup for barbecue sauce.

    For a smoky flavor, toss in a dash of liquid smoke or smoked paprika. Don’t forget to experiment with spices—cumin or chili powder can really amp up the taste.

    Feel free to customize the onions, too; shallots or green onions work wonderfully. The possibilities are endless, so get creative!

    What to Serve with Barbecue Beef

    While savoring that delicious Coca-Cola Barbecue Beef, you’ll want to complement it with side dishes that enhance its rich flavors.

    I love serving it with creamy coleslaw; the crunch and tanginess balance the meat’s sweetness perfectly.

    Baked beans are another favorite, adding a hearty touch.

    I often whip up some buttery cornbread too, which is great for soaking up those tasty juices.

    For a lighter option, grilled veggies or a fresh green salad can brighten the meal.

    Don’t forget some crisp pickles on the side; they add an extra zing that really elevates the entire experience!

    Additional Tips & Notes

    When it comes to perfecting your Coca-Cola Barbecue Beef, a few additional tips can really elevate your dish. First, I recommend letting the meat marinate overnight; it enhances the flavors beautifully.

    If you prefer a spicier kick, add some cayenne pepper or hot sauce to the sauce mix. Don’t forget to baste the meat halfway through cooking for extra moisture.

    After baking, let it rest for at least 15 minutes before slicing; this helps retain juices. Finally, serve it with your favorite sides, like coleslaw or cornbread, to create a complete meal that everyone will love!